
If there is one thing that my entire family loves, it is a good book. While we all love different genres, we are definitely all bookworms. I made these fun and easy shirts for my girls to celebrate their love of reading! All of them are really easy to make if you follow the instructions below.
Reading Shirts
For all of the Shirts
You will need:
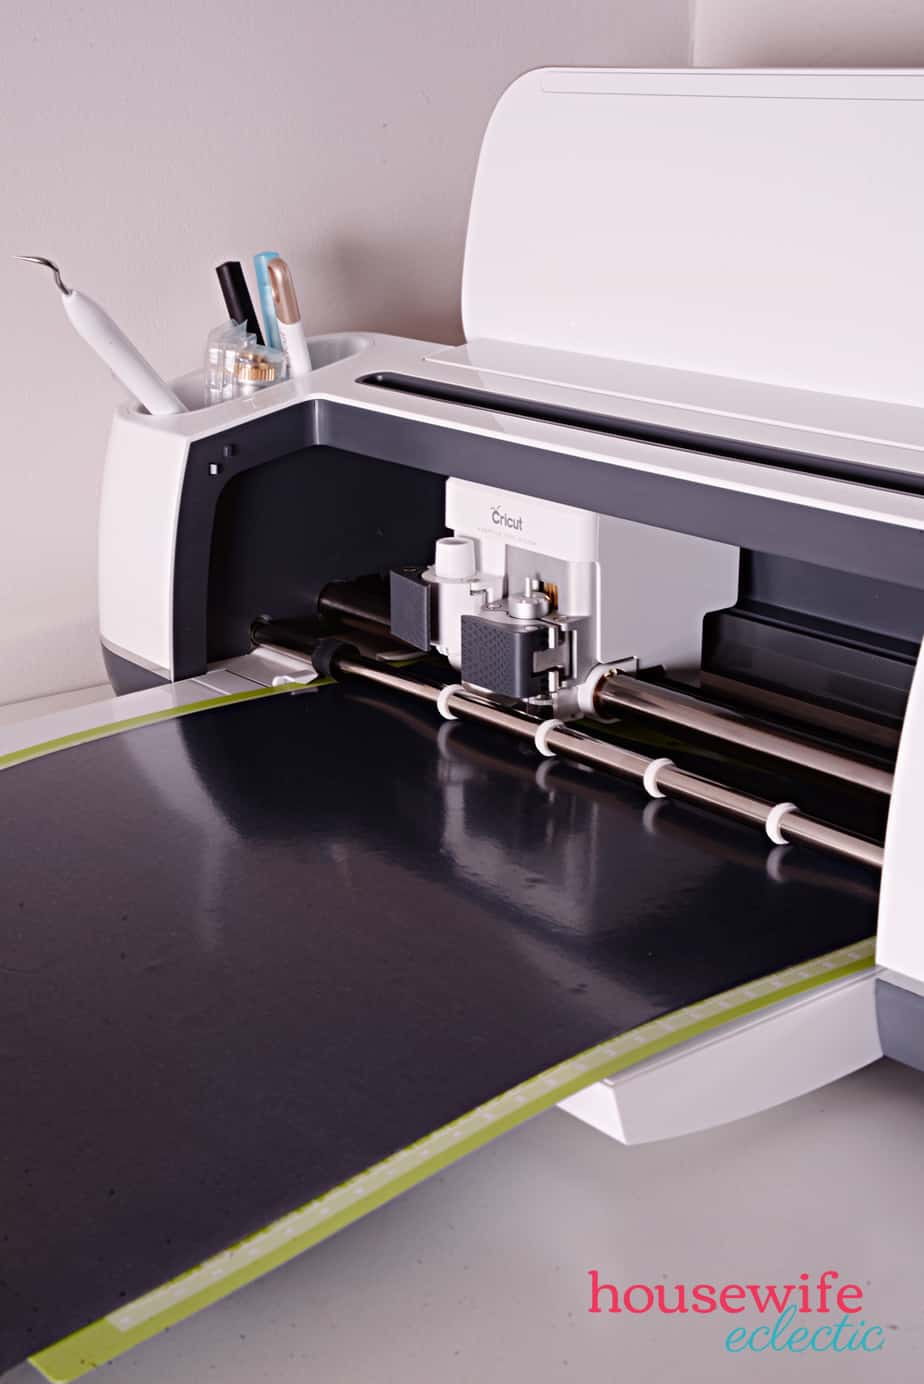
- a Cricut
- Cricut EasyPress or Iron
- Cricut Brightpad
- a blank shirt
My Weekend Is All Booked Shirt
For this project you will need:
- Glitter Iron-on in blue
- Glitter Iron -on in red
To make life really easy, you can find my cut files here. Follow the instruction below for resizing or creating from scratch.
Arthur Library Card Shirt
For this project you will need:
- Glitter Iron-on in blue
To make life really easy, you can find my cut files here. Follow the instruction below for resizing or creating from scratch.
Ha! Made You Read Shirt
For this project you will need:
- Glitter Iron-on in red and gold
To make life really easy, you can find my cut files here. Follow the instruction below for resizing or creating from scratch.
Bookmarks are for Quitters Shirt
For this project you will need:
- Glitter Iron-on in blue and black
To make life really easy, you can find my cut files here. Follow the instruction below for resizing or creating from scratch.
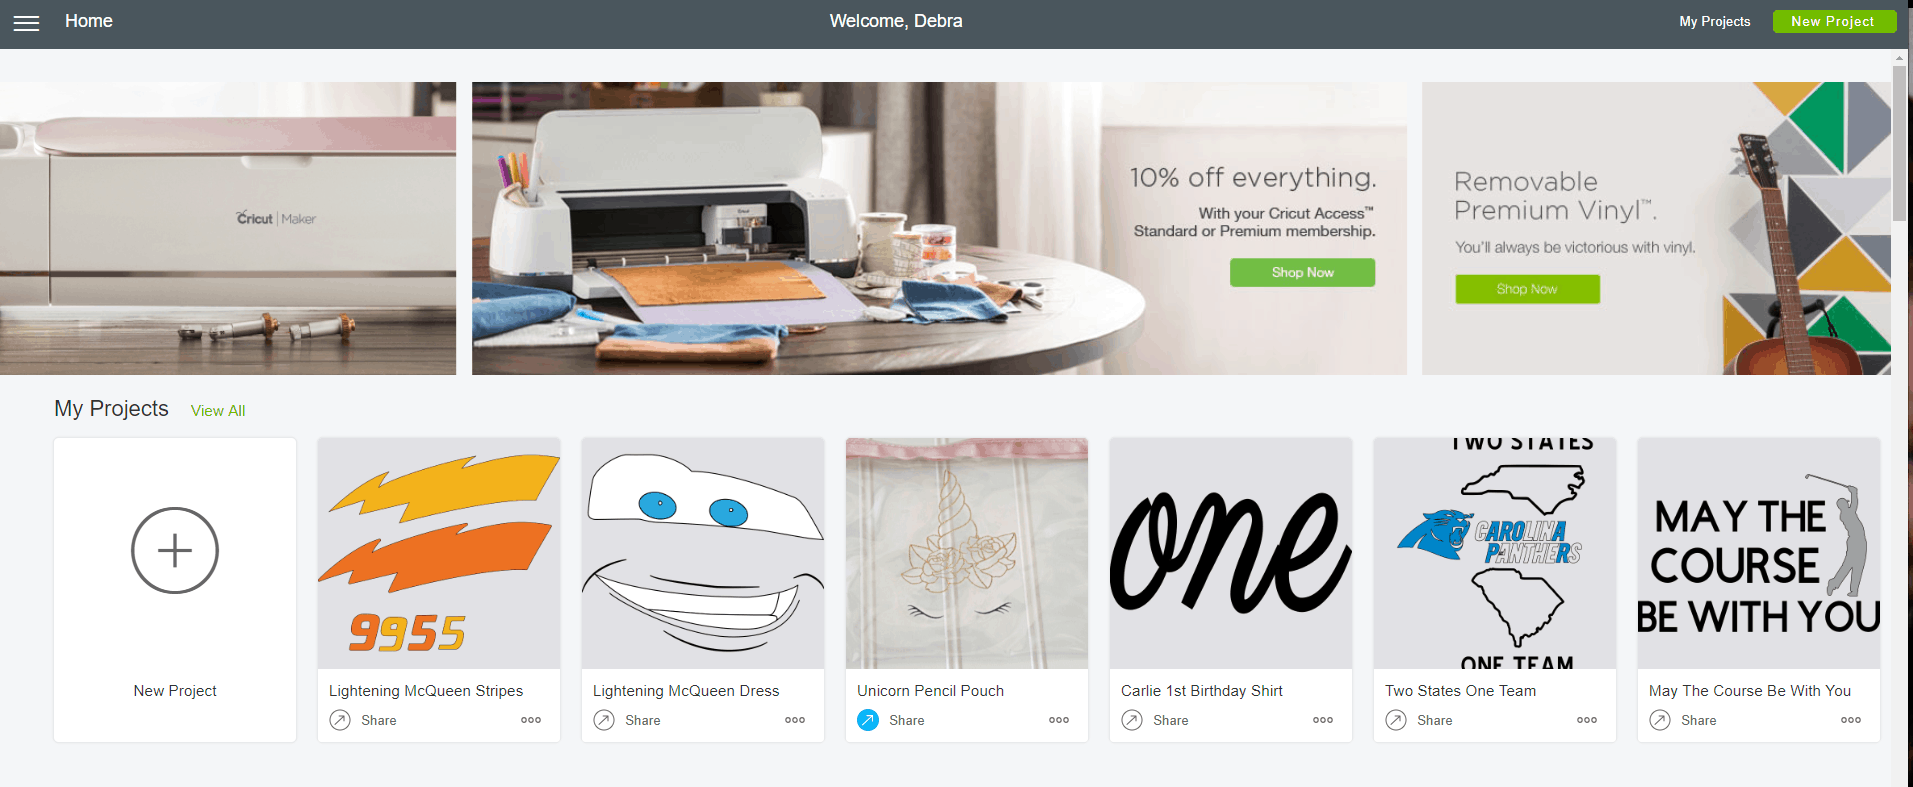
Open up and sign into Cricut Design Space. Your screen will look similar to the above. There will be a top banner, followed by a banner of your latest projects. You can see some of my most recent projects on the screen above. Below that will be the Make it Now projects. Hit the green plus sign next your projects to get started.
Using Cricut Images
Your new project will open up for you as a blank grid. Click on the images tab on the left-hand side of the screen to start this project. First search for books in the top right corner search bar.
For the My Weekend is All Booked Shirt you will My Weekend select the book in the top left corner and insert it into your project. The image is: Book Square #M30E67
For the Having Fun Isn’t Hard, shirt you search for book and add the book with a hot pink background. The image is : Book Square #M30E67
For the Ha! Made You Read Shirt you will type read and add the read image with the book in the background. The image is: Read #M3C758
For the Bookmarks are for Quitter shirt you will type book and add the word book and the ribbon framework. The book image is: Book #M3C058, the ribbon framework is: Ribbons Framework #M3EDEB

Adding Text
Add text by hitting the text button in the far left menu. A text box will pop up and you can type what you want the project to say.
For the My Weekend is All Booked Shirt you will My Weekend is one text box and Is All Booked in another.
For the Having Fun Isn’t Hard, shirt you will type Having Fun Isn’t Hard in one text box and When You Have A Library Card in another.
For the Ha! Made You Read Shirt you will type Ha! in one text box and Made You in another.
For the Bookmarks are for Quitter’s shirt you will type Marks in one text box and Are For Quitters in another.
Resizing
Once you have inserted the text into your project you can resize it and move it around. Resize the image by clicking and dragging on the double arrow symbol that appears when you have the image selected. There is also size box at the top of the screen that lists how big the text or image is, you can adjust the width and height here if you don’t want to manually toggle the blue arrow key.
Creating Your Own Bookmark Image
Add a basic square to your canvas from the shapes menu on the left-hand side. Unlock the shape by hitting the lock symbol on the square and then click and drag the green arrows until you have a long bookmark shape. Take the ribbon picture that you added earlier and layer it on top of the bookmark shape. Select both items and hit attach in the bottom right corner.
You will now use the slice tool to take cut the words out of the image. Select both the words and the image and select slice in the lower right-hand corner of the screen. Pull the text off of your image and you still see the letters have now cut through the image. Grab the letters again and pull the second set off as well. Now your Cricut will cut the words out of the image.
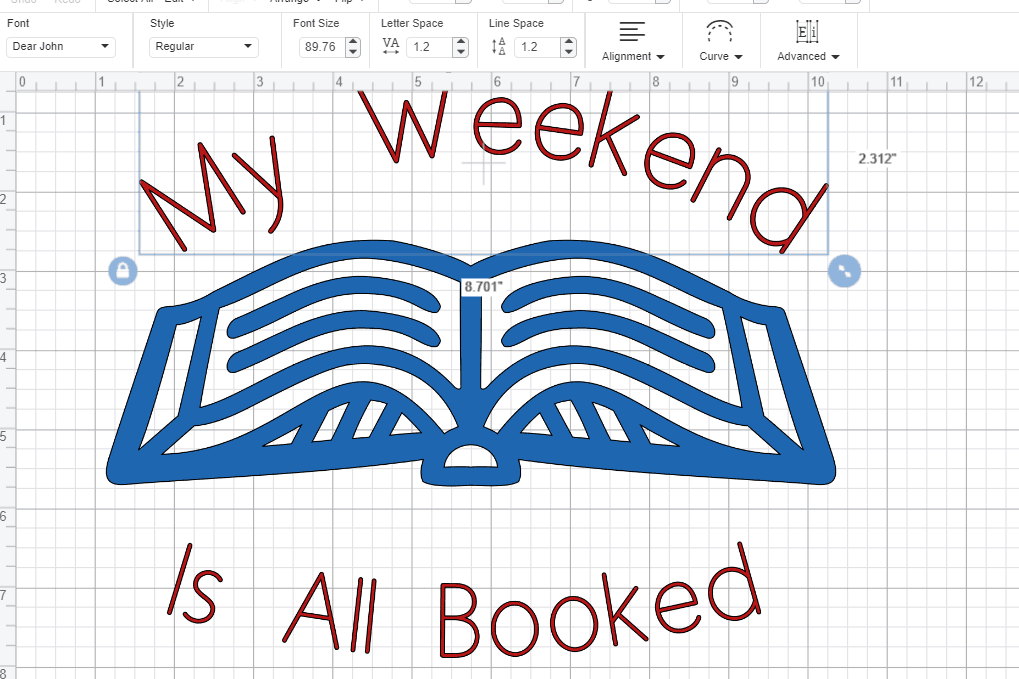
Curve Tool (My Weekend is All Booked Shirt)

Select the text you want to curve and slide the diameter bar to the right to curve your text down and to the left to curve it up. Slide the bar until the text looks like you want it. For this shirt, we are just curving the words slightly into the book.
Slice Tool (Having Fun Isn’t Hard When You Have a Library Card Shirt)
You will now use the slice tool to take cut the words out of the image. Select both the words and the image and select slice in the lower right-hand corner of the screen. Pull the text off of your image and you still see the letters have now cut through the image. Grab the letters again and pull the second set off as well. Now your Cricut will cut the words out of the image.

Make It
When your project looks the way you want it, it the Make It button in the top right corner of the screen. Hit the mirror image button on the right-hand side, your project will flip on the screen and look backward. Make sure you hit the mirror button on all colors of the mats.

Place the Iron on shiny side down onto your Cricut mat and then load your mat into your machine, spin the dial to iron-on and hit the flashing Cricut button.
Weeding
Peel the heat transfer off of your mat and then weed (peel apart) the iron on until just your design remains on the sticky backing.
Layering Iron On (Ha! Made You Read Shirt)
The difference in the Ha! Made you Read Shirt and others is during the actually ironing process. Normally you just iron one layer on and you are done, with this shirt you have multiple colors and layers to get the right look. First, lay down the red glitter back part of the book and the words except Read. Iron it down using the instructions below. Place the gold piece on top of the red book and then cover the entire design with a piece of parchment paper (THIS IS IMPORTANT! It keeps the design from sticking to your iron) and iron it down with the same process. Repeat with the last layer, the red Read.
EasyPress
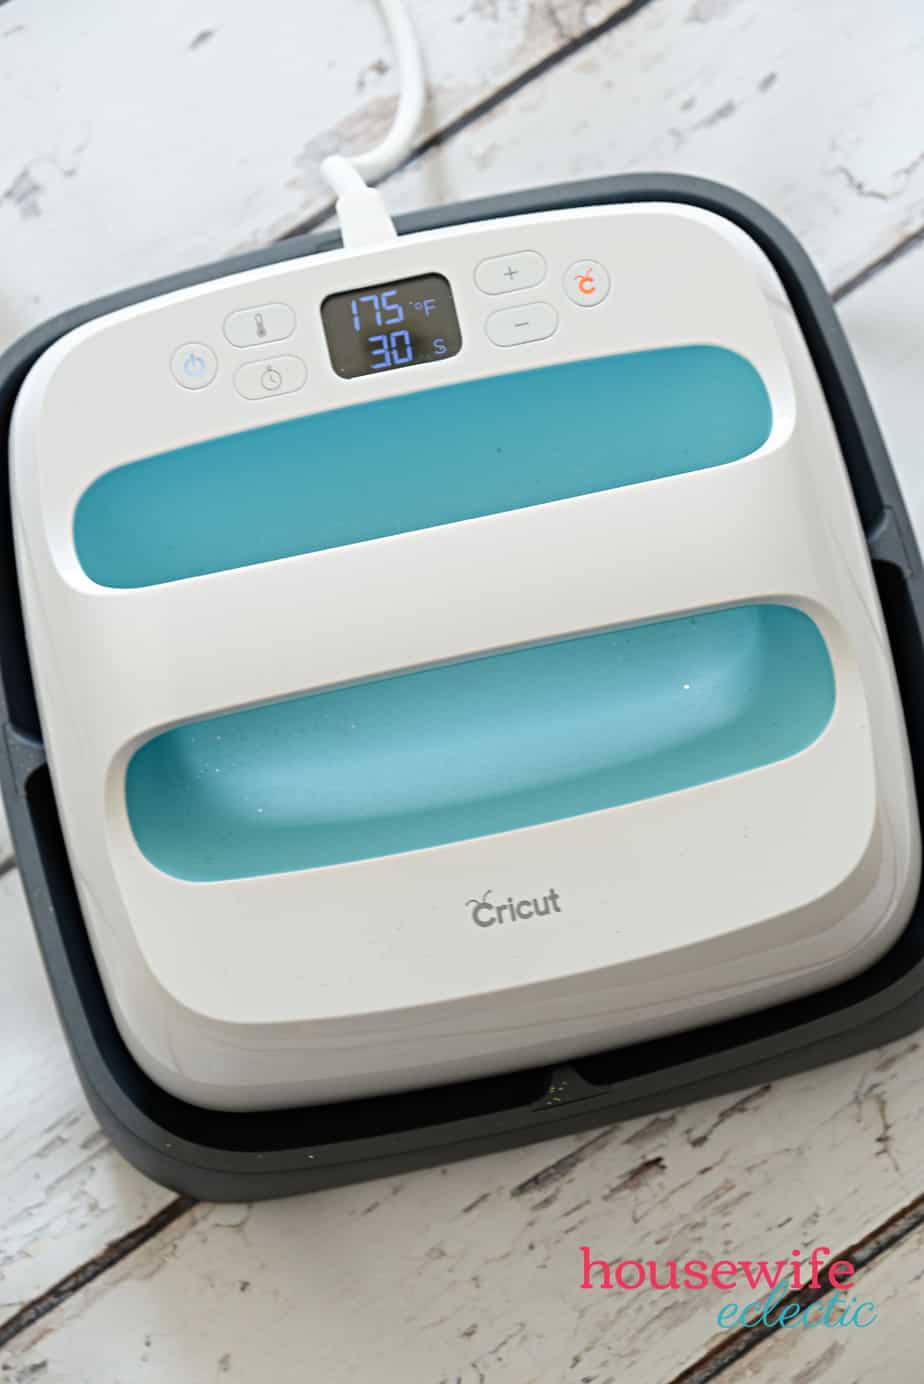
Heat your iron up to the hottest setting or you EasyPress to 305 degrees. Place the book design sticky side down onto your shirt. Iron straight onto the plastic, making sure each element of the design gets 30 seconds of pressure and hit. Start pulling up the plastic backing and if any of the elements pull up at all, put the plastic back down and iron that area again. Peel the plastic off and then repeat with the words.

Which shirt would you make for your favorite reader?
This is a sponsored conversation written by me on behalf of Cricut. The opinions and text are all mine.
These shirts are so cute. It would be so much fun to make them for the kiddos. I know they would love them.
I’m an avid reader so I really love these shirts. They are so cute and I love how detailed your instructions are.
Those shirts are super cute. I am positive that my niece would love one of these to wear to school.
These shirts are the absolute best! I love to read and I want my kids to as well, so I need to make these. My weekends are usually booked 😉
These are really cute shirts and what a great idea for all the book lovers in the family. Seems simply enough to make. Would make great gifts for everyone.
These are adorable! We are big readers here, and these would be perfect. I’m not crafty, but I can order! LOL
I love to read too! This shirts are absolutely adorable. I have been wanting to get a Cricut for a while now. I could create so much! I saw that easy press in Micheals a few weeks ago.
The “My Weekend is Booked” one is my favorite. I like all of these. They are super cute. My daughter would like them.
Oh! That is too cute. I love the “My weekend is all booked shirt.” I would wear that myself!
These are so fun, my daughter would love them all! My favorite is the “bookmarks are for quitters”
This is such a cool idea. I know my daughters would love to make their own shirt with a cool saying. And I love the positive message about reading.
OK now this is such a fun idea! I love the idea of book themed anything really as after all who doesn’t love getting lost in a different world.
I would have worn these when I was younger. I was such a reader when I was groing up.
These are so cute! I need to get some for my daughter; she is the resident reader.
It’s so fun to make your own t-shirts. The boys and I love to read, my husband not so much unless it is on a tablet. It sounds like you’ve established the right habits in your family.
That’s a great idea! My kid will love it! It seems so easy to make this themed shirts with your tips! I need to try it!
Sounds like a great idea! Those t-shirts look amazing and that device is quite handy.
Oh I wish I had the same one. I love the idea of having such t-shirts. For sure there will so many ideas to print and make. Perfect as giveaways…
This is awesome! I would make one for all the kids in the house. My wife is a pretty avid reader too. I’m sure she’d love one