
Hello friends! Lorene here again — intermittent co-conspirator here with Debra. Recently I shared how I make these easy and comfortable girls dresses from a men’s t-shirt, and today I’m showing a different style, one with a contrast waistband — perfect for a little comfortable Mary Poppins Jolly Holiday dress cosplay for my girls! (You can also see how Debra made a Belle-inspired t-shirt dress for her little princess here.)
We are big fans of musicals and musical theater at our house, and every summer during the school break, we have a “summer of musicals” featuring various musicals we love, with new ones added each year. We watch some classics like Singin’ in the Rain and some smaller hits, like our family favorite LaGaan (which is briefly summed up as a Bollywood musical about cricket — it sounds strange but it’s so good! and currently on Netflix!). One of my kids’ favorites is always Mary Poppins, so it was only a matter of time before we needed a Jolly Holiday dress.
One of the best parts of these t-shirt dresses is that, on top of being inexpensive and quick and easy to make, they are also stretchy enough that both of my girls (age 6 and 4) can wear the same dress — the elasticized waist fits them both, and it’s just a shorter length on my older daughter. You could use any color shirt and fabric to make all sorts of combinations — we’ve done a weeping angel, a Dalek, and a TARDIS (yes, our Whovian shows big-time!) and we have plans for more princess styles, too.
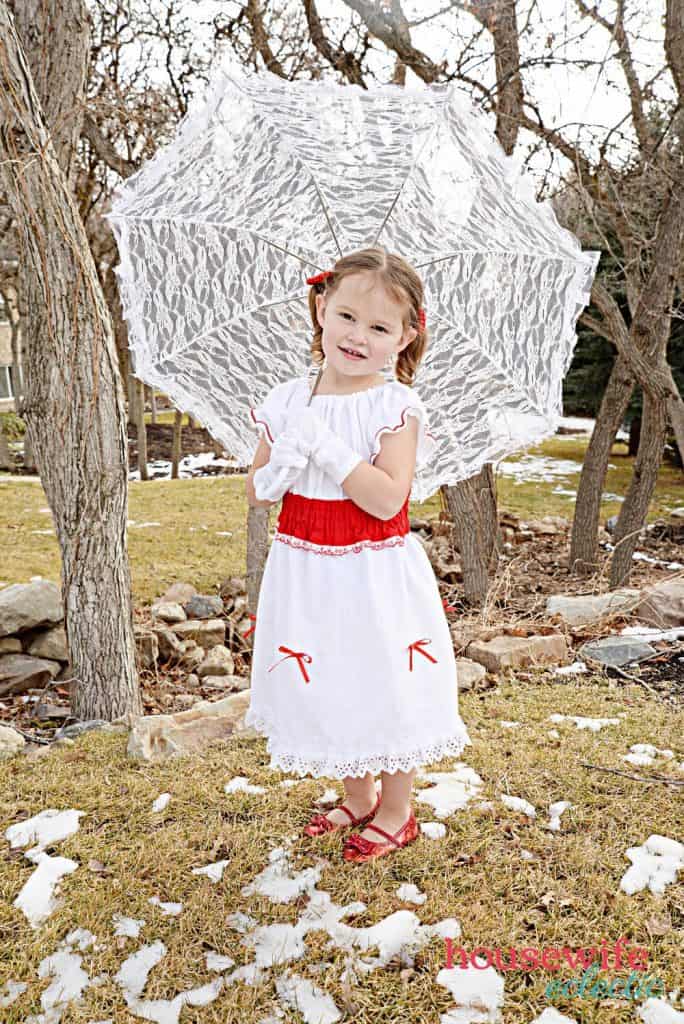
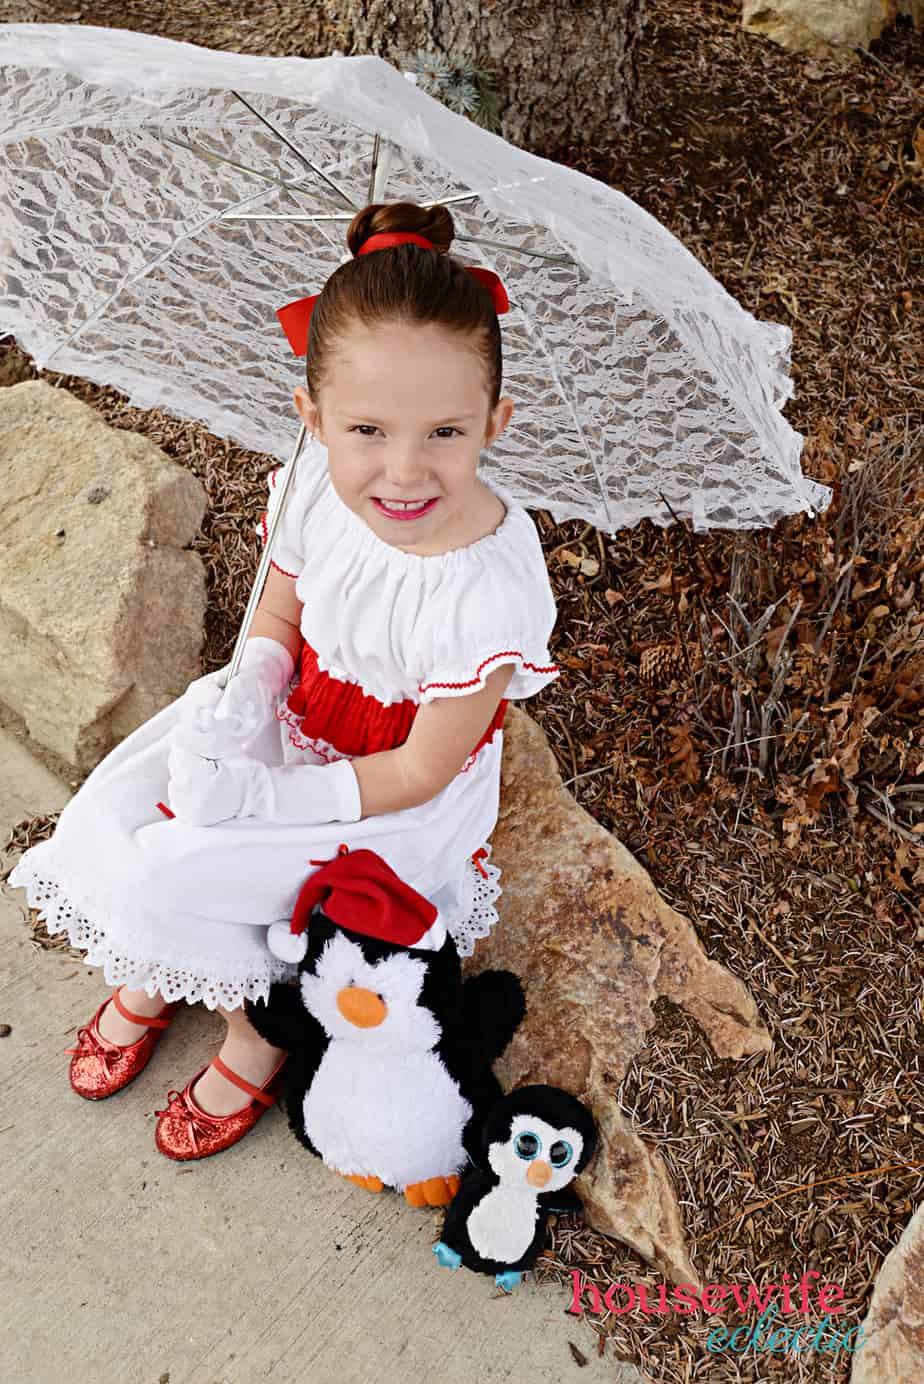
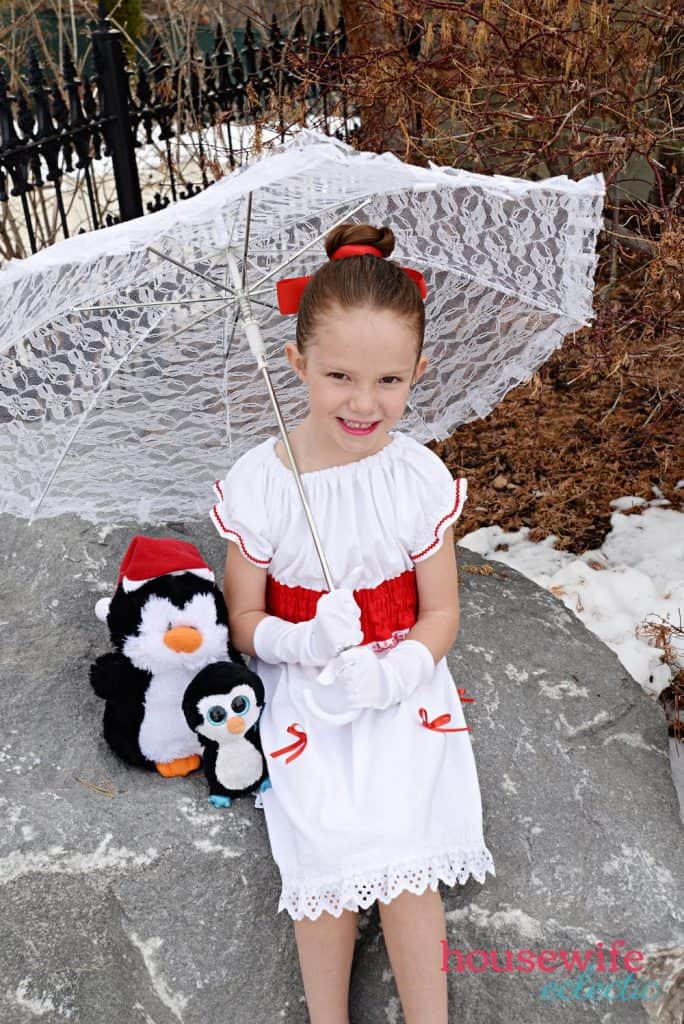
Of course, you can’t be Mary Poppins and go popping through pictures without the appropriate accessories, so we paired the white and red dress with the perfect long white gloves and lace parasol from Oriental Trading. A dab of red lip gloss and sparkly red shoes complete the Mary Poppins-inspired ensemble and my girls are over the moon! They even convinced me to let them cosplay to church as Mary Poppins.
So, let’s make the dress. Debra and I made this during a live show over on Facebook, so if you want to follow along “real-time” you can watch that video here.
How to Make a Mary Poppins Jolly Holiday Dress from a T-Shirt
Materials:
- one white adult t-shirt (see the post here for information about deciding which size to use for your daughter)
- lace – I used 2 different widths of white lace, a wider gathered lace like this and a thinner flat lace, and one piece of red and white lace that I had on-hand, similar to this
- red 1/4 inch ribbon or pre-tied bows
- red mini ricrac
- 3/8 inch elastic — 4+ yards depending on the size of the dress (I usually use a 6-yard spool and have leftover)
- one fat quarter or 1/4 yard red cotton fabric, prewashed
- fabric marking pen
- sewing machine with white and red thread
This Mary Poppins dress starts out just like the basic girls t-shirt dress tutorial here. Trim the top of the shirt and create the neck casing, but don’t add the elastic to the neck yet.

Add any embellishments around the bottom hem of the dress. This step is really what helps disguise the fact that this dress is made from a tshirt, by covering up the manufacturer’s hem. For this dress, I added one layer of a gathered wider lace, about 2 inches wide, and then one layer of a flat 3/4 inch lace on top. (I didn’t add the quintessential red bows to the skirt until after the bodice was gathered, so I could place them better where I wanted them.)

Now this is where the contrast waistband comes in, and where we diverge from the original shirred waistband in the basic t-shirt dress tutorial. To create the waistband, you’ll be creating a loop of doubled-up fabric to overlay the waistband, and then the elastic will be inserted between the tshirt and the waistband.
If you have fabric yardage, cut one long strip that is about 6 inches wide and double the width of the tshirt, when measuring from side to side just below the sleeves, plus an inch (or more) for turning/seams.
If you are using a fat quarter like we did, the width of the fat quarter is about the same width as the shirt, so we cut two pieces 6 inches wide, and then sewed together one short edge (right sides together) to form one longer piece of fabric, 6 inches wide and approximately double the width of the tshirt so it will wrap all the way around.
The 6 inch width makes the finished waistband about 2.5 inches wide and each elastic channel about 1/2 inch — adjust this as needed for thinner waistband or thicker elastic.

Next, fold the waistband fabric, right sides together, lengthwise, so you have a long strip of doubled up fabric that is about 3 inches wide. Sew along the long edge and ONE short edge, using about a 1/2 inch seam, so when you turn it right side out you’ll only have one unfinished edge. Trim the corners and turn the tube. Press the waistband flat with an iron. I prefer to use the seam as the lower edge of the waistband, but you could hide it at the back center of the waistband piece if you prefer.

Turn the unfinished short edge of the waistband inside the tube 1/4-1/2 inch and press it to hold the seam allowance. (You can topstitch here if you’d like to hold it, too, but it will be stitched down anyway.)
Align the waistband fabric with the bodice of the dress — for my girls, the right location is usually right beneath the sleeves so it’s easy to eyeball it, but you can draw a line on the shirt to line up the edge of the waistband if you prefer. Start at one side seam (or under the arm if there isn’t a side seam) so that the join will be more hidden later, and pin and sew the top and bottom of the waistband all the way around the bodice.

With the fabric marking pen, draw three lines to mark the channels for the elastic. You can mark these all the way around the waistband if you prefer, or you can mark them in one spot like I did and then use the presser foot and adjust the needle to keep the channels straight and even.
You’ll be sewing four channels for the elastic along the waistband, for a total of five lines of stitching — along the top, completing channel one, completing channel two, completing channel three, and along to bottom to complete channel four- so each channel will be between around 1/2 inch (plus 1/4 inch at the top and bottom to total ~ 2.5 inch wide waistband). Each channel just needs to be wide enough to accommodate the elastic, but the gathering will hide imperfections so if they aren’t exactly equal, it’s okay. (I rarely sew exactly so if you want it exact, feel free to do more precise math and seams! )

If you want to add additional trim (like the red and white lace I added), pin it in the waistband now so it gets sewn in the first time. It’s a huge pain to take it out and add it again after the elastic is put in (like I did) 😉 but it makes such a big difference to the dress!
Sew around the top and bottom edges of the waistband and each of the marked channels, leaving both ends of the channels open.
Cut 4 lengths of elastic the length needed for a comfortable bodice — my girls don’t like the bodice very snug, so I cut the elastic short enough to clearly gather the waist but long enough to be comfortable for them both, around 24 inches.

Using a safety pin (or it’s really high time I invested in one of these fancy elastic threader tools), feed each elastic piece through one of the channels, pinning the start and end of each piece to the dress so that it doesn’t get pulled through or lost inside the casing (like ours did). Once you have all 4 pieces of elastic in the channels, sew the ends of each loop together. I like to stitch down the sides of the dress, across all the elastic casing channels, to help hold the elastic in place and keep it from twisting. This also anchors the joining of the waistband fabric so that it doesn’t show the elastic.

Now that the waistband is done, finish up the dress by adding the neck elastic and shirring the sleeves like in the original tutorial. To add the red mini ricrac, I just sewed it in as I shirred the sleeves. Then I finished it up by hand-sewing on 5 red bows, spaced equally around the skirt.
Accessorize and grab a favorite penguin pal (or a turtle, since that part is one of my favorites, too) and your mini Mary Poppins is ready for a grand adventure!
Looking for more Disney Costume ideas? Check these out!
Minnie Mouse Costume
https://sugarbeecrafts.com/diy-minnie-mouse-costume-no-sew
Darth Maul and Yoda Costume
https://www.thescrapshoppeblog.com/diy-darth-maul-yoda-costumes/
Minnie Mouse Costume
https://www.unoriginalmom.com/the-perfect-diy-minnie-mouse-costume/
Officer Judy Hopps Costume
https://housefulofhandmade.com/officer-judy-hopps-halloween-costume/
Ducktales Costume
https://suburbanwifecitylife.com/diy-ducktales-costumes/
Angry Birds R2D2 Costume
https://twindragonflydesigns.com/angry-birds-star-wars-r2d2-costume/
Maui Costume
https://seelindsay.com/make-disney-maui-halloween-costume/
Woody and Jessie Costumes
https://www.sewsimplehome.com/2013/10/diy-woody-jessie-costumes-31-day-of.html
Merida Costume
https://ithappensinablink.com/disney-brave-merida-costume-with-simplicity-pattern-1557/
Dole Whip
https://www.girllovesglam.com/dole-whip-costume/
Easy Jedi Costume
https://www.fleecefun.com/easy-jedi-diy-costume-tutorial/
Minnie Mouse Costume
https://thecelebrationshoppe.com/minnie-mouse-halloween-costume-cricut/
Monsters Inc Costumes
https://creativelybeth.com/monsters-inc-halloween-costumes-created-from-t-shirts/
Jolly Holiday Mary Poppins Costume
https://www.housewifeeclectic.com/its-a-jolly-holiday-diy-mary-poppins-dress-for-little-girls/
Tangled Costumes
https://makeit-loveit.com/halloween-costumes-2013-the-whole-tangled-crew-plus-a-video
Ariel Costume
https://www.polkadotchair.com/ariel-halloween-costume/
Minnie Mouse Costume
https://www.designdazzle.com/diy-mickey-minnie-mouse-halloween-costumes/
Moana’s Necklace
https://simplepracticalbeautiful.com/moanas-necklace/
I am so impressed with your creativity. This is my biggest problem in life I’m not creative. I wish I had a little girl to do this for. Such a cute little girl dress!
Thanks, Shelley! That is one perk of having two little girls, plenty of chances for fun ideas like this!
How perfectly sweet! Indeed the pretty red shoes make the look everything it should be. Love the parasol too!
Thanks, Joely! It all came together so well. My girls love it!
This is such a cute dress! My daughter has never seen Mary Poppins. We need to watch the movie. Maybe we will this summer.
Thanks, Melanie! It’s definitely worthy of a watch — such a classic!
This dress is so adorable. It will be so much fun to make it for my nieces. I know they would love it.
Thanks, Tasheena! Send us a pic if you make it.
This is so darling! I have to send this link over to my friend who has a daughter. Perfect for the new movie coming out.
So perfect! We might have to actually go see it… but then I’d need to make costumes for everyone 😉
This is such a cute and fun diy! She really does look like Mary Poppins now!
Thanks, Sara! My girls were pretty thrilled with the “transformation”.
This is too cute! I’m loving the minor details on this Marry Poppins look. Brings me back to my childhood when I did dance and we did this musical one year.
What a fun musical to do! Thanks for the comment, Fatima.
This is a fun idea and it doesn’t look too complicated. I heard rumors that my daughter’s school may try to do Mary Poppins.
Creating dresses for little girls is so exciting! With your tips everything seems to be easier!
This is so cute! My daughter recently watched Mary Poppins for the first time and fell in love. I bet she would love this costume!
This is so cute! For a DIY, this is just amazing. I love the idea and the way you made it too!