
Ms. Frizzle Costume
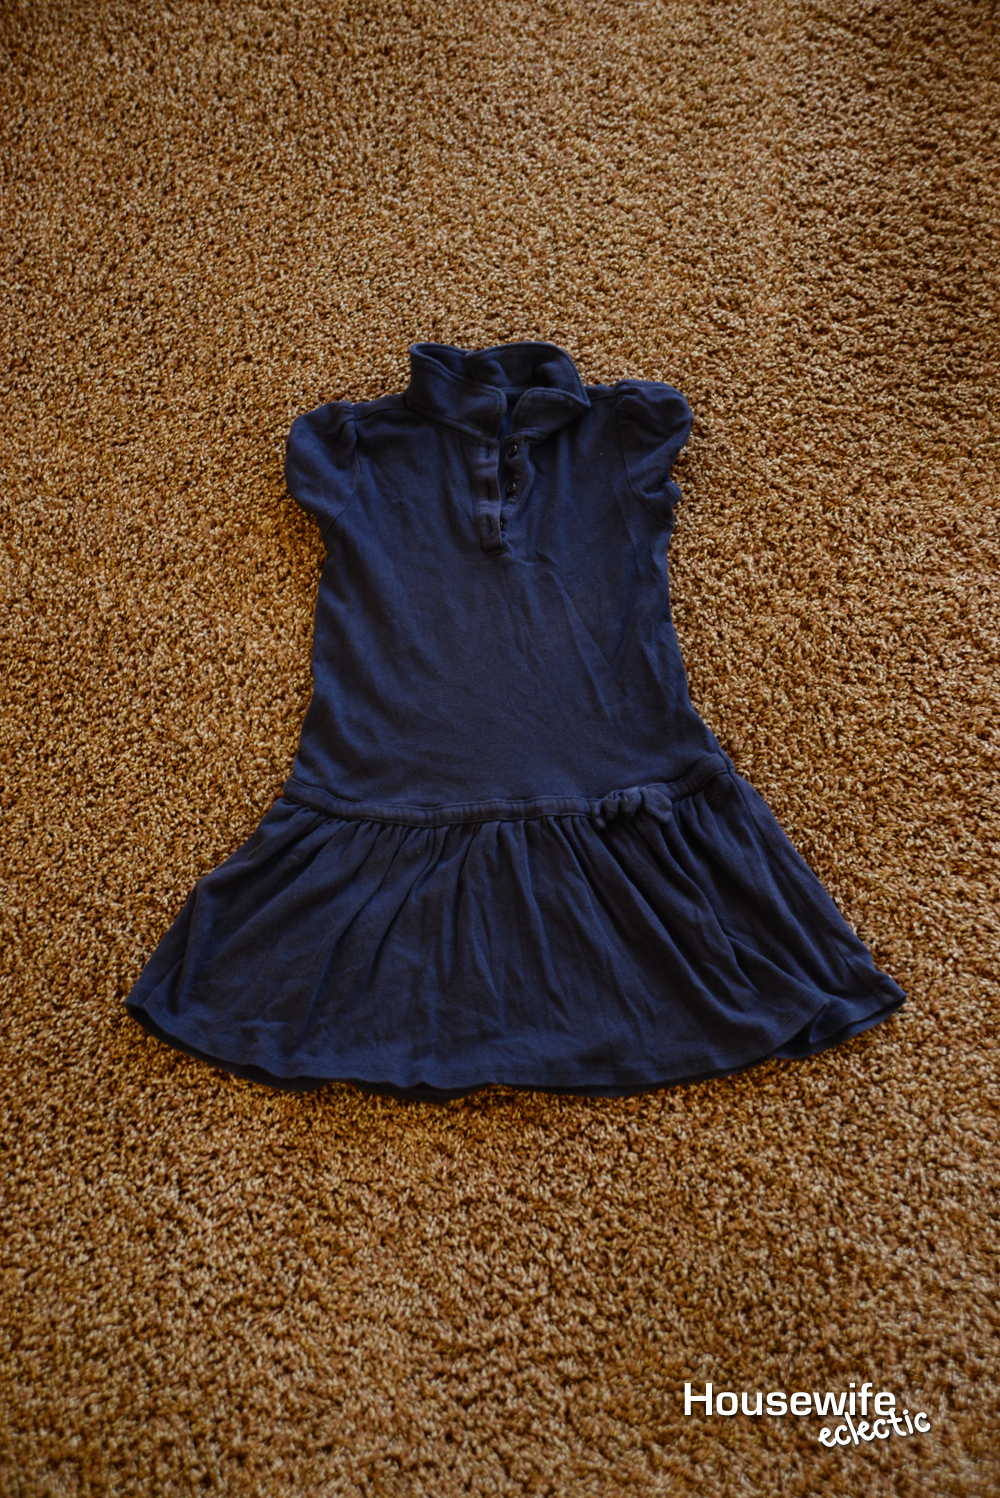
- a navy blue dress (school uniform dresses work great)
- heat transfer vinyl in white, blue, green, yellow, and red
- a solar system kit
- paint for the planets
- heavy duty wire
- Saturn earrings
- a iron
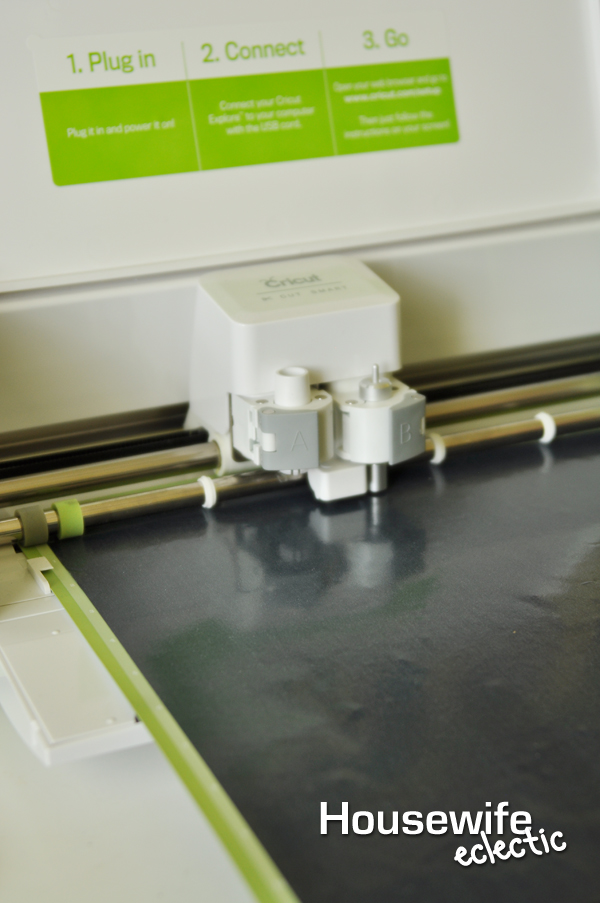
- A Cricut
- Design Space
Cricut has a really awesome set of planets in their image library and I used those for all of the major planets. You can find them here. I simplified most of them to be just two layers because I wanted to conserve vinyl. You can turn off a layer in Design Space by clicking on the eye in the layers section on the far right side of the screen. Simply click the eye on what you don’t want to cut and it will take it off your screen without completely deleting it.
To make this dress, head over to the Explore site and select the great big blue, Create a New Project button. Hit the Insert Images button and then search for the different planets that you want to add.
Make your images different colors and your Cricut will know that you plan on cutting them out of different colors and place them on different mats when you hit cut. It will separate your planets into two pieces so you can cut them out of different colored heat transfer.
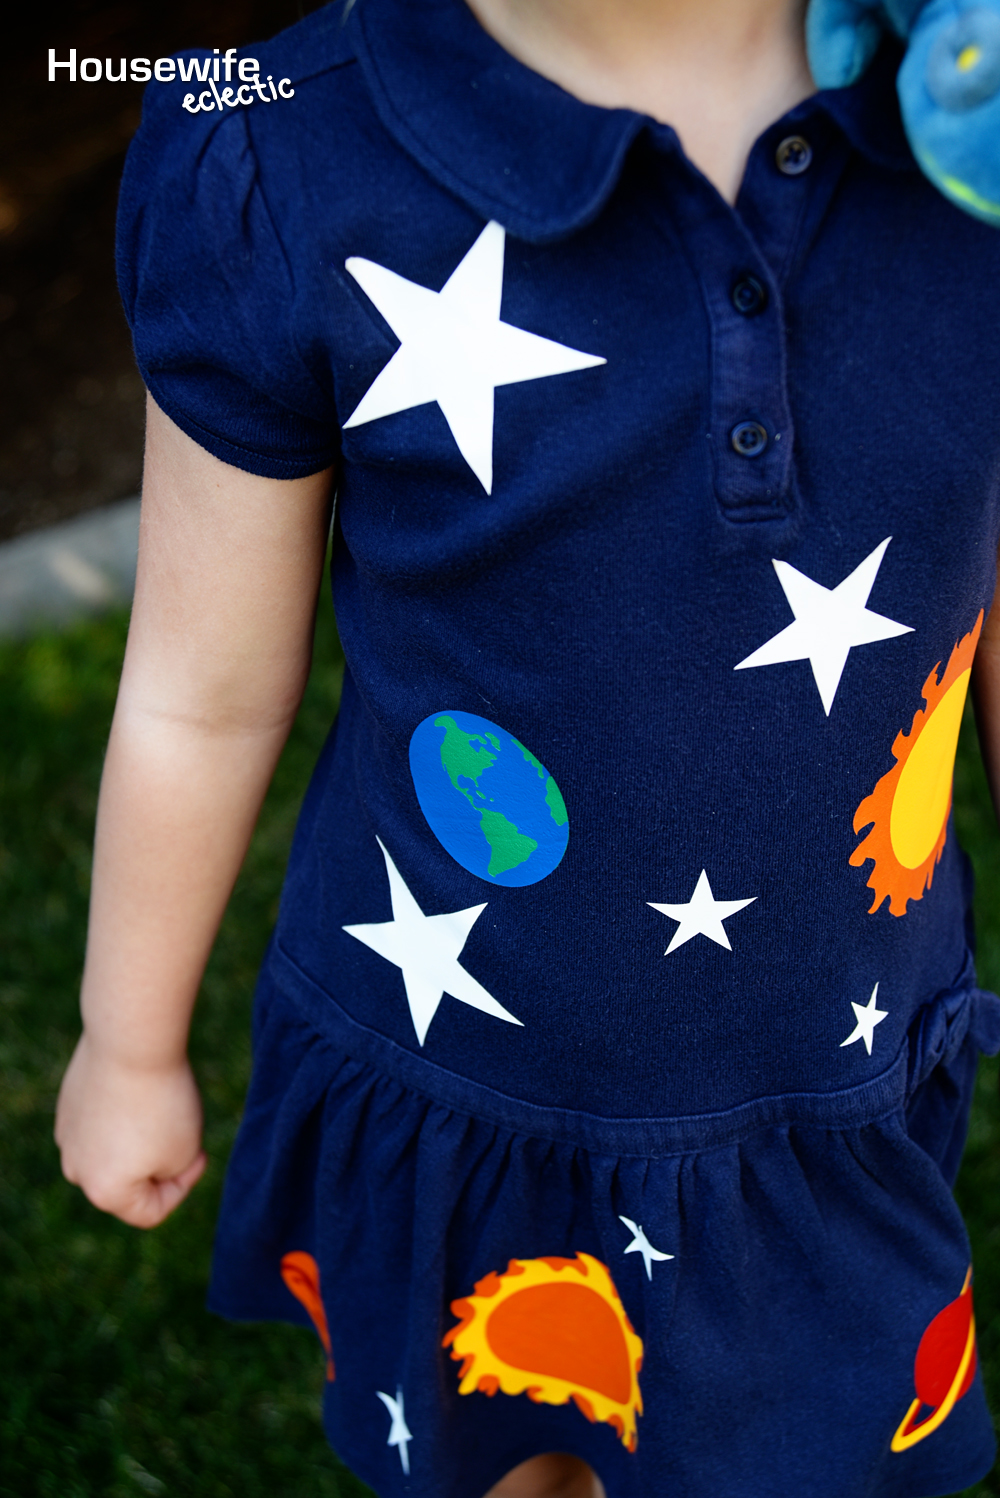
When you make projects with more than on top of each other one color of vinyl is called layering heat transfer and it is surprisingly easy and just needs a little patience. You will need to cut two layers for each of the sun, one in yellow, one in orange. Two layers for the Earth in green and blue and two layers for Mars and Jupiter. The stars are just white heat transfer and only need the one layer. I copied and pasted the stars over and over again on my screen and then enlarged some and shrunk others to have different sized stars.
Heat Transfer goes onto your mat with the shiny side down. Set your machine to iron-on and then hit the go button. Remember when cutting heat transfer with a machine, you always need to be sure to flip/mirror your images or you text will be backwards when you iron it on. For this project is isn’t crucial to flip the images, but I do anyways.
Weed the all of the negative parts of the design away, leaving just the pieces you need. Always start with the bottom layer on your shirt with the carrier sheet up. Place the other sheets on top of the bottom design until it is positioned how you want. Peel the other sheets off the shirt leaving just the bottom layer.
Line up the top of the planet over the the piece already ironed down and iron down for 15 seconds. Peel the carrier sheet off. Make sure the entire design is always covered by a carrier sheet or a piece of parchment paper. This will keep the black from sticking to your iron.
Iron over the entire design for about 30 seconds, so the entire design has been ironed for 30 seconds, not 30 seconds total. Flip over and iron from the back for an additional 15-20 seconds.
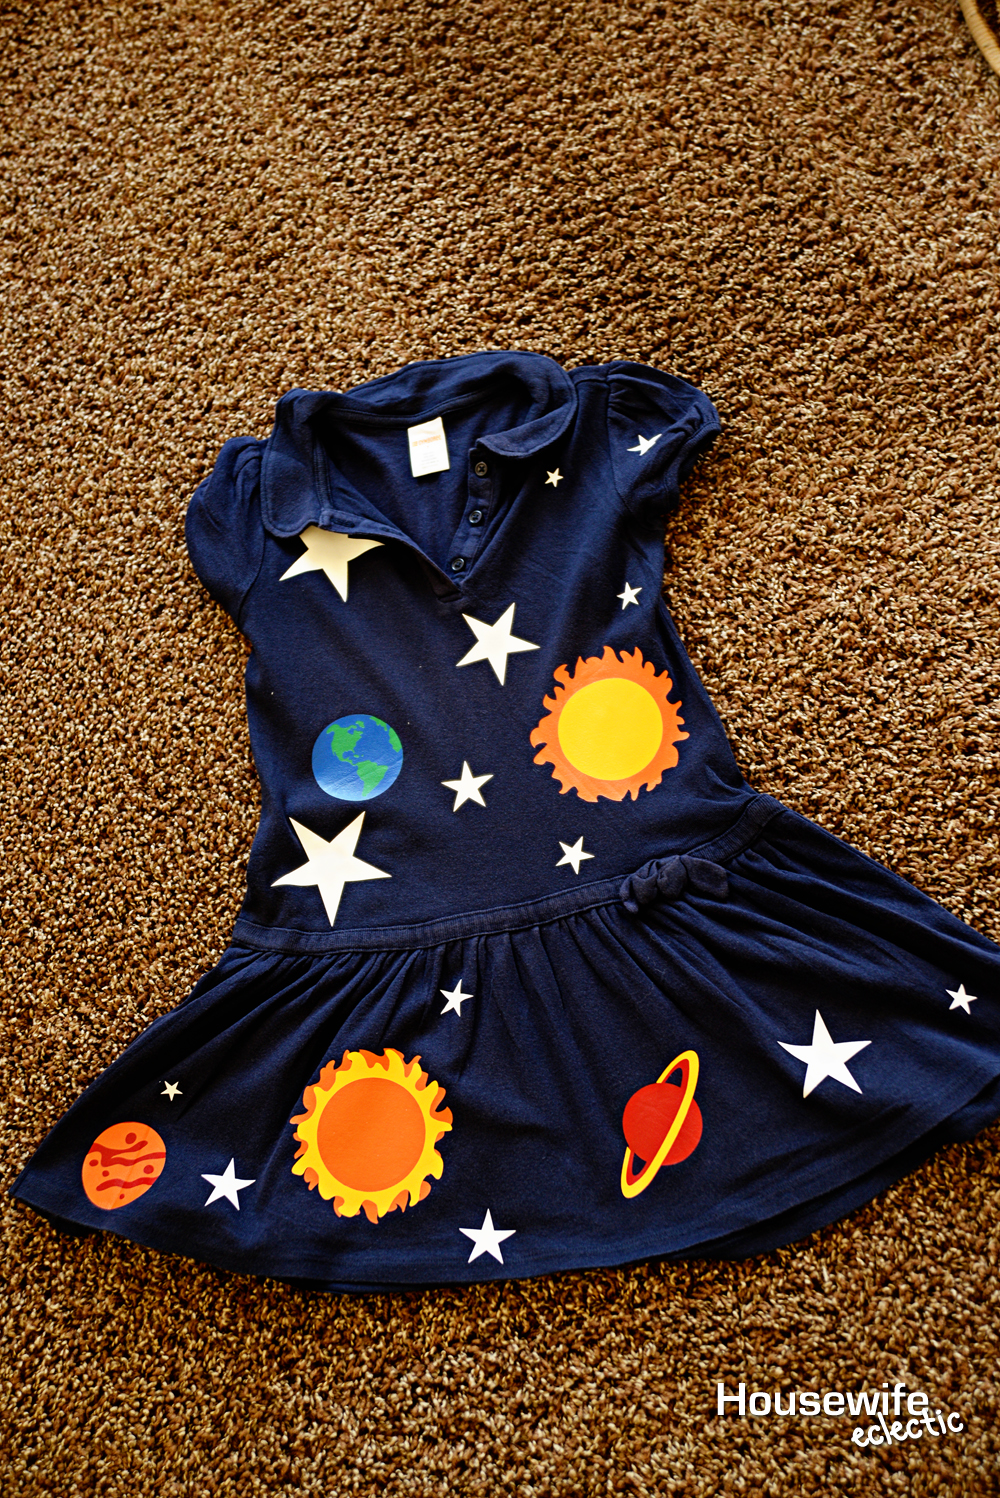
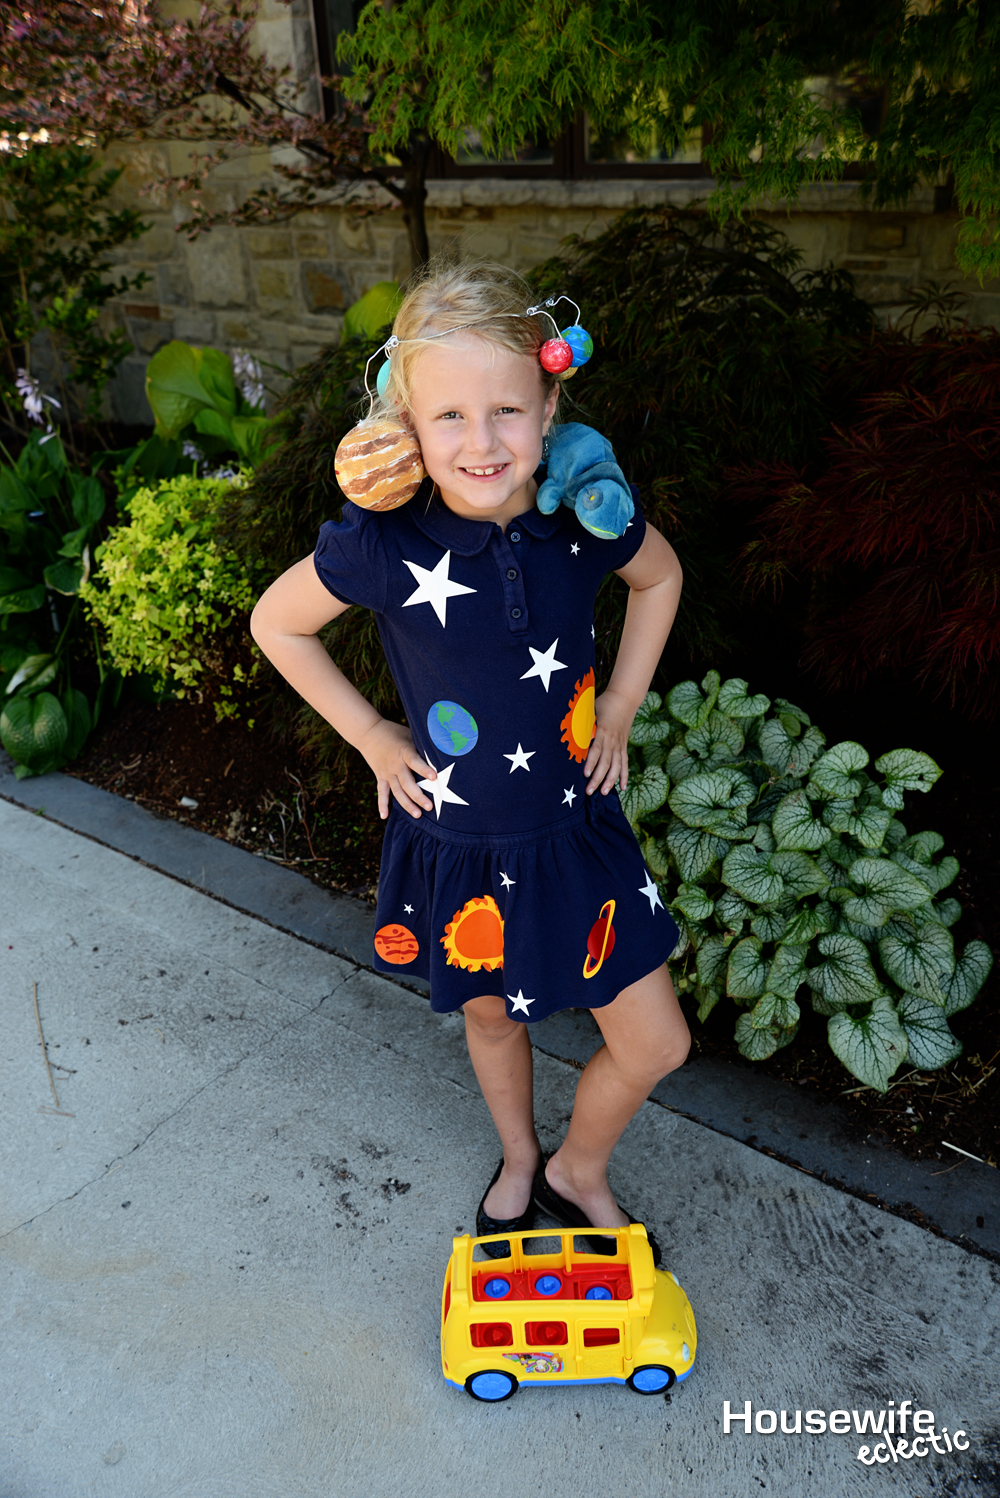
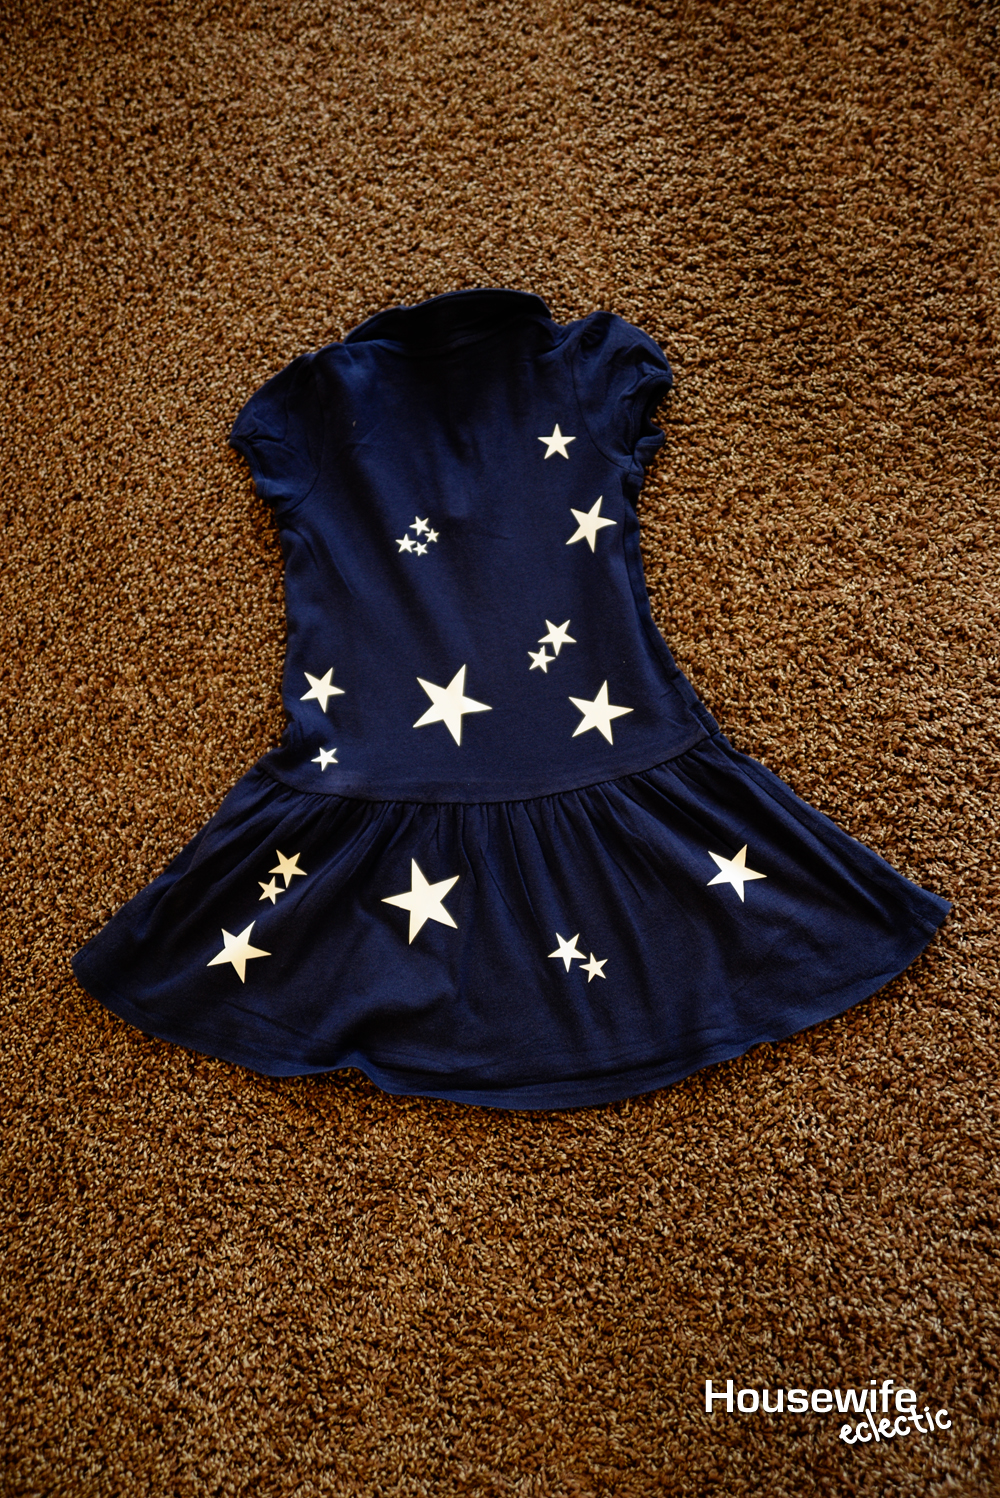
The planets and some of the stars go on the front of the dress and then stars of all different sizes go on the back as well.
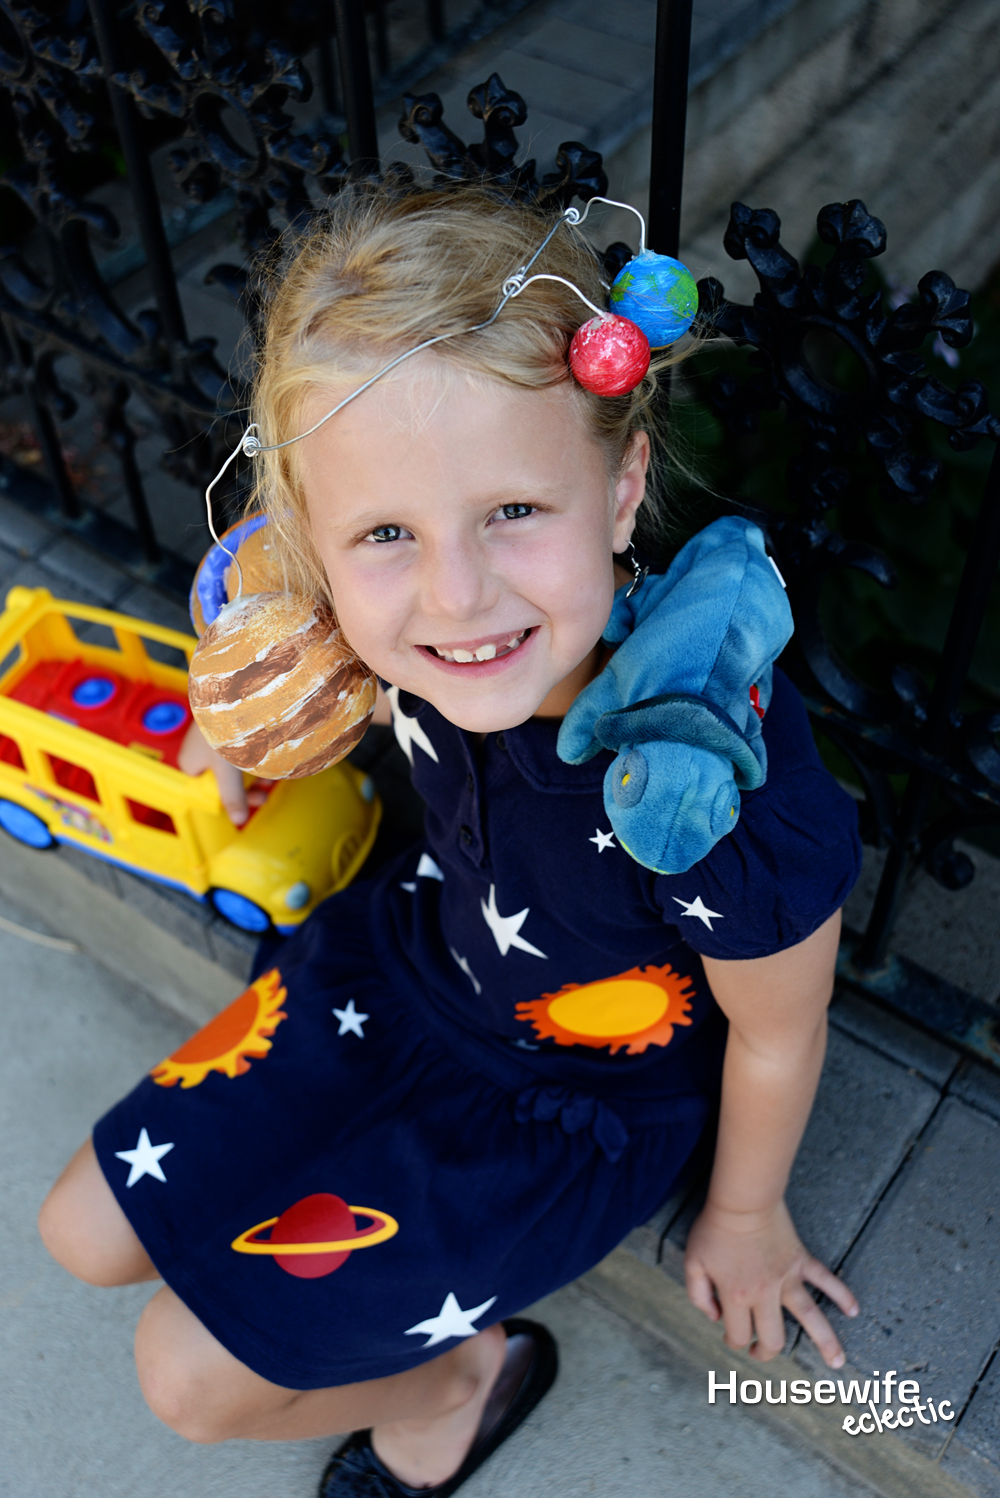
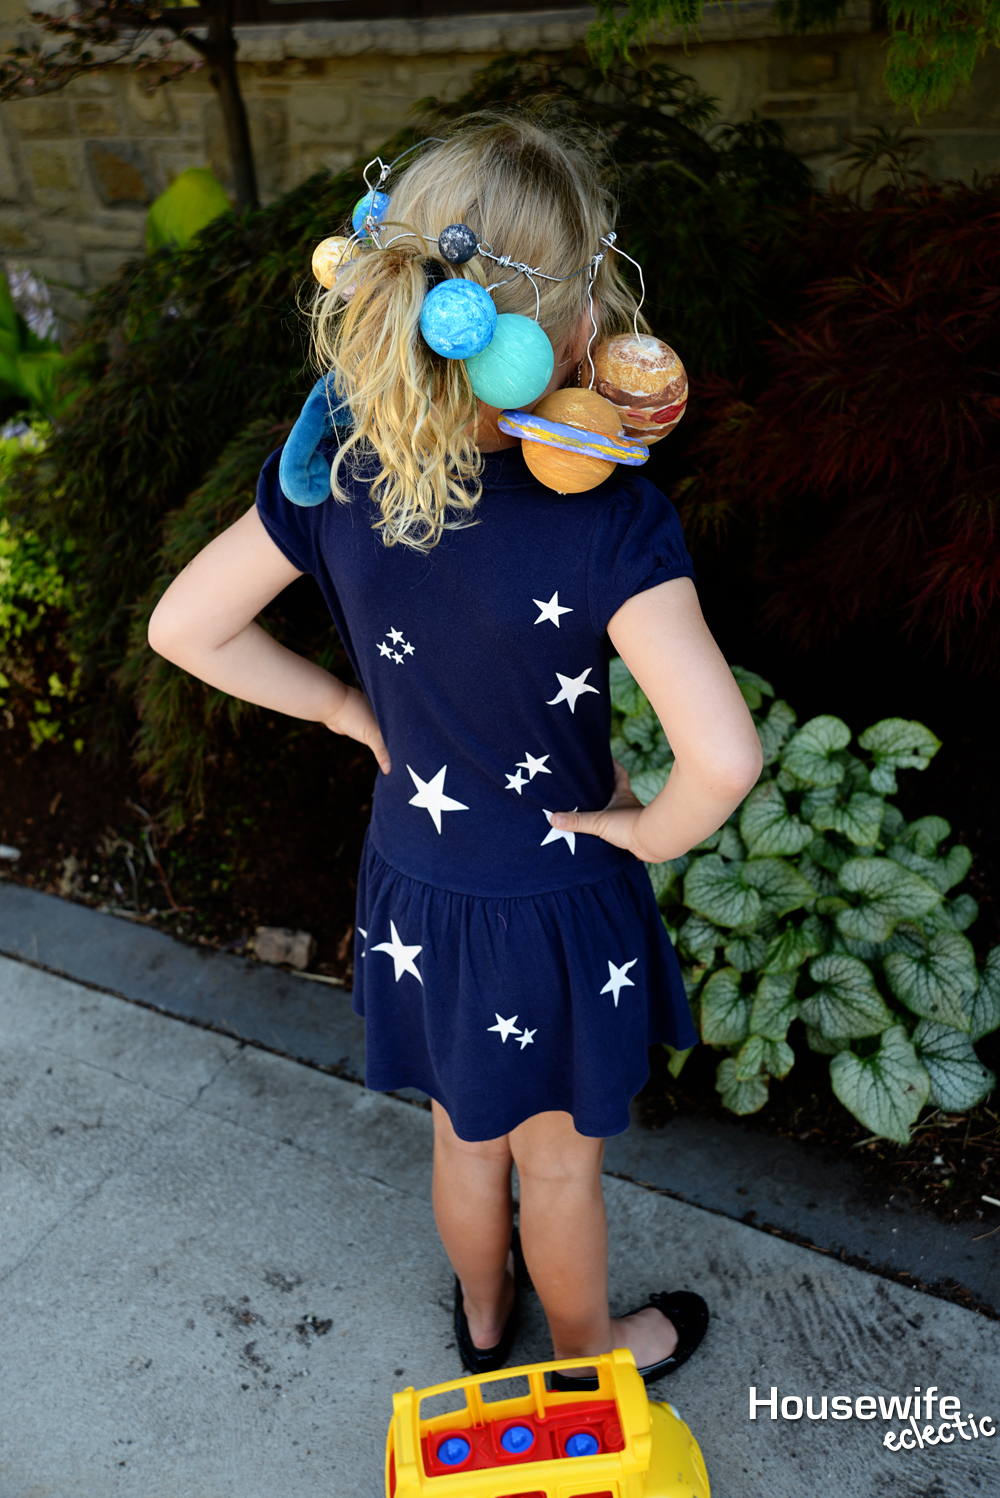
After your dress is done, you can start work on Ms. Frizzle’s headpiece. Paint all of the Styrofoam planets as the box directs you. When they are dry, make a circlet of thick wire that fits on the head of the person who is going to wear the costume. Close the circle by twisting the wire together. Stick a piece of wire a couple inches long into each planet. Secure the wire with hot glue. Twist the other end of the wire around the large circle of wire, creating a planet head piece.
It seemed the most comfortable way for the head piece to be worn was with the smallest planets surrounding the face and the larger ones in the back. Finish off the costume with Saturn earrings, and a little Liz for the shoulder.

Ms. Frizzle Costume
Materials
- a navy blue dress school uniform dresses work great
- heat transfer vinyl in white blue, green, yellow, and red
- a solar system kit
- paint for the planets
- heavy duty wire
- Saturn earrings
- a iron
- A Cricut
- Design Space
Instructions
- Cricut has a really awesome set of planets in their image library and I used those for all of the major planets. You can find them here. I simplified most of them to be just two layers because I wanted to conserve vinyl. You can turn off a layer in Design Space by clicking on the eye in the layers section on the far right side of the screen. Simply click the eye on what you don’t want to cut and it will take it off your screen without completely deleting it.
- To make this dress, head over to the Explore site and select the great big blue, Create a New Project button. Hit the Insert Images button and then search for the different planets that you want to add.
- Make your images different colors and your Cricut will know that you plan on cutting them out of different colors and place them on different mats when you hit cut. It will separate your planets into two pieces so you can cut them out of different colored heat transfer.
- When you make projects with more than on top of each other one color of vinyl is called layering heat transfer and it is surprisingly easy and just needs a little patience. You will need to cut two layers for each of the sun, one in yellow, one in orange. Two layers for the Earth in green and blue and two layers for Mars and Jupiter. The stars are just white heat transfer and only need the one layer. I copied and pasted the stars over and over again on my screen and then enlarged some and shrunk others to have different sized stars.
- Heat Transfer goes onto your mat with the shiny side down. Set your machine to iron-on and then hit the go button. Remember when cutting heat transfer with a machine, you always need to be sure to flip/mirror your images or you text will be backwards when you iron it on. For this project is isn’t crucial to flip the images, but I do anyways.
- Weed the all of the negative parts of the design away, leaving just the pieces you need. Always start with the bottom layer on your shirt with the carrier sheet up. Place the other sheets on top of the bottom design until it is positioned how you want. Peel the other sheets off the shirt leaving just the bottom layer.
- Iron directly onto the carrier sheet with the bottom layer in each planet for about 15 seconds. Peel the carrier sheet off, leaving the design on the dress.
- Line up the top of the planet over the the piece already ironed down and iron down for 15 seconds. Peel the carrier sheet off. Make sure the entire design is always covered by a carrier sheet or a piece of parchment paper. This will keep the black from sticking to your iron.
- Iron over the entire design for about 30 seconds, so the entire design has been ironed for 30 seconds, not 30 seconds total. Flip over and iron from the back for an additional 15-20 seconds.
- The planets and some of the stars go on the front of the dress and then stars of all different sizes go on the back as well.
- After your dress is done, you can start work on Ms. Frizzle’s headpiece. Paint all of the Styrofoam planets as the box directs you. When they are dry, make a circlet of thick wire that fits on the head of the person who is going to wear the costume. Close the circle by twisting the wire together. Stick a piece of wire a couple inches long into each planet. Secure the wire with hot glue. Twist the other end of the wire around the large circle of wire, creating a planet head piece.
- It seemed the most comfortable way for the head piece to be worn was with the smallest planets surrounding the face and the larger ones in the back. Finish off the costume with Saturn earrings, and a little Liz for the shoulder.

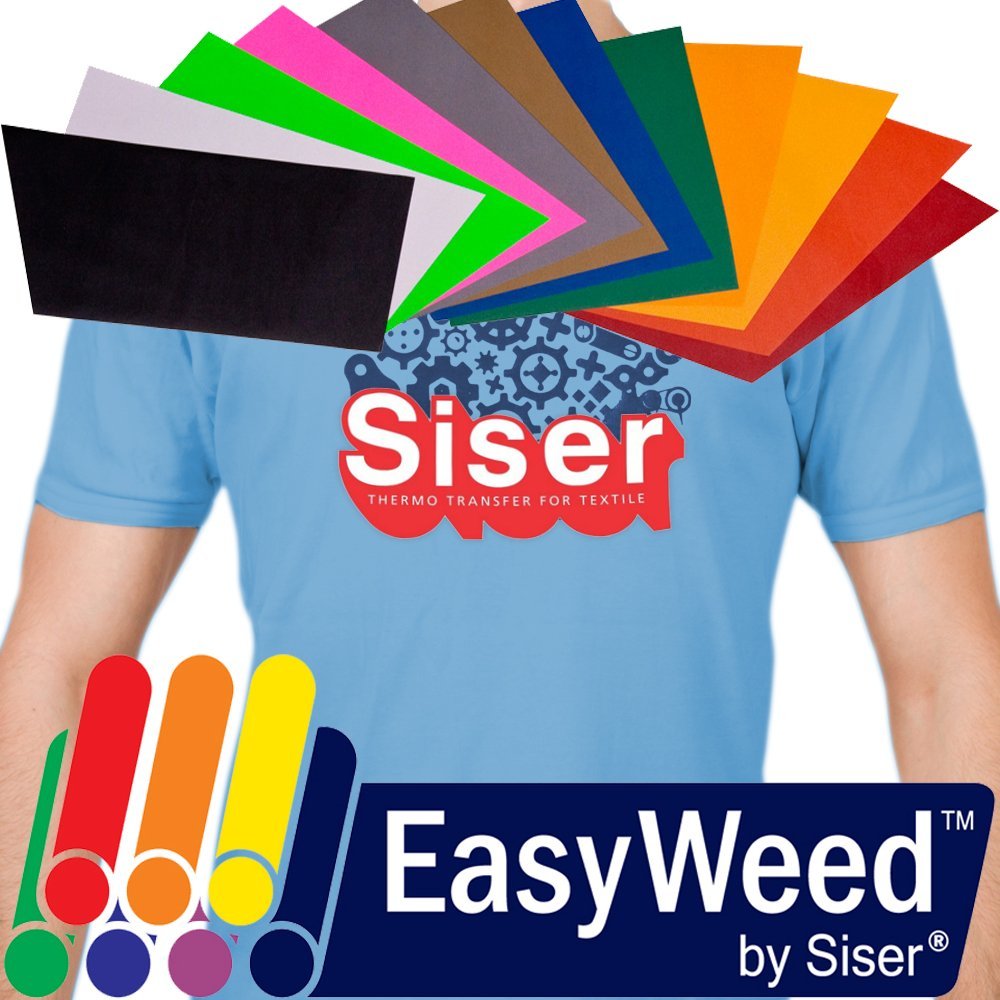 Heat Transfer Vinyl
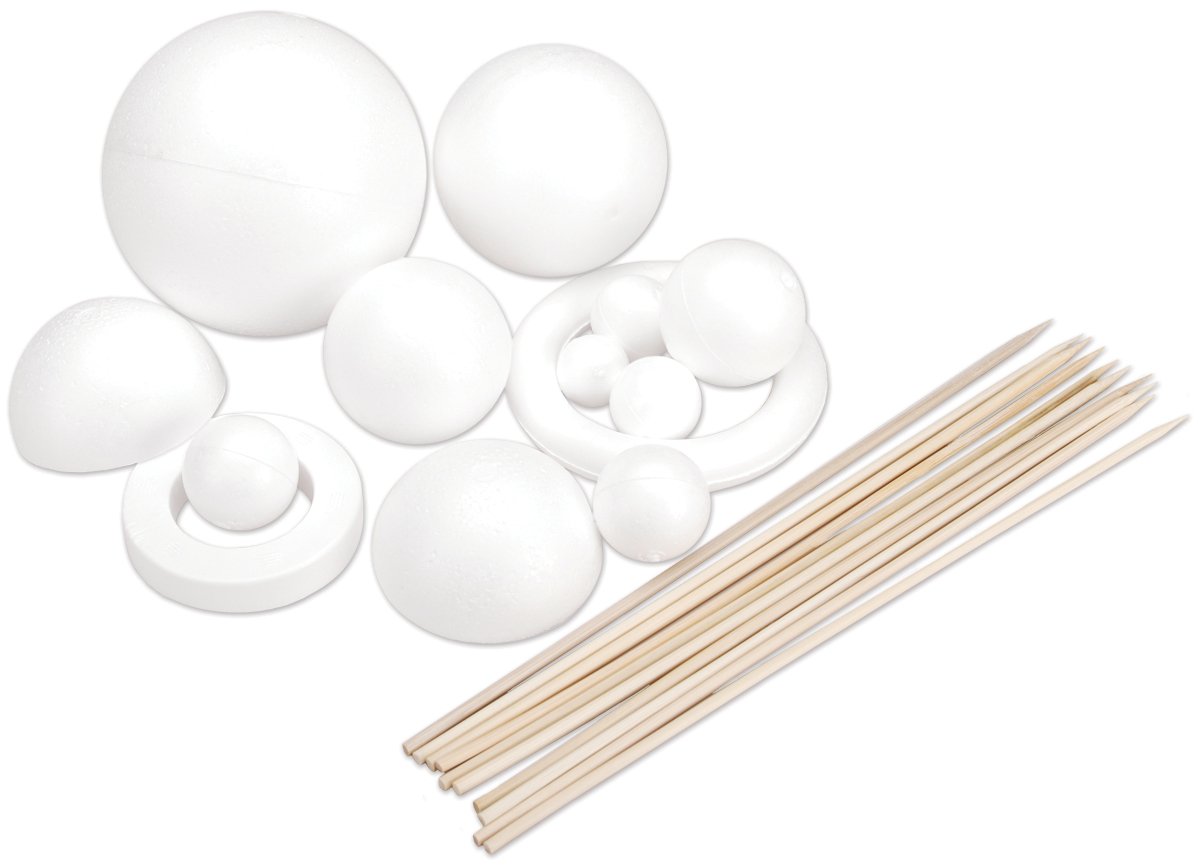 Solar System Kit
 Thick Jewelry Wire
  Saturn Earrings
 School Bus Bag
Looking for More Kids Costume Ideas? Check these Out!
DIY Dice Costume
https://sugarbeecrafts.com/diy-dice-costume-boxtume
Teenage Mutant Ninja Turtle Costume
https://www.thescrapshoppeblog.com/teenage-mutant-ninja-turtle-costumes/
Ninja Costume
https://pagingsupermom.com/nosew-ninja-costume/
DIY Cupcake Costume
https://www.sewwhatalicia.com/diy-tutu-and-cupcake-costume/
DIY Mermaid and Flounder Costume
https://www.unoriginalmom.com/diy-little-mermaid-and-flounder-costumes/
Sharkboy and LavaGirl Costumes
https://housefulofhandmade.com/sharkboy-and-lavagirl-halloween-costumes/
Golden Snitch Costume
https://suburbanwifecitylife.com/golden-snitch-costume/
Plants Versus Zombies Costume
https://twindragonflydesigns.com/plants-vs-zombies-costume/
DIY Bee Costume
https://cutesycrafts.com/2013/10/diy-bee-costume-big-kid-tee-into.html
Disney Maui Costume
https://seelindsay.com/make-disney-maui-halloween-costume/
TMNT Costume
https://www.sewsimplehome.com/2014/10/tmnt-halloween-costume-for-halloween.html
Kids Unicorn Costume
https://craftboxgirls.com/blogs/articles/diy-kids-unicorn-halloween-costume
Star Trek Kids Costume
https://www.triedandtrueblog.com/star-trek-halloween-costume-kids/
Toddler Boy Halloween Costumes
https://www.sengerson.com/motherhood/toddler-boy-halloween-costumes/
DIY Elmo Costume
https://www.girllovesglam.com/diy-sew-elmo-halloween-costume/
Princess Poppy Costume
https://www.fleecefun.com/princess-poppy-costume-diy-free-pattern/
Halloween Costumes from T-shirts
https://creativelybeth.com/monsters-inc-halloween-costumes-created-from-t-shirts/
Ms. Frizzle Costume
https://www.housewifeeclectic.com/magic-school-bus-ms-frizzle-costume/
Skeleton Costume
https://www.gingersnapcrafts.com/2016/10/skeleton-costume-tutorial.html
Mummy Costume
https://www.polkadotchair.com/how-make-mummy-costume/
Star Wars Costumes
https://www.designdazzle.com/star-wars-costume-ideas-kids/
Monster Costumes
https://simplepracticalbeautiful.com/handmade-kids-monster-costumes/
You are JUST so clever and creative! I love how you put these together and am impressed with your skills, lady!!
Karen | GlamKaren.com
This is AMAZING! I didn't know that kids still watch the Magic School Bus! This makes me so happy and clearly makes the little one super happy ! Such a cute outfit! Love it great post!
Totally adorable outfit. When I was a teacher I used to dress like Ms. Frizzle for Halloween. The students loved it!
What a cute outfit. I use to watch Magic School Bus with my brothers all the time.
My daughter would love to wear that outfit. That is so cute!
I don't know who Ms Fizzle is, but I love the outfit. You did an amazing job. Have fun at comic con.
What a cute outfit. We don't really watch the magic school bus but if we did I'm sure my daughter would be all over this.
How fun is this idea!? I adore this – my girls would totally love to make a planet dress or t-shirt.
Oh this is the cutest! My daughter just watched her first episode of the magic school bus the other week, and she loved it 🙂
I love this! We are huge Magic School Bus fans here! The books play a huge role in our science for homeschool.
I loved ms. frizzle growing up! This is so cute. You are so creative.
That's so adorable! We love the Magic School Bus at home too and the kids have learned a lot from the show and the books. It's awesome how you were able to pull this costume off, it's really lovely!
I used to love watching this when I was younger. My kids don't enjoy it but Netflix has it! Great costume.
Your DIY hacks never cease to amaze me and I think this must be one of my favorites. I love the magic bus design.
Oh the nostalgia!!!!!! I LOVED the Magic School Bus growing up and you hit this costume idea write on the nail. Love it.
I have always loved this show!!!! How cute is this! I love how different this is too!
This is absolutely amazing! I grew up on the Magic School Bus as well so I love everything about this. So creative!
Incredibly creative. Amazing that it was made with a Cricut. My kids loved magic school bus.
This is so adorable! I need to get my kids to start watching more of shows like we had when we were younger.
This is the coolest costume ever!! So creative & fun! I loved the Magic School Bus as a kid, too 🙂 Thanks for linking up with our Merry Monday party this week!
super cute! and i love the "readers gonna read" shirt, i just saw that in a pillow and thought how i need it.
b