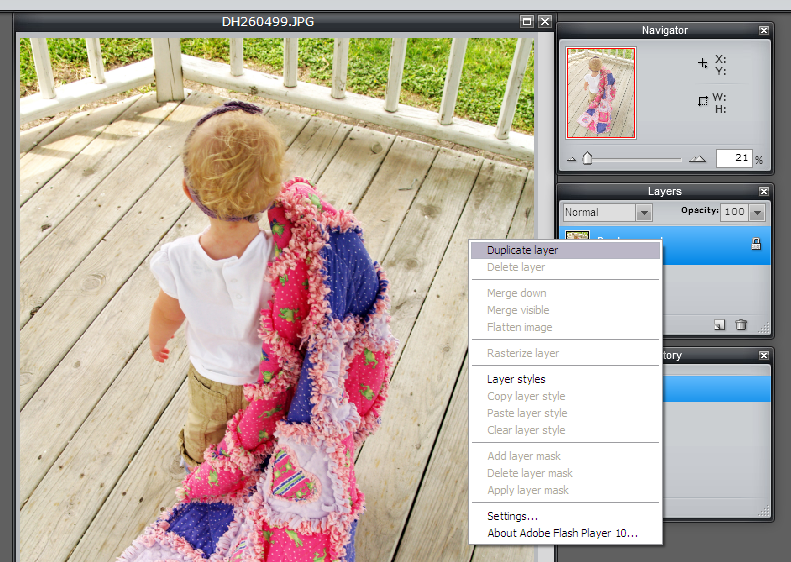
 To avoid confusion, we should name our layers. To name a layer, simply double-click on the layer name and rename the layer. Rename one layer Black and White and the other Color (or choose something more creative if you want).
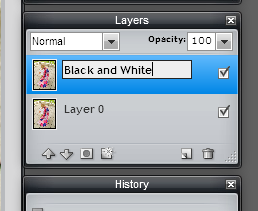 Next, select whichever layer you named Black and White. Go to the Adjustment menu (Image menu, Adjustments submenu in Photoshop) and select “Hue & Saturation.” The shortcut key in both programs is Ctrl+U. In the dialog box that appears, drag the saturation to as low as it goes. Your layer is now in black and white. Don’t worry, you still have a color layer.
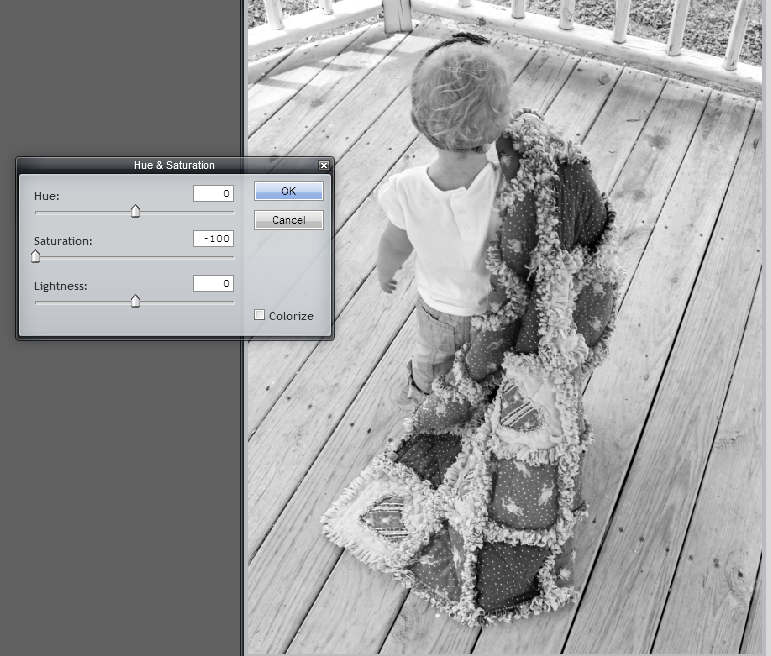 Now it’s time to create a mask. A mask is fancy way of cutting out parts of a layer without actually cutting out the layer. This allows you to “add” back parts of the layer if you accidentally cut them out.
 Unfortunately, we have another problem depending on which program you’re using.
 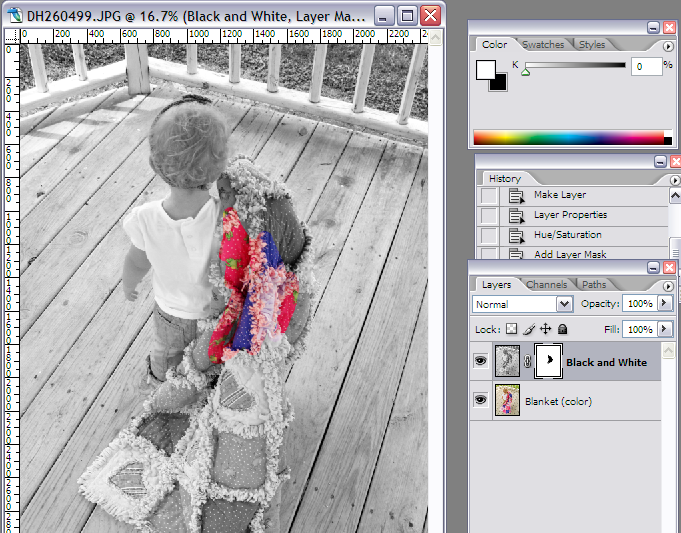 PIXLR
PIXLR When you have finished removing the black and white that you don’t want, you should see your picture developing nicely. You’ll also notice an outline in the layer mask in your Layers palette. This shows you how much of the picture you have erased using the mask.
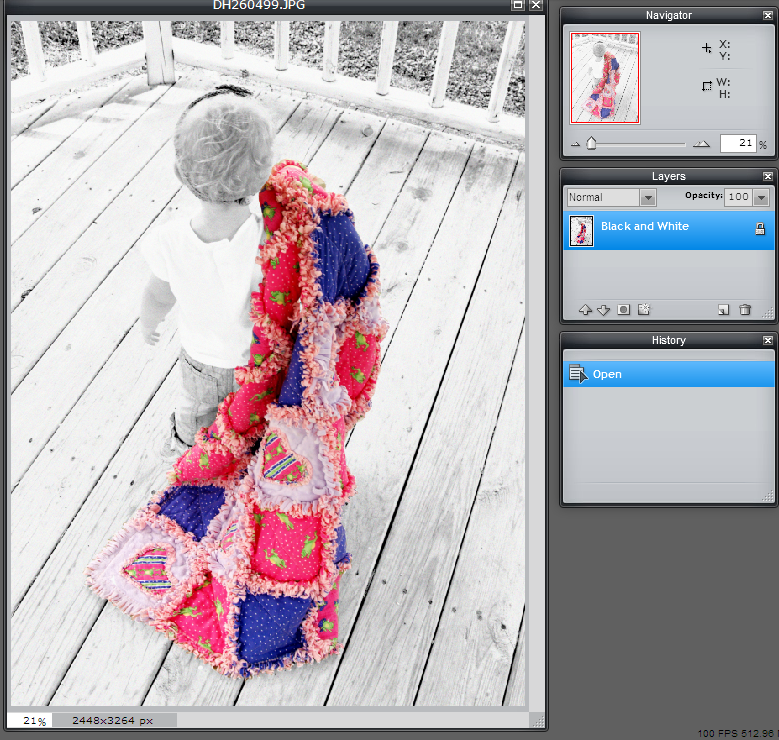 Once your image is complete, you need to flatten your image. You have two separate layers and a mask. That’s a lot of stuff going on with a picture. You need to combine it into one picture. Go to the Layer menu and select “Flatten Image.” All your layers will now combine into one complete picture. However, be warned that once you do this, you can no longer edit each layer individually. Any adjustments you make now will be to the picture as a whole.
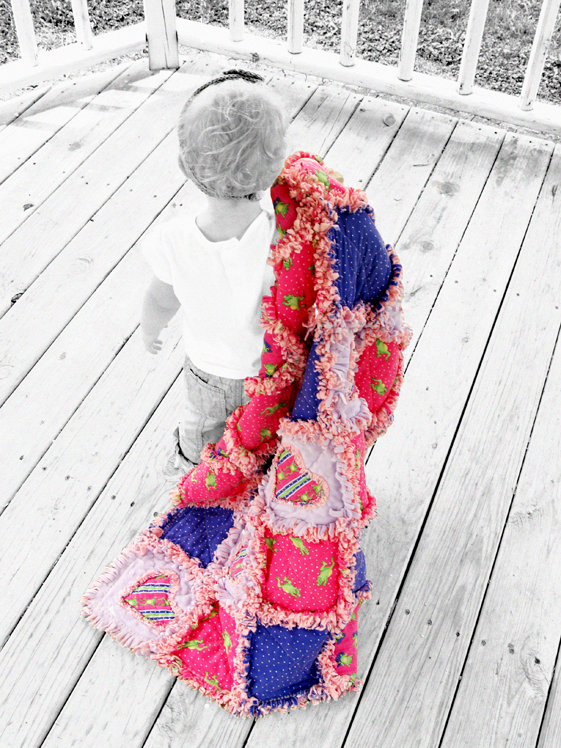 This is such an easy technique that every wedding photographer is probably cursing me right now for giving away their dirty little secret about how simple it is. While it may be easy, it is time consuming. But the final product is well worth the time and effort.
I love focal BW and I love masks! Seriously, the day I learned about Photoshop masks was the day I knew I could learn to love Photoshop. Happy day. 🙂
I love that picture! The blanket is awesome! Kiss that sweetie for me!
I'm your newest follower from FMBT. Please visit my blog and return the favor.
http://alittleoftheother.com
Have a great week,
Ellie
Wow – this is the best find of the week!! Thank you so much for posting this. I have Photoshop and know just enough to frustrate the heck out of myself. Now I can make my pics look great!
this was awesome, first day with photoshop and i schooled it! you are great!