Origami is one of those things that my husband randomly loves. He has been making me origami for as long as I can remember, roses and boxes have been among his favorites and this week he started making me stars for my Christmas decorations. We like to sit and make origami while we watch movies and this week even though he hates being in pictures for my blog, he agreed to let me take step by step photos. So here is how to make these awesome stars that can be used as ornaments or tree toppers.

You will need:
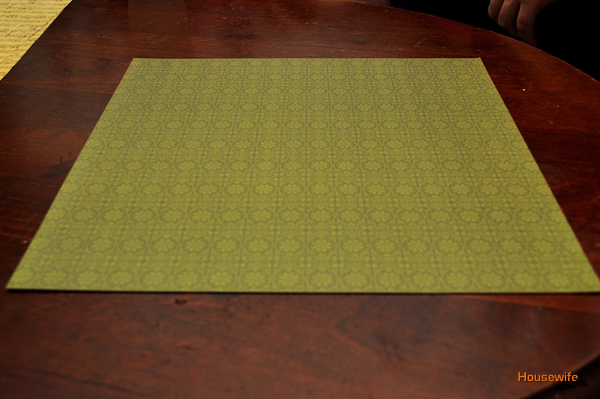
a square piece of paper (in this tutorial we used 12×12 so you can see everything but you can cut your squares down to be smaller for ornaments)
scissors
a glue stick
a pencil
(Click read more to get the full tutorial!)
Make sure your paper is square and then fold it in half.

Then fold it in half again.

Open up your paper and you should have four squares.

Make a triangle fold across the entire paper.

Unfold the paper.

Fold a triangle fold the opposite way.

Do not unfold from this triangle fold. Your paper should look like this.

Now take a pair of scissors and on the two outside folds cut about half way up the fold.
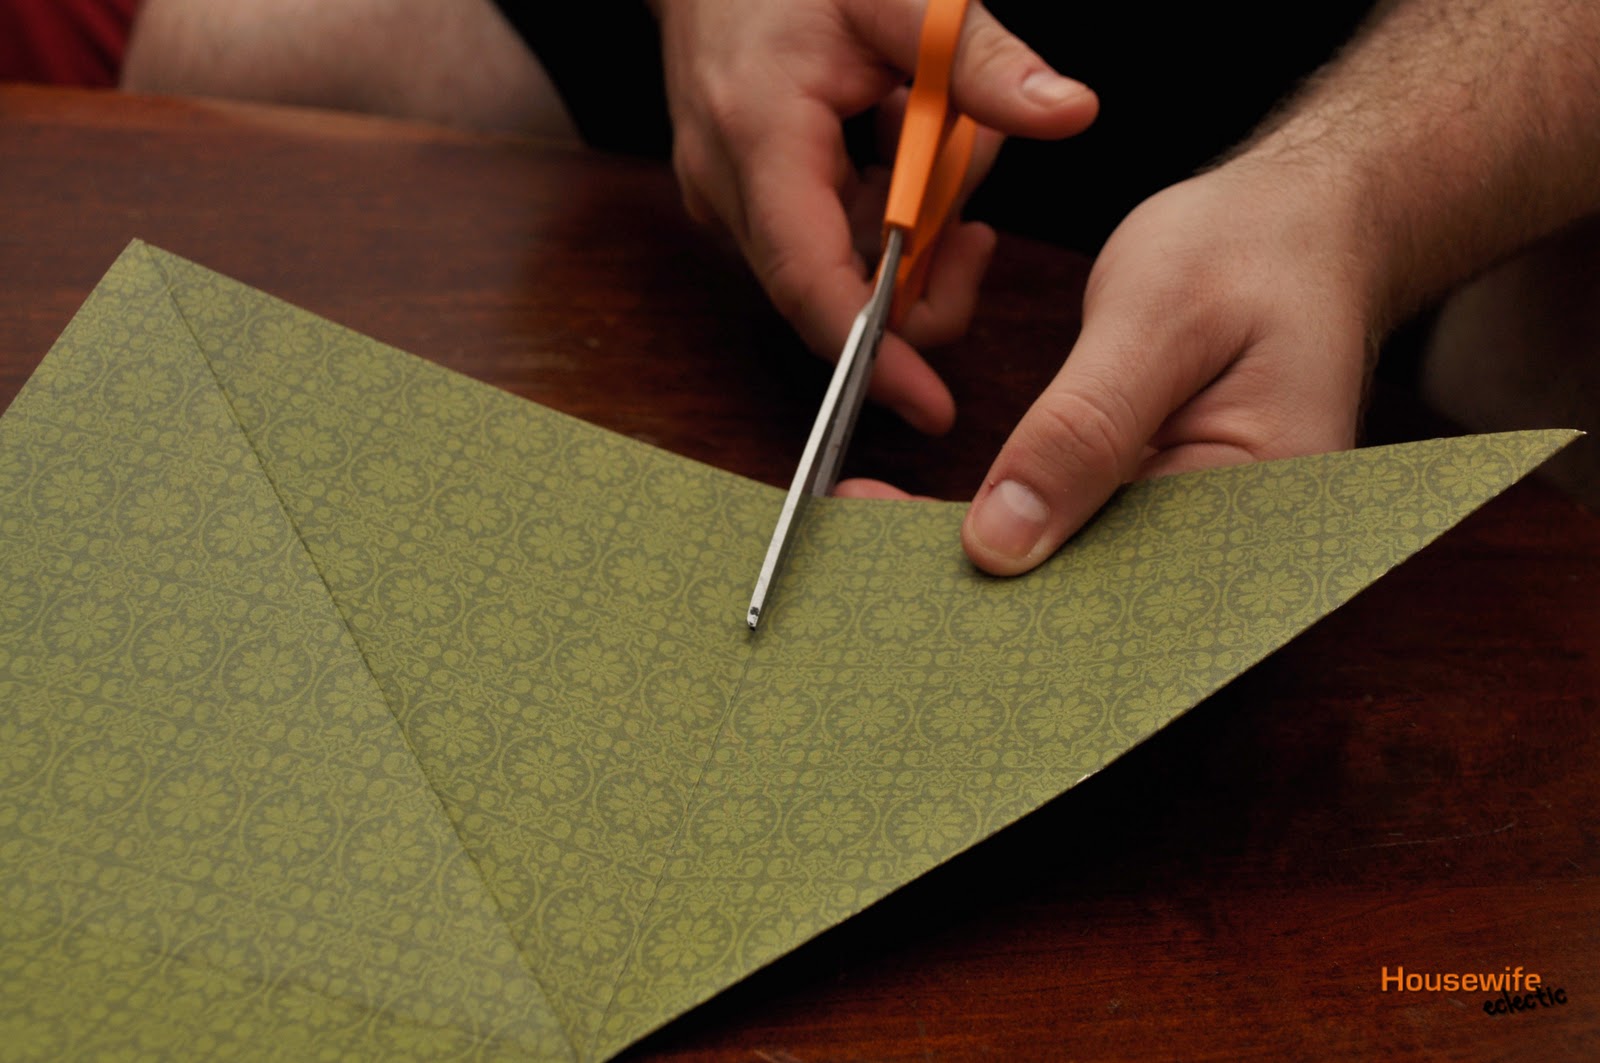
Your cuts should look similar to this photo below. Careful not to cut to far.

Repeat on the other side. Your paper should look like the photo below.

Unfold. You should now have four equal diamonds.

Take one edge of one of the diamonds and fold it to the middle, kind of like when you are making a paper airplane.
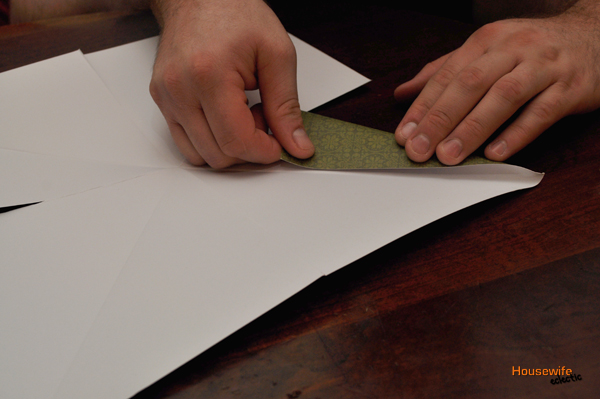
Do the same with the other side of the diamond.

Your paper should look like the photo below at this point. Repeat with the rest of the diamonds.


After you have all four diamonds folded into points, pull out your glue stick and glue one side of one of the diamonds.
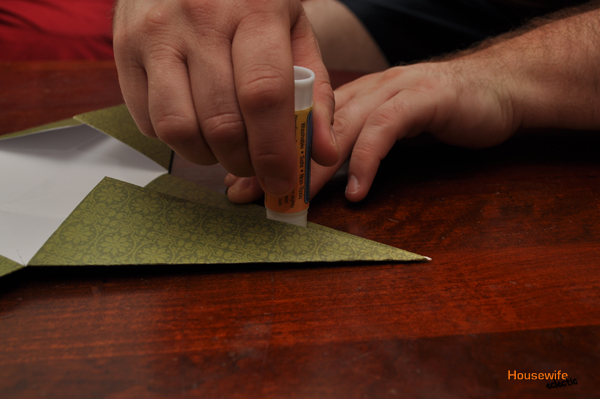
Slide the glued side of the diamond under the other side of the diamond. This will make the paper puff up into 3D.
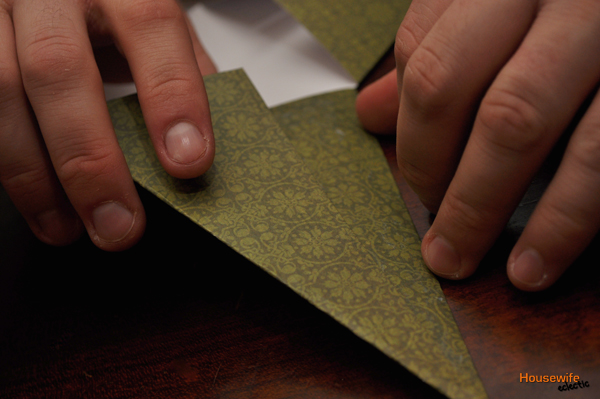
Slide a pen or pencil down the point to help push the point of the star out so that it isn’t flat.

Your point should look like the photo below. Repeat with the rest of your points until they are all 3D
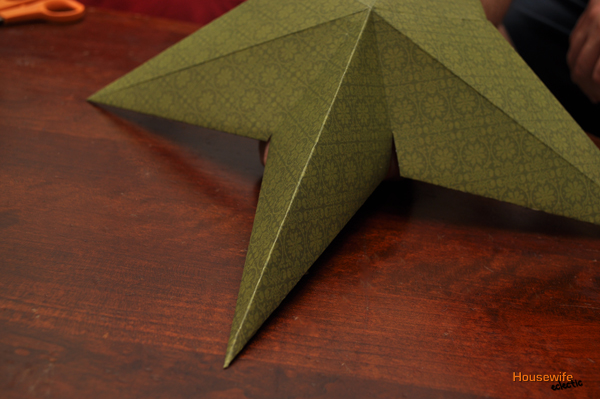
When all the sides are dry, you can push an ornament hanger through one of the points and then hang your star on your tree. If you need a star for the top of your tree, make the star out of 12×12 paper it makes a star that is pretty close to the right size.

Stay tuned for some more awesome tutorials this week that involves these stars!


Umm… these are awesome! Glad I've stashed lots of paper! 🙂
Thank you for the tutorial. Awesome 😉