Are you unicorn crazy like we are at my house? My kiddos love anything and everything unicorn, and so do Debra’s girls, so for Christmas, I decided to sew them hooded unicorn blankets from cozy fleece. (I have an awesome pseudo-aunt reputation to uphold, y’know.) And I am THRILLED with how they turned out!

Hooded Unicorn Blanket
There is no way I am patient enough to crochet a unicorn blanket like I’ve seen around, and I shopped around and decided that I could make one myself for what I would pay for the least expensive commercially available option (and for much less than the expensive versions!), plus then I could make it from thicker cozier fabric AND customize the colors AND make it to my style of cuteness. Win-win-win!
These hooded unicorn blankets are so cozy and comfy for snuggling, plus they’re machine washable and quite durable. I designed these to be generously sized (about 50×56″ finished) and with the extra wide lined hood, that’s enough to completely swaddle a toddler twice over and still big enough for a big kid, teen or adult to snuggle up, too. Plus, I lined the hood so that you don’t end up with fuzzy hair after snuggling, and the lining adds an extra bit of personality to the blanket — useful for when you’re making two for sisters!

I’ve included the pattern directions and template here in the tutorial AND I’m pretty happy that I figured out a way to get a sturdy stitched unicorn horn without having to sew the spiral by hand. (I did still have to attach the horn by hand, so if anyone has a brilliant hack for that, I’d love to hear it!)

So, let’s add some magic and sparkle to your life and make a hooded unicorn fleece blanket!
How to Make a Hooded Unicorn Blanket
Materials:
- 2 yards white fleece (blanket + hood), cut into one 1 1/2 yard piece and one 1/2 yard piece*
- 1/8 to 1/6 yard (4.5-6 inches) fleece in 6 different rainbow colors (mane and fringe)
- 1/4 yard gold fabric (horn and ear lining)
- 1/2 yard printed fabric (hood lining)
- Small amount of fusible fleece (1/4 yard will make many many unicorn horns 😉
- Water- or air-soluble fabric marking pen
- Thread: white and a contrast pink/purple/whatever color.
- Seam ripper (just keeping it real!)
- New/sharp sewing machine needle — since you’re sewing fleece, a nice sharp needle always helps!
- Double-needle compatible with your machine (optional but it adds a really nice pro touch)
- Sharp sewing scissors — you’ll be fringing a lot of fleece, so you may want to splurge for new scissors with a comfy grip 😉
- printable unicorn horn and ears template — available at the bottom of the post for Housewife Eclectic subscribers
*It’s easiest to have them cut the large pieces of fleece at the fabric store, but it’s often more cost-effective (when using a coupon) to have it cut in one piece and then cut the two separate pieces yourself using a rotary cutter.
Fabric notes:
- Obviously, you can use whatever colors of fleece and fabric you’d like. The white has washed up surprisingly well! I’ve used regular blizzard fleece, anti-pill fleece, and lush fleece; I’d love to try it with luxe fleece or sweatshirt fleece, too. It would be adorable to add the unicorn hood to a blanket of unicorn fleece like this — you can even use a pre-made fleece blanket and add the hood!
- If you’re making multiples, you could make 2 blankets from 3.5 yards of white fleece.
- You could also make this more cost-effective by using the same fabric to line the hood as you use to make the horn and line the ears.
- Budget tip: To make this the most affordable, watch for those golden sales when JoAnn’s 40-50% off fleece matches up with the 20% off entire purchase coupon. Then, you can get as many cuts of fleece as you need without having to do a lot of coupon wrangling.
Okay, now let’s get started!
Cutting the Fabric
White fleece: Trim the selvage from both pieces. From the 1/2 yard piece, cut one 18×24 piece for the hood and two earpieces.

You May Also Like: Rainbow Themed Party

Colored fleece: Cut 4 – 3″ x 5″ pieces (or 3″ by however wide your cut of fabric is, from 4.5 to 6″) from each color for the mane. This will make for a really thick mane (which I love!) but you can use 2 pieces of each color if you’d prefer for a lighter mane that’s easier to sew. Cut 4 – 10″ x 5″ pieces from each color for the fringe. These pieces don’t have to be perfectly square, so scissors work just fine — but you will want to make sure the edges are smooth and not jagged.

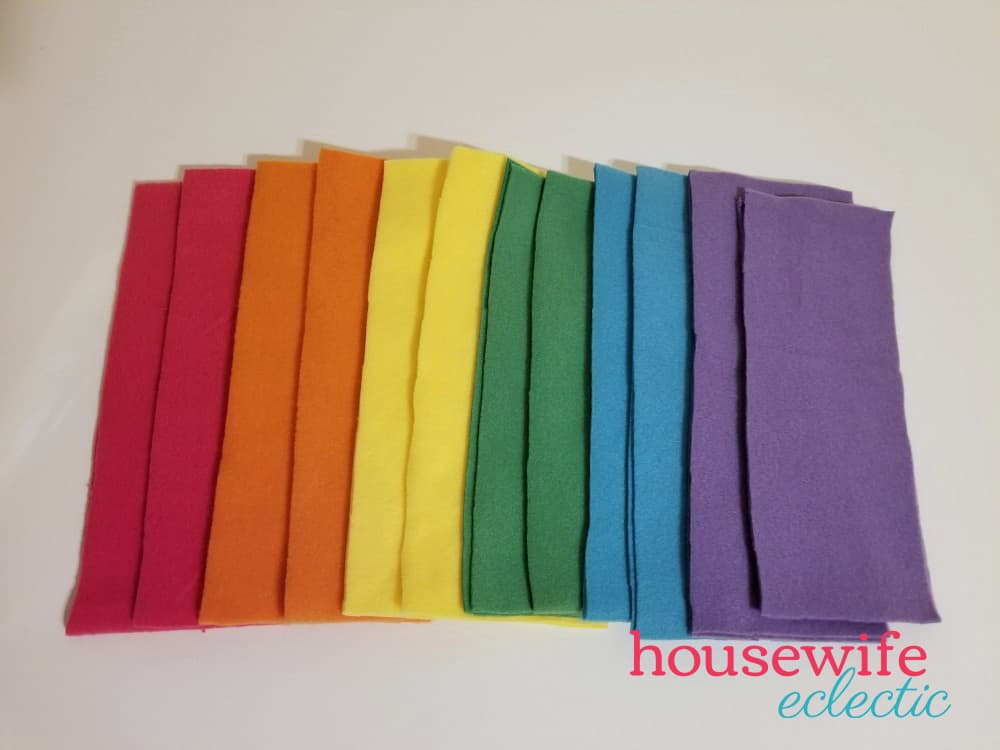
Note: I cut my pieces slightly longer than 3″ and 10″ to provide more overlap on the fringed fleece blanket edges and mane. Your total mane length (3x however many colors you have) is about 14 inches, and the total fringe length along the edges of the blanket is about 50 inches.
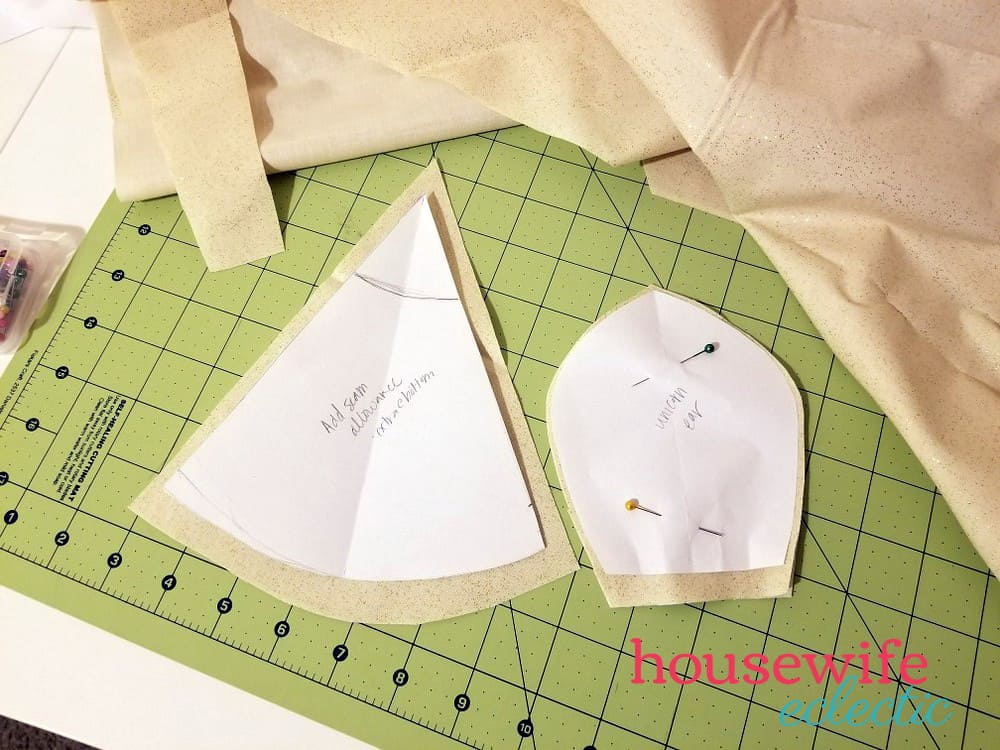
Gold fabric: Cut one horn piece (full piece, including gray seam allowance section) and two earpieces.
Printed fabric: Cut one 18×24 rectangle for the hood lining.
You May Also Like: Rainbow Cupcakes

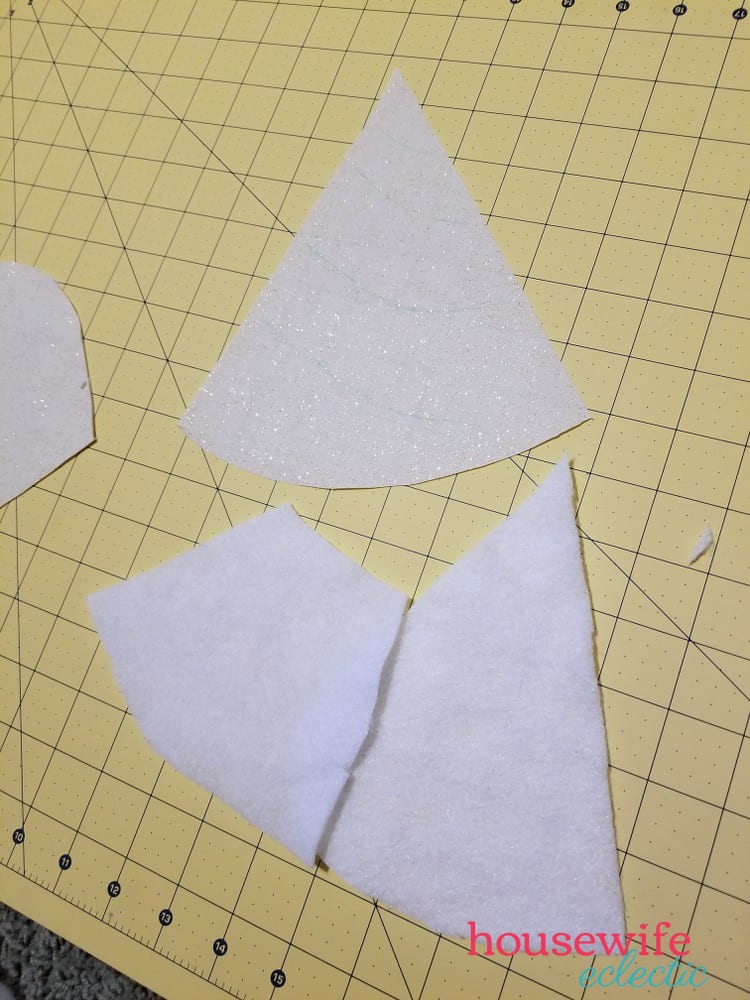
Fusible fleece: Cut two inner horn pieces (without the gray seam allowance section).
Making the Unicorn Horn
I used fusible fleece instead of stuffing in the horn (like many tutorials use) to give it some quilt-like texture and make it more durable for washing while still giving it structure. It worked GREAT!
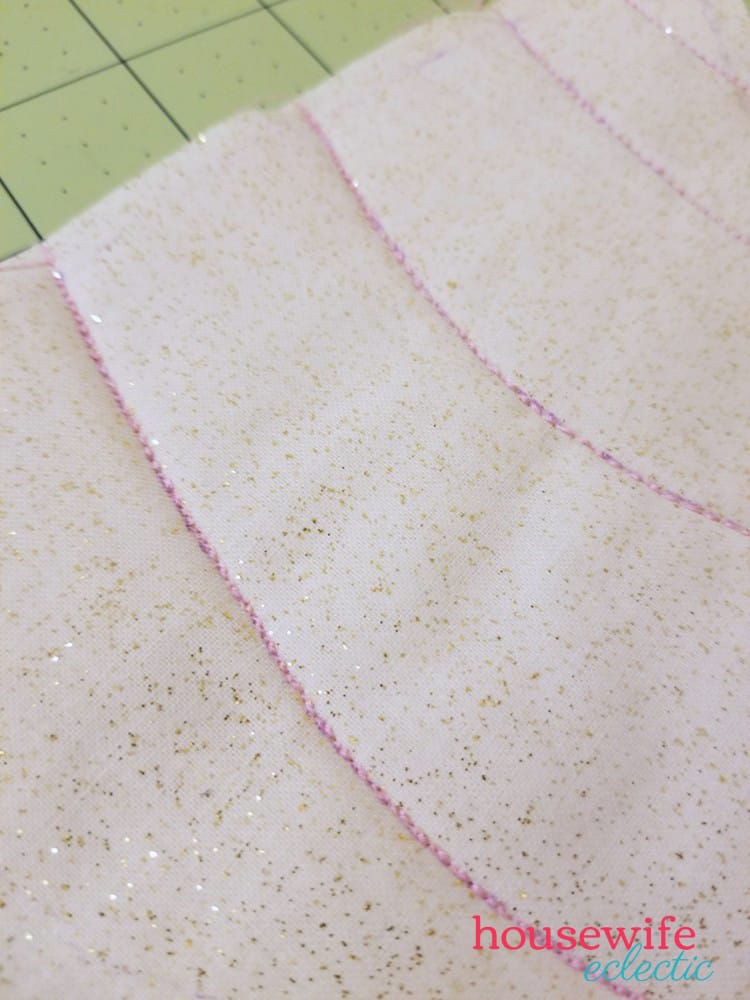
Step 1: Trace the spiral lines and outline from the template onto the front (right side) of the gold horn piece using your disappearing fabric marker.

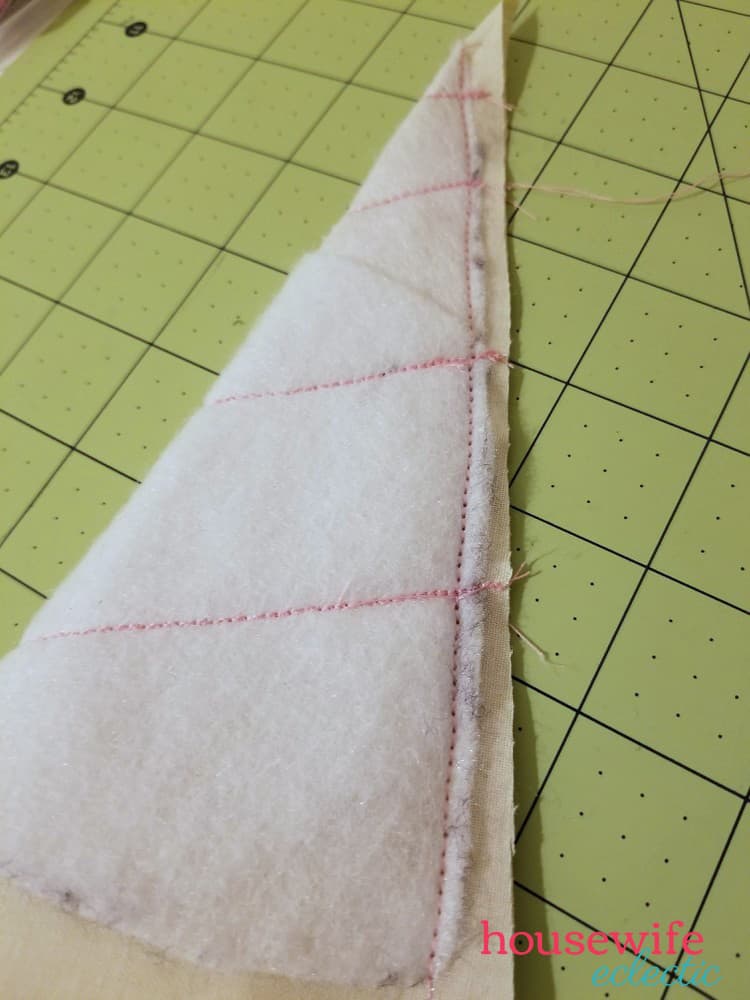
Step 2: Trim the two fusible fleece horn pieces like shown, so one remains the full size and the other has the top trimmed off.
Step 3: Iron the fusible fleece pieces to the back (wrong side) of the gold horn piece, following the manufacturer’s instructions for time and temperature.
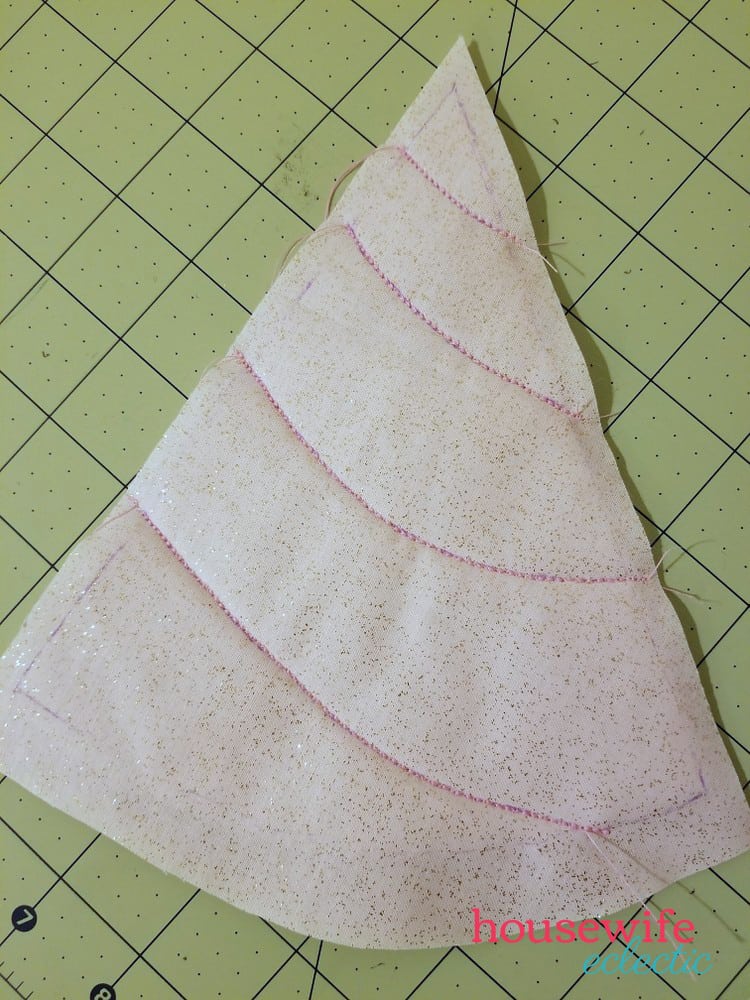
Step 4: Sew along the spiral template lines on the RIGHT side of the horn piece, using a thick stitch on your sewing machine: I used #14 on my machine, called the triple stretch stitch.

If you don’t have a stitch like that on your machine, you could use a really thin and tight zigzag, a decorative stitch, or stitch it by hand using embroidery floss. The final result looks something like this:
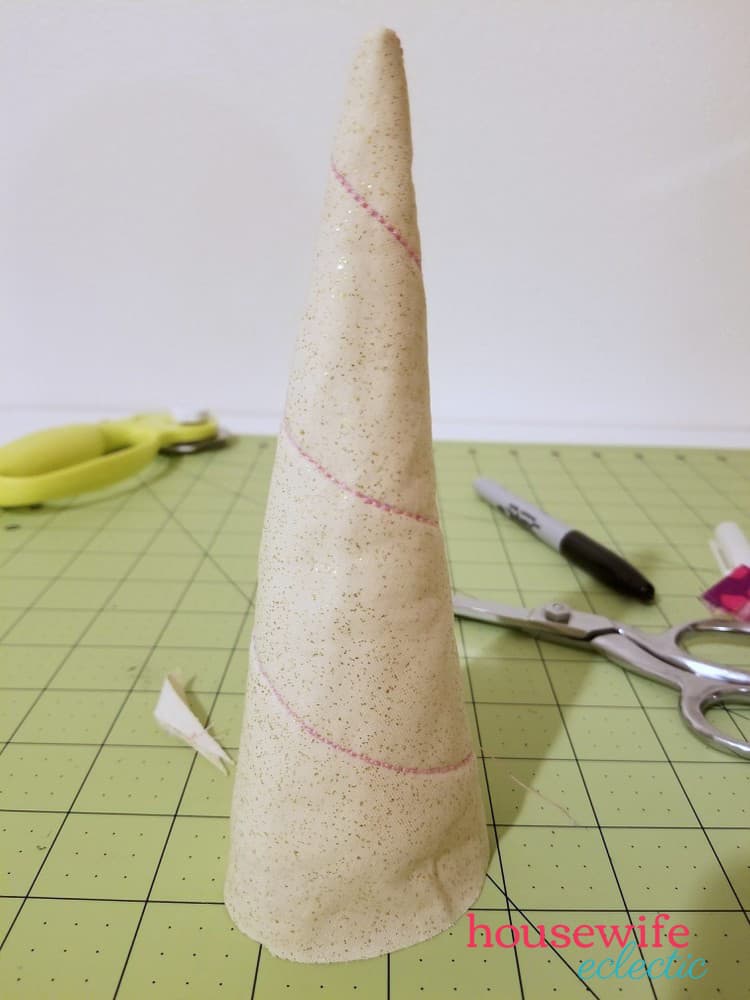
Step 5: Turn the horn right sides together, line up the edges, and sew along the long edge to form a cone.

Step 6: Trim the seam allowance at the tip of the horn, and turn the horn right side out.

The spiral lines should match up along the seam, woohoo! (or at least be very close 😉

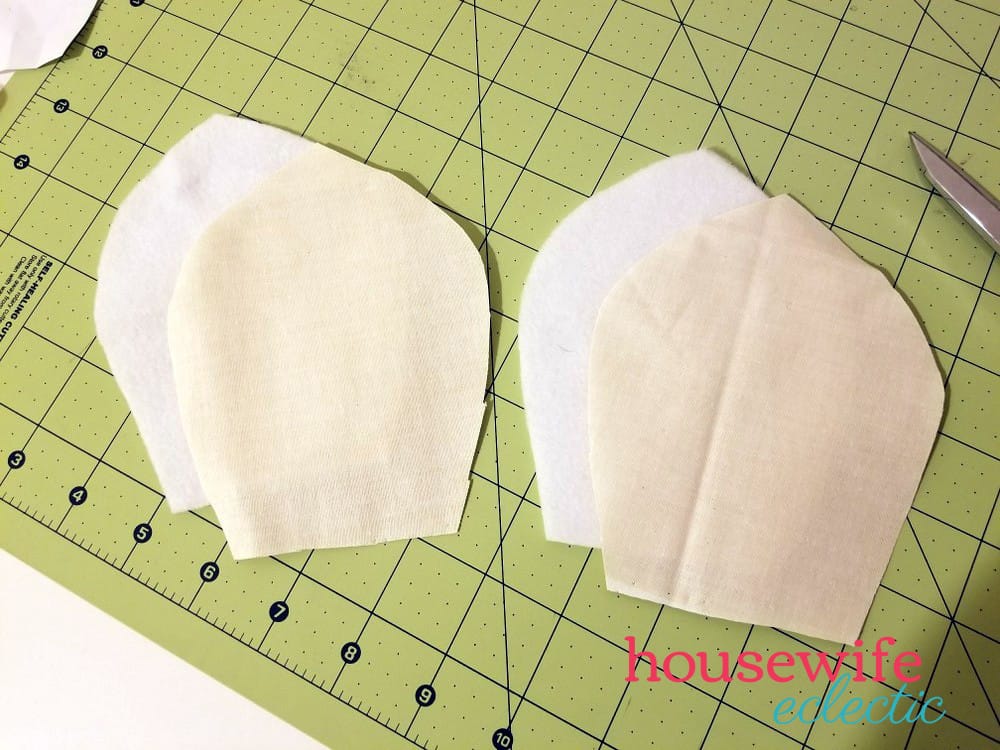
Making the Unicorn Ears
The ears, as made with one layer of fleece and one layer of cotton fabric, are fairly floppy; if you’d like stiffer ears, use fleece instead of the cotton, or you could try adding fusible fleece to the back of the cotton piece.
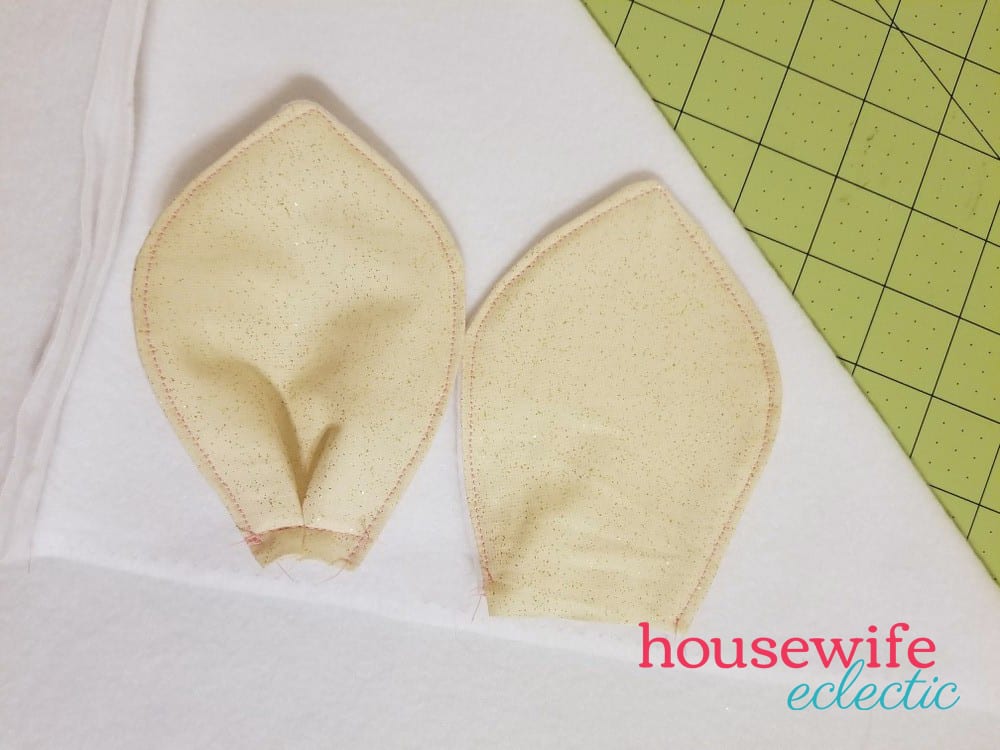
Step 1: Pair one fleece piece with one cotton piece and match the pieces right sides together.
Step 2: Sew a small seam allowance around the rounded sides of each ear, leaving the bottom flat piece open for turning.

Step 3: Clip (or notch) the seam allowance around the curve carefully, and turn the ears right side out.
Step 4 (optional): Topstitch around the 2 rounded sides of the ears. (Topstitching helps the ears stand up better and I found I preferred the finished look with topstitching.)

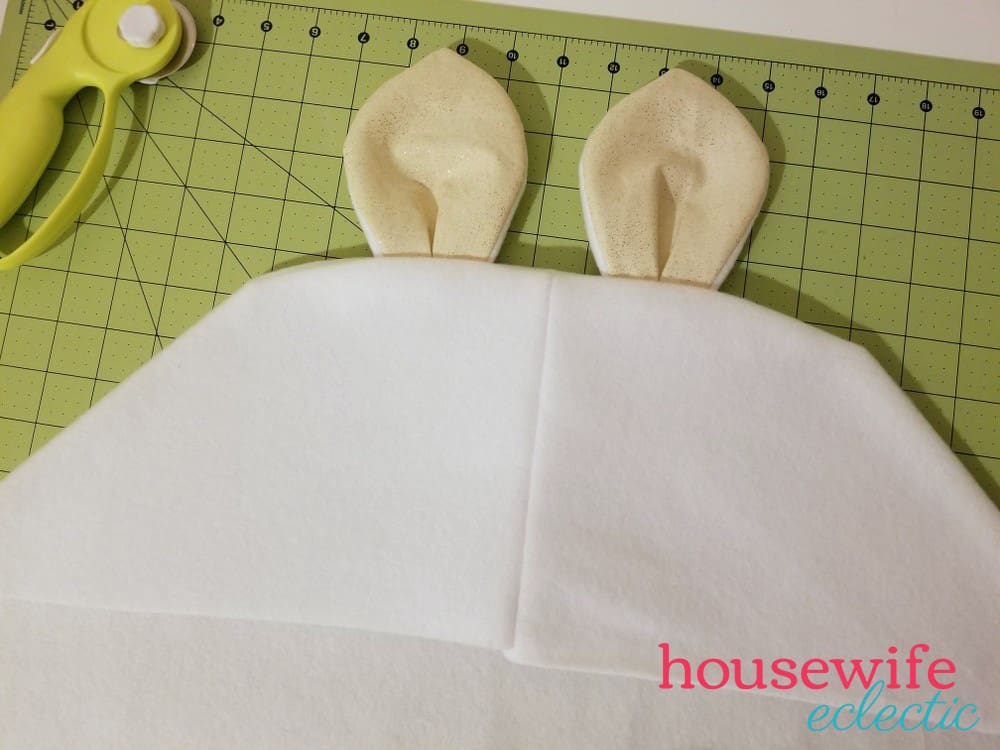
Making the Unicorn Hood
This step is the trickiest, so be sure to read all the directions *before* you start cutting and sewing. 🙂
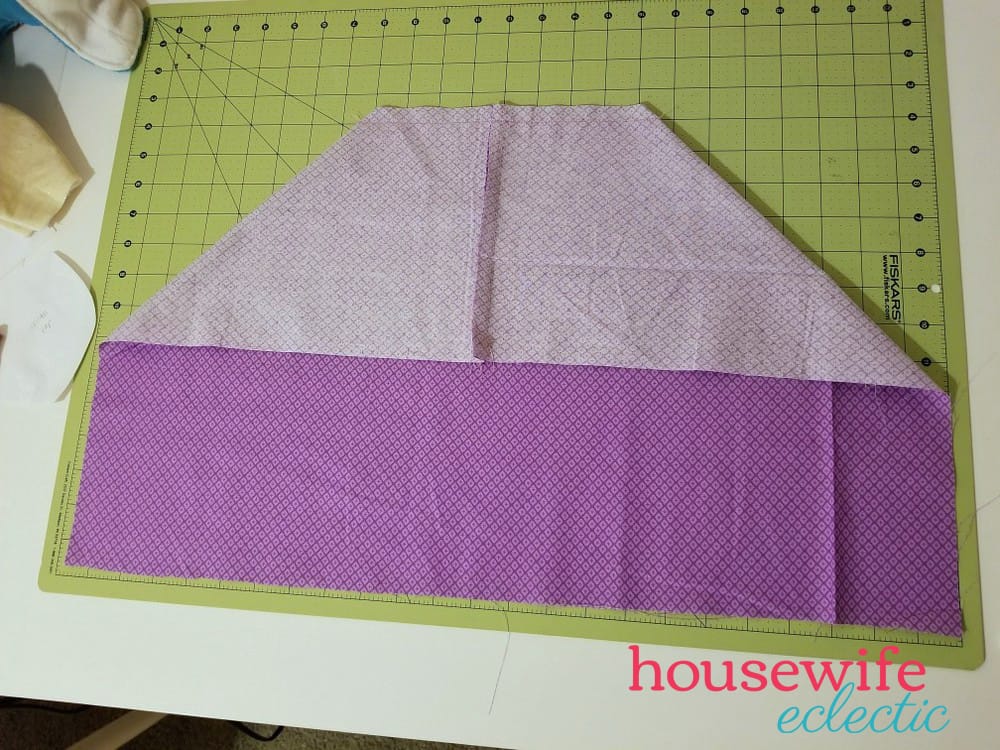
Step 1: Fold the 18×24 inch fleece piece in half, right sides together, to form a folded piece that is 18×12. Match up the edges and sew along ONE of the 12″ sides. Repeat for the 18×24 inch cotton piece.

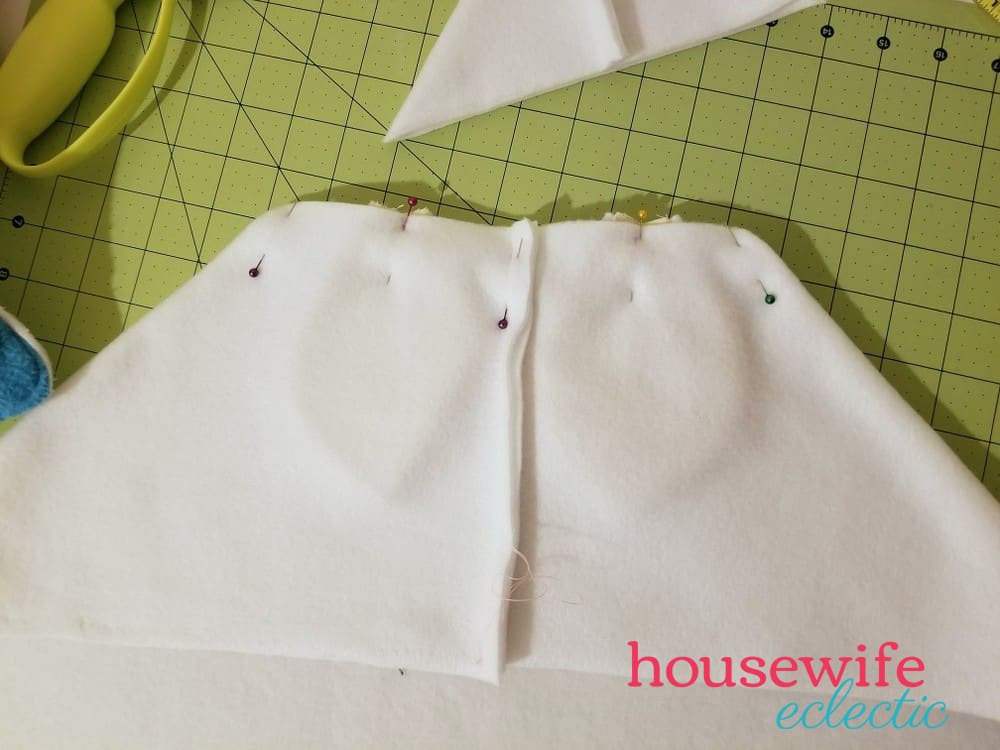
Step 2: Fold each piece as shown, leaving the hood pieces inside out, and aligning the seam to the center. Pin in several spots to hold it in place.
 Measure down 4.5 inches from the peak, and mark a line straight across using the fabric marker. Mark another line at 4 inches down from the peak, so you have two parallel lines half an inch apart (not pictured)

A quilting ruler or square is really helpful here! If you don’t have one, you can check your line’s straightness by measuring from the peak to your line on each side; if your line is straight the measurements down each side should be the same or very close to the same.
Step 3: Cut along the upper line, to remove the 4-inch triangle from the top of each of the hood pieces.

Step 4: Sew a straight stitch along the remaining line *on the cotton hood piece only*, and set the cotton hood piece aside for a minute. (You could sew this line before cutting, but for giving instructions, it was easier to put this step second.)
Step 5 (optional): Fold each of the unicorn ears in a box pleat, as shown, and secure the pleat with a narrow (1/8 -1/4 inch) seam along the bottom of the ear. This gives the ears more dimension and helps them stand up, but you can leave the ears flat if you’d rather skip this step.


Step 6: Sandwich the ear pieces, lining side up, between the two layers of fleece, inside the inside-out fleece hood, and pin in place, with the ears centered 2 inches from the center line (seam) of the hood. This leaves about 3 inches between the ears for the mane. (If you chose not to pleat the ears in step 5, you may want to center the ears at 2.5 or 3 inches instead to leave more room for the mane.)
Not like this:

YES like this:

Make sure the ears are inserted even with the edge of the fabric, or even sticking out 1/8 inch or so, to ensure that you won’t miss them when you sew the next seam. Because that’s frustrating. (Ask me how I know 😉
Step 7: Sew a straight 3/8 inch seam along the edge of the hood where the ears are pinned — you’re sewing the two layers of the hood together with the ears in between.

Then, curve the corners from the edge of the ear to the edge of the hood by sewing a curve, as shown. Repeat the same curved stitch on the cotton hood piece. Trim both curves.
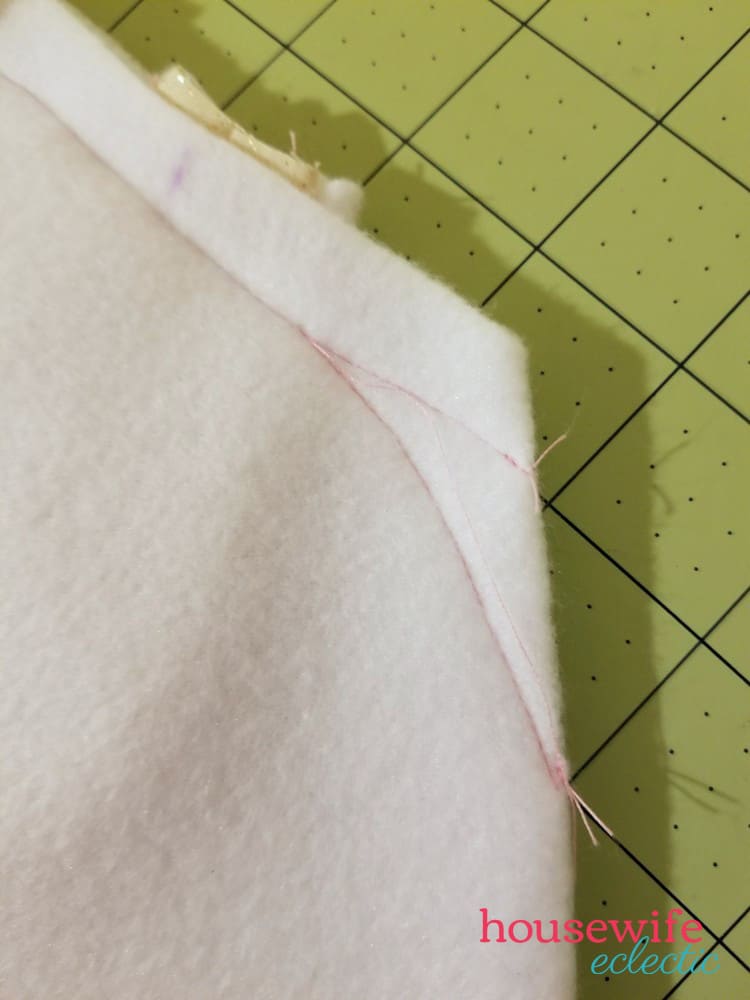
You can skip this step if you want, but this curve sewing and trimming step takes the hood from this shape with pointed corners

to a curvier shape that fits a head more naturally and looks better:
Turn the fleece hood right side out and admire that you have sewn… a horse. or some other animal with ears. Don’t worry, the unicorn part is still coming!
Step 8: Place the horn base template on the right side of the fleece hood, centered with the hood seam and about 4 inches down from the ear seam. Trace around it (or around the actual horn if you’d prefer) with the disappearing fabric pen to mark where the horn will be. You won’t sew the horn to the hood yet.

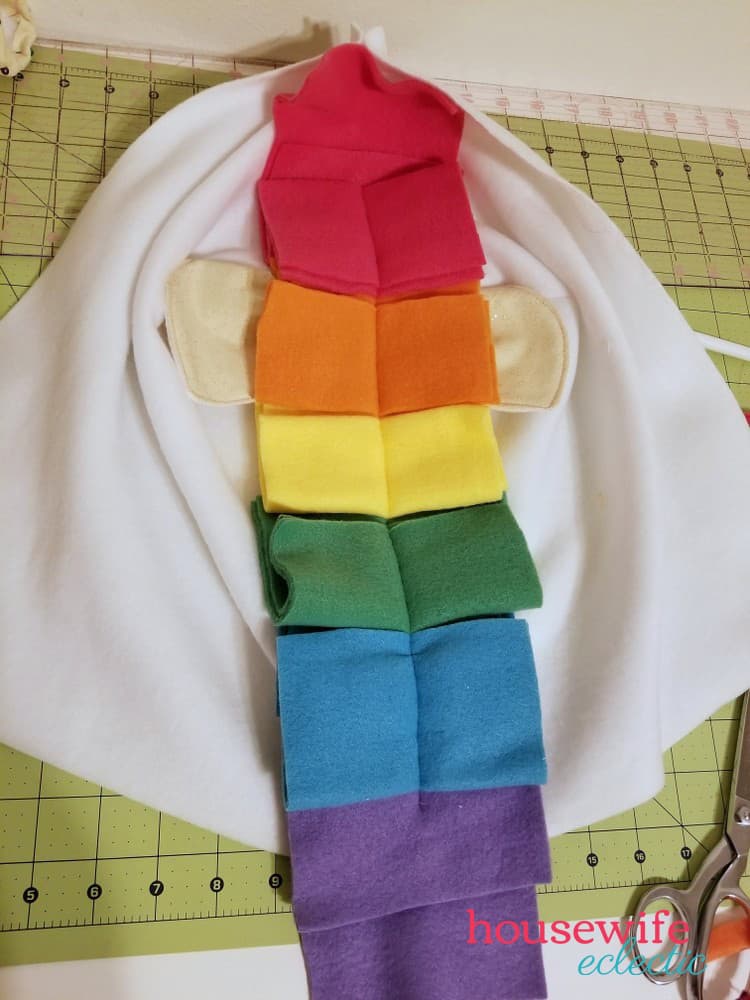
Step 9: Line up the 3×5 inch fleece pieces and pin along the center of the hood, starting at the horn and continuing up between the ears and down the center of the back of the hood, stopping about 1/2 inch above the bottom of the hood. (My photos here look a little bit different because I left some fleece to hang down below the bottom of the hood once it was attached to the blanket, but I think it was more trouble than it was worth!)


I overlapped and staggered the colored layers to add a rainbow unicorn effect, but you can place them however you’d like.

You’ll have about 14 total inches to cover, so you can use more or fewer colors in larger or smaller pieces, too. I also put the first pink piece of fleece overlapping a bit with where the horn will be, so that it flows around the horn a little. Again, do whatever feels right for you to get the look you want.

Step 10: Sew a straight stitch down the middle of the rainbow fleece mane pieces to attach them to the hood.
We are almost done with the hood!
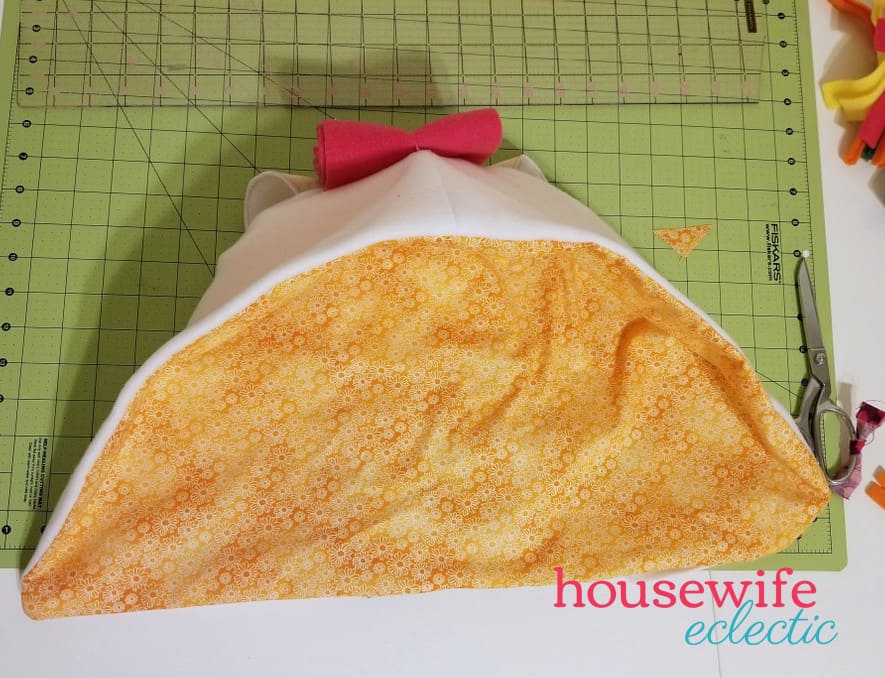
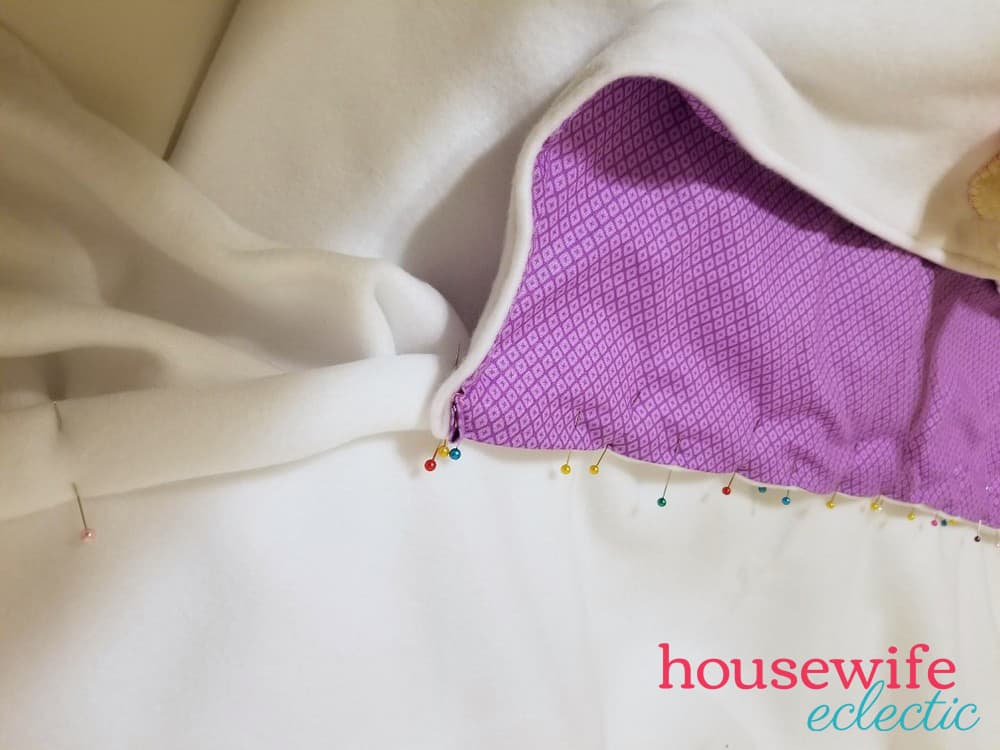
Step 11: Leave the cotton hood piece inside out and line up the two hood pieces right sides together, so the mane and ears are inside.

Match up the center seams and pin the edges, leaving at least a 6-inch gap along the bottom of the hood for turning — my gap is marked by the double sets of needles. (You can pin just the edges, but sewing partway along on the bottom edges makes it really easy to turn it under later when you’re attaching it to the blanket piece.)


Step 12: Sew a 3/8 inch seam along the edges you just pinned, leaving the majority of the bottom of the hood open for turning. Be certain that you don’t catch any of the ear or mane pieces in this seam!

Clip the seam allowance. Turn the hood right side out through the opening, and tuck the cotton fabric lining to form the lined hood.
Step 13: Sew a topstitch 1/4 from the edge around the edge of the hood (but not along the bottom of the hood).

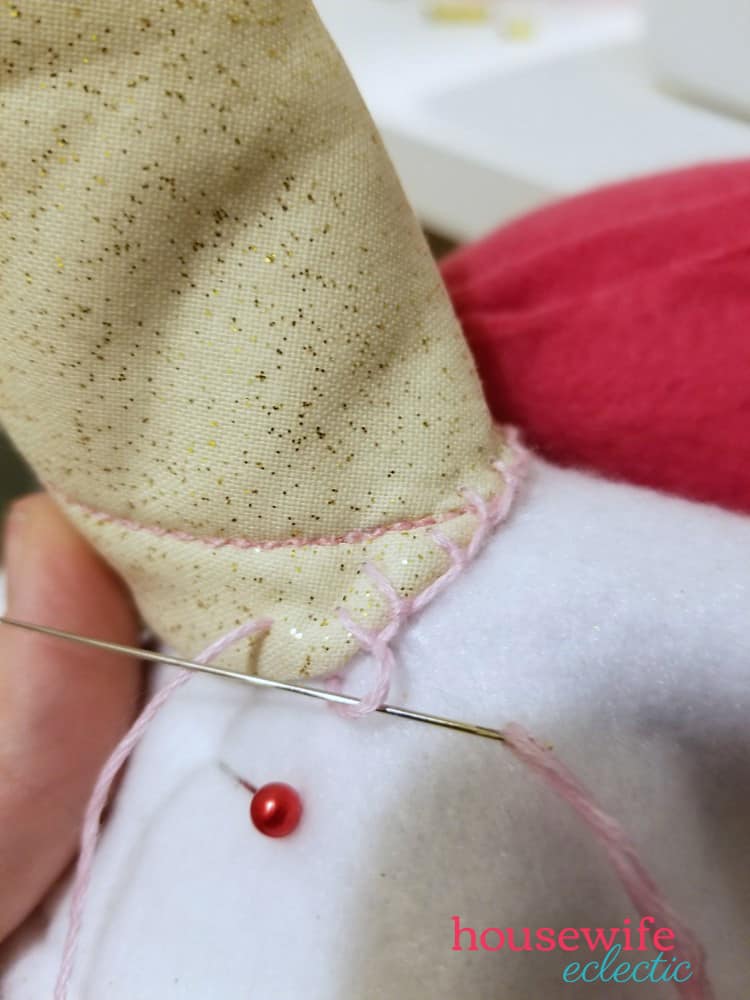
Step 14: Attach the horn by hand-sewing it in the spot marked in step 8, with the seam toward the ears and the extra outer fabric tucked up inside the horn.
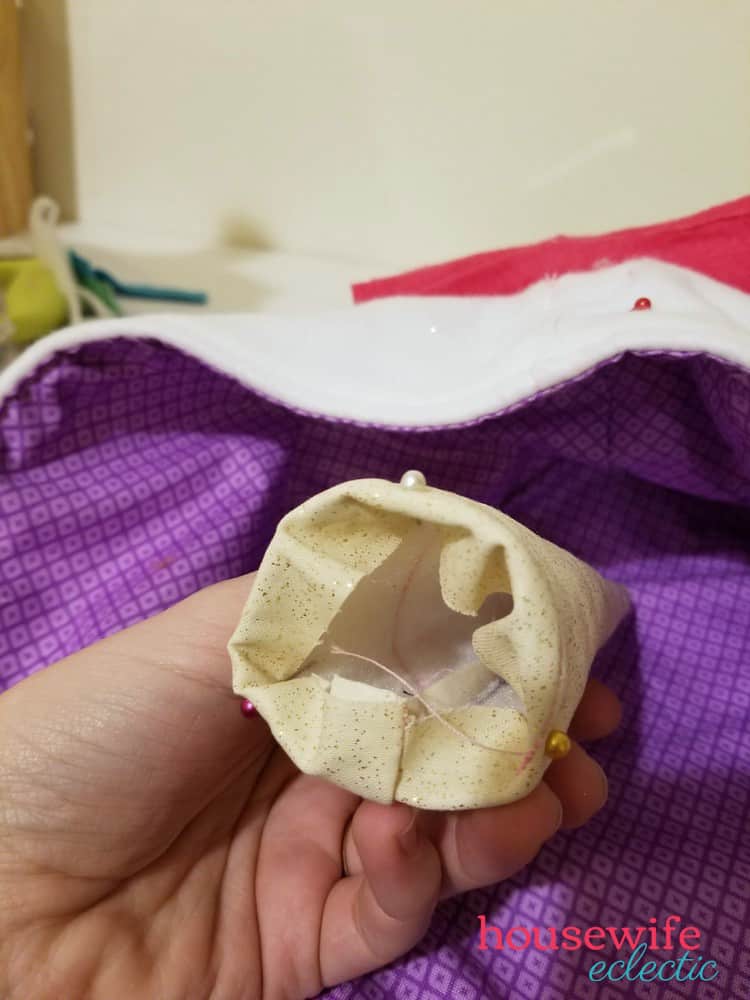
I used a blanket stitch for a bit of a decorative look, but a simple whip stitch or any kind of hand-sewing will work.
Making the Unicorn Blanket
Almost done! Just a few more straight seams…
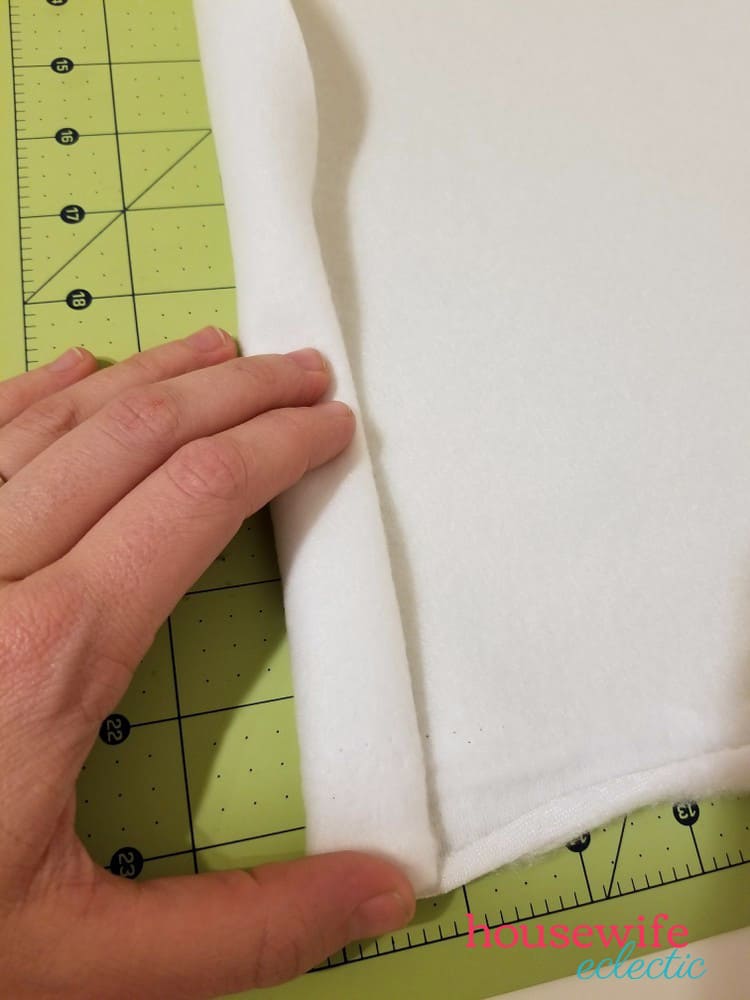
Step 1: Turn under 1/2 – 3/4 inch of fleece along the two longer edges of the 1 1/2 yard piece of white fleece (the top and bottom edges of the blanket), and then turn under that much again, to create a wide rolled hem. Pin in place.

Along one edge, mark the center of the blanket, and line up the center of the bottom edge of the finished hood, with the unfinished edges of the bottom of the hood tucked inside (which they will naturally do since you sewed most of the bottom edge together before turning). Pin any fleece mane out of the way so it won’t be sewed into the seam.
Step 2: Sew along the inner edge of the turned-under hem using the double needle with an extra spool of thread — stitch along both longer edges of the blanket, stitching the hood (but not the mane) into the seam along the top of the blanket.
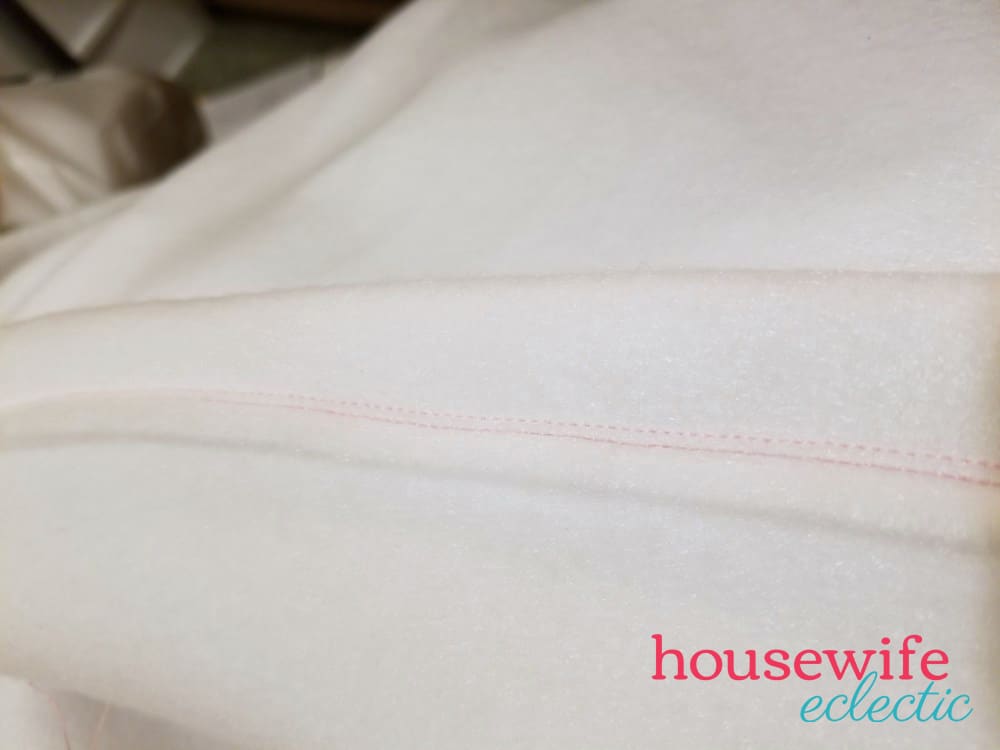

If you’re not sure how to use a double needle, consult your sewing machine user manual. If your machine doesn’t have a double needle, you can use a straight stitch, a zig-zag stitch, or a decorative stitch. I just really love the look of the double needle hem.
![]()
Step 3: Place the blanket with the inside of the blanket facing up (so you’re looking at the inside of the hood, like you’d lay inside the blanket to wrap it around yourself). Along the 2 remaining edges of the blanket, fold in 1/2 – 1 inch.
![]()
Line up 2 of the cut 5×12 inch pieces of each color fleece along the edge of the blanket, matching the inner edge of the colored fleece with the cut edge of the fleece, like shown.
![]()
The distance to cover is just over 50 inches, so I cut 12-inch pieces and overlapped them, similar to what I did on the mane. Again, do what feels right and looks right to you!
Step 4: Pin the colored fleece in place and stitch along the edge using the double needle. Be sure to catch both the layers of colored fleece AND both layers of the turned-under white fleece in this seam.

Step 5: Repeat steps 3 and 4 to add the fringe to the other edge of the blanket.
Finishing
Clip any errant threads and snip allll that rainbow fringe and mane — clip every 1/2 inch or so along alll the layers of rainbow fleece, being careful not to clip the hem that holds the fleece to the blanket…

and then you’re DONE!
How to make a Hooded Unicorn Blanket
Notes
If you’re making multiples, you could make 2 blankets from 3.5 yards of white fleece.
You could also make this more cost-effective by using the same fabric to line the hood as you use to make the horn and line the ears.
Budget tip: To make this the most affordable, watch for those golden sales when JoAnn’s 40-50% off fleece matches up with the 20% off entire purchase coupon. Then, you can get as many cuts of fleece as you need without having to do a lot of coupon wrangling.
This really isn’t as complicated as it seems, but send me questions if you have them. I hope you and your little unicorns will love it as much as I do. Please send us pictures when you make one!
Printables in this post are for personal use and available to subscribers of Housewife Eclectic only. To use this printable, please SUBSCRIBE NOW.


My brother and sister in law are expecting another baby girl and this is the perfect gift for them. My daughters love to sew and need a summer project to keep them busy and they would love to make a DIY, handmade gift for their new cousin who will be joining up soon.
What a great idea, Teresa! Thanks for the comment.
Oh my gosh, how cute! These look so comfy and cozy . . . wish I would have had one this past winter!
They are perfect for winter! It took me some time to get it all typed up so hopefully they will be cozy for summer too 😉
Thanks for the comment, Ann!
This is such an adorable projects! Kids are so into unicorns lately so this will make such a popular DIY gift! Very clear and thorough instructions too!
Right? I kind of love the unicorn craze though. Not nearly so messy as the slime craze!
This is ABSOLUTELY adorable! I love how in depth your directions are with step by step photos. I would love to create one of these for my niece! I bet I could even do gray for my son!
Thanks, Nicole! You could definitely do whatever colors you want — easy to customize!
Alright this is just too cute! I MUST have one and I know my daughter will want one too – yes we are both adults lol. I love your easy to follow step by step instructions for this unicorn hooded blanket! I am not that great when it comes to sewing and making things like this but I seriously think I can pull this off thanks to your great instructions!
Oh, this will definitely work for adults, too, Jo! Unicorns know no bounds 😉
I put a lot of time into simplifying the sewing and writing detailed instructions to make it accessible so I’d love to hear your feedback after you make one!
This is cute and looks actually doable. I am a very novice sewer but I have all the tools to make this.
Thanks, Rachel! I’d love to hear what you think as you make it, if there’s anywhere to improve the instructions. 🙂
I am so in love with this blanket. If I was crafty I would definitely give it a go. However, unfortunately, the crafty gene skipped me.
I bet you could do it! Or find a crafty friend to make it for you. That’s why Debra found me 😉
Thank you for the excellent post
This is the cutest blanket! I am in the process of making two (one for daughter and none for niece). I am on the hood and my ears won’t stand up! Any tips? I used fusible fleece and sewed a box pleat on both ears, but they fall right over. 🙁 . Help please!
So I wanted to point out that the list of items needed says 1/4 yard of the hood lining, that cant be correct? How am I going to cut a piece of fabric 18×24 with a quarter yard of fabric? I wish I would have read further before purchasing my fabric. Im still excited to make this for my niece, just need to make another stop!
I would love to make this, but would rather have printable instructions. How do I get them.
We do not have printable instructions available at this time.
I just finished the unicorn blanket for my granddaughter. Thanks for the clear directions and pictures. You made it easy to do!
Jill