
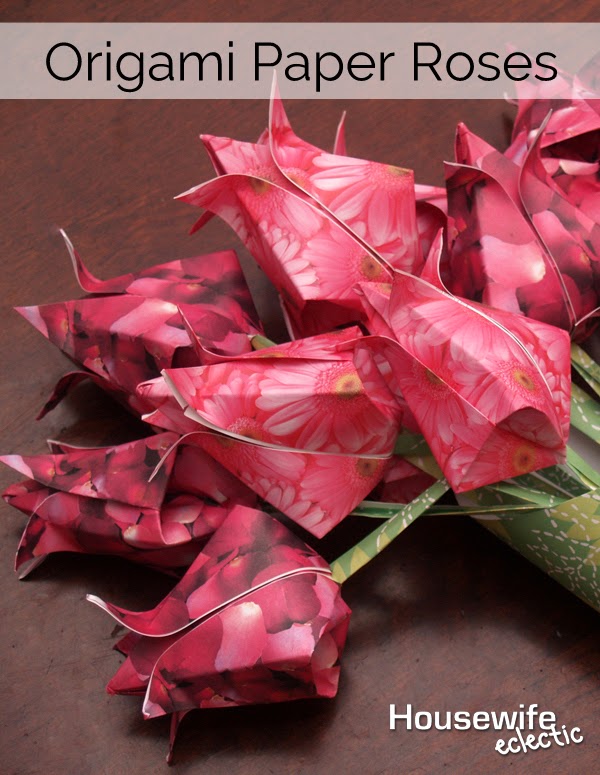
I woke up to these this morning. My husband decided that paper roses were the way to go this year. I love them! He learned how to make them from a student last week and decided to make them for me. I begged and begged for him to let me do a tutorial and he finally relented (probably just because it is Valentine’s Day.)
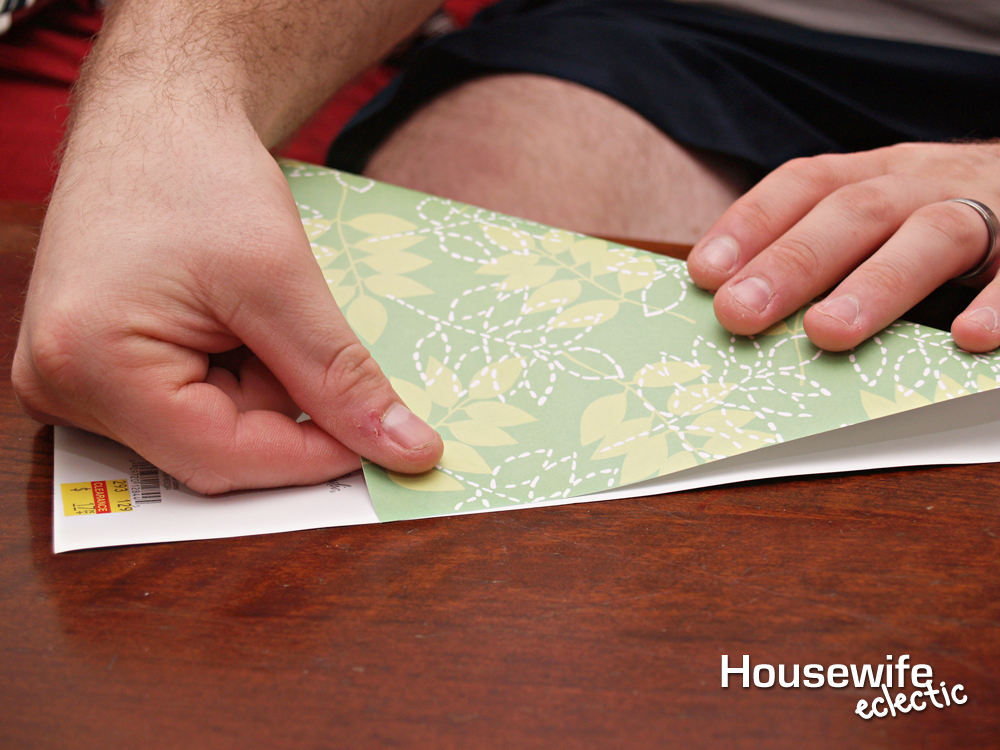
OK, to start off, you want the non-pretty side facing up. Fold a triangle into the paper. A strip of paper will be left at the top.
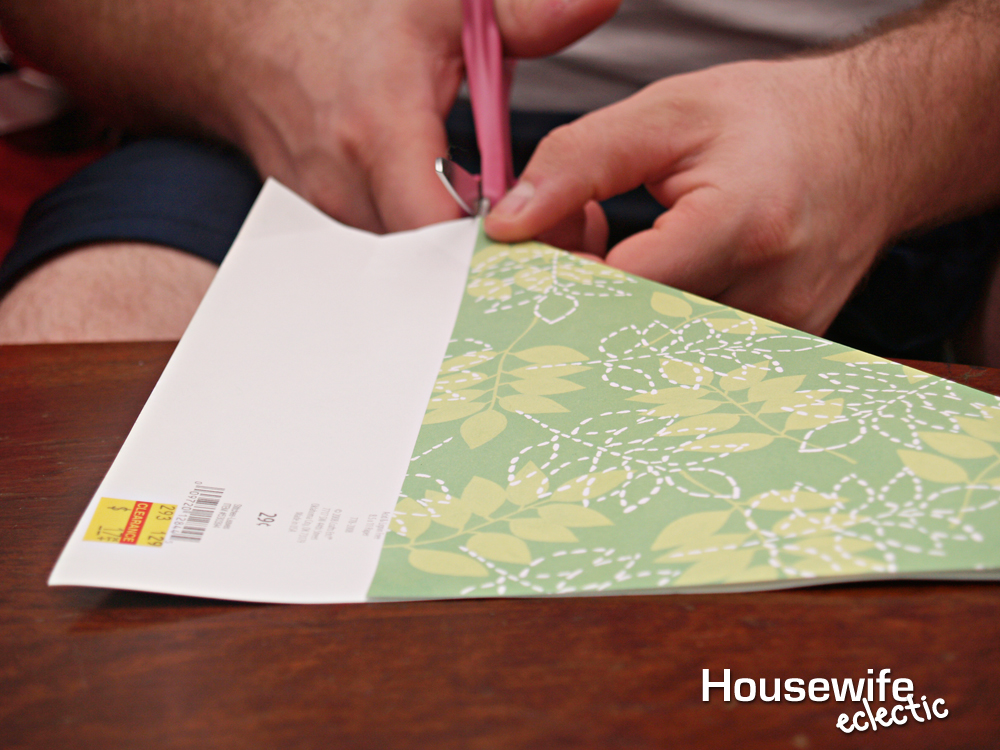
Cut the strip off. (This makes the paper square)
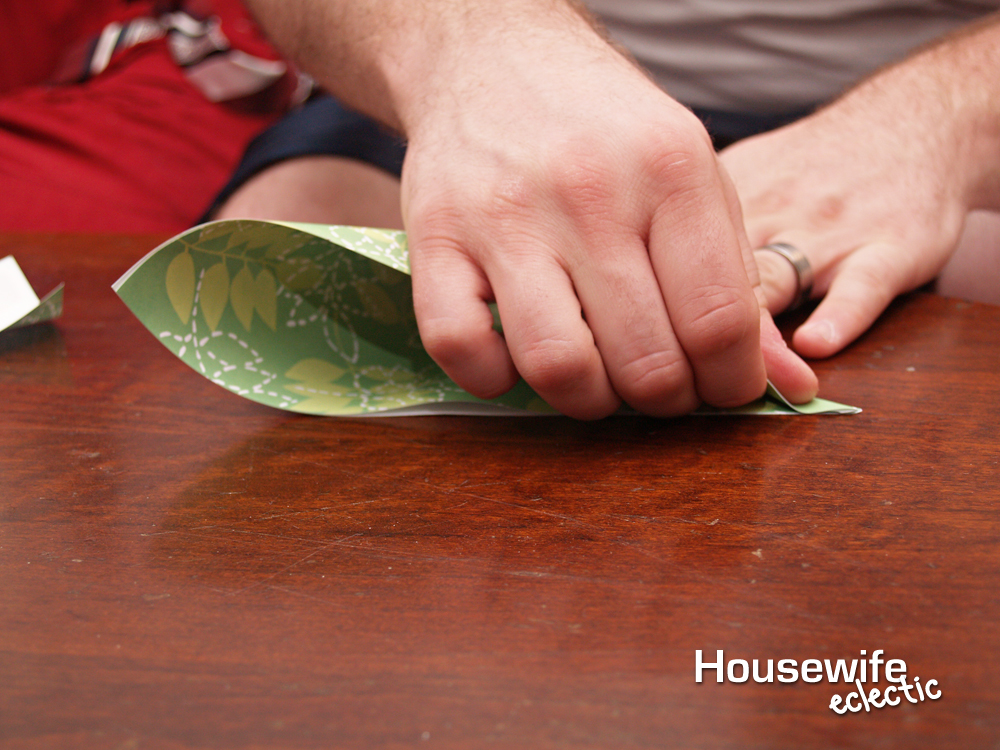
Take one end of the triangle over to the opposite end, you are just making a smaller triangle.
Then you unfold it back to a square. Then you flip it over so the pretty side is now out, then you pinch it in the center of the paper, making kind of a mountain until you can make it back into a triangle.

Then take bottom right corner and fold it to the top of the triangle, and then do the same with the other side. You will have a diamond on one side and still a full triangle on the other.


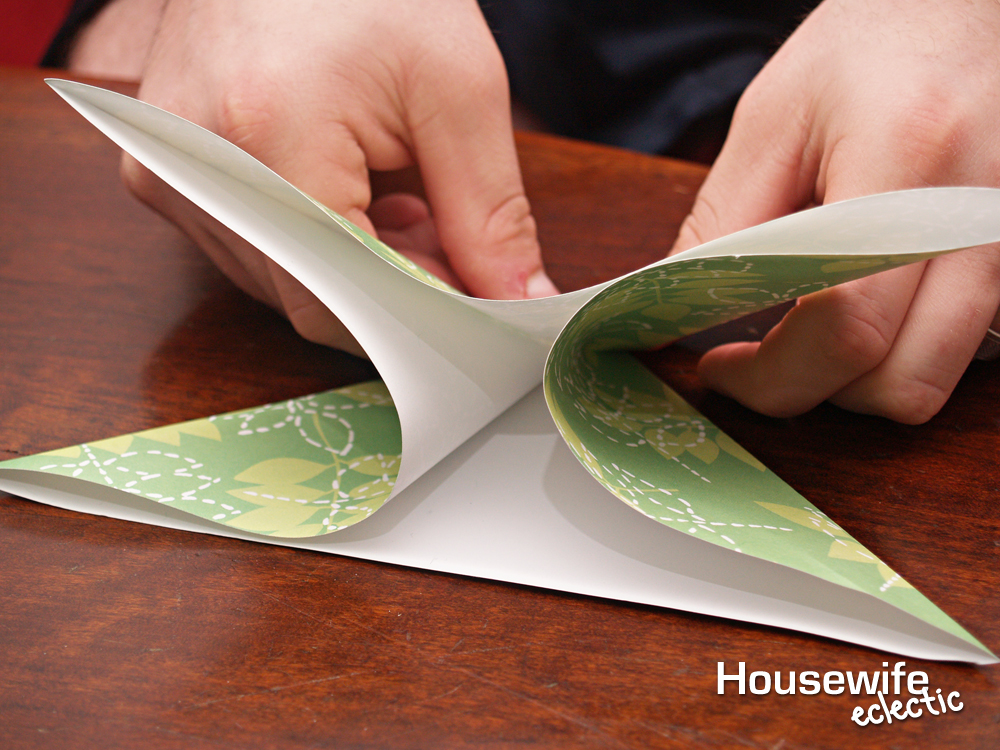
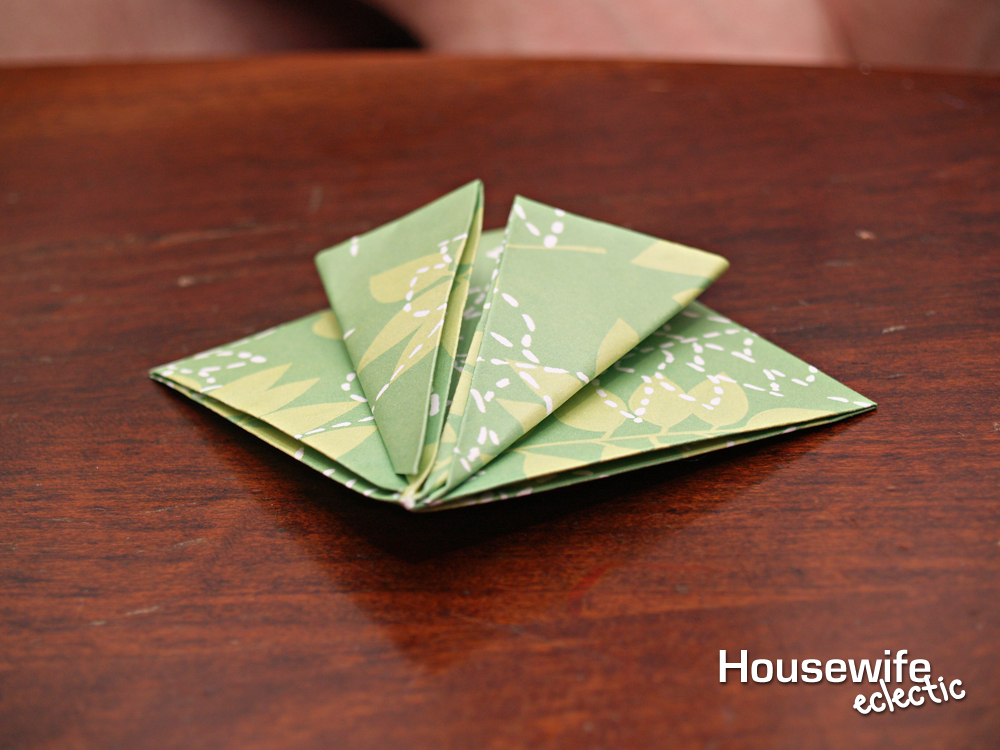
Then flip it over and do the same thing to the other side until you end up with a complete diamond.
Take the right flap and fold it across the center until it meets up with the left. Flip it over and do the same thing on the other side. Rotate 180 degrees.
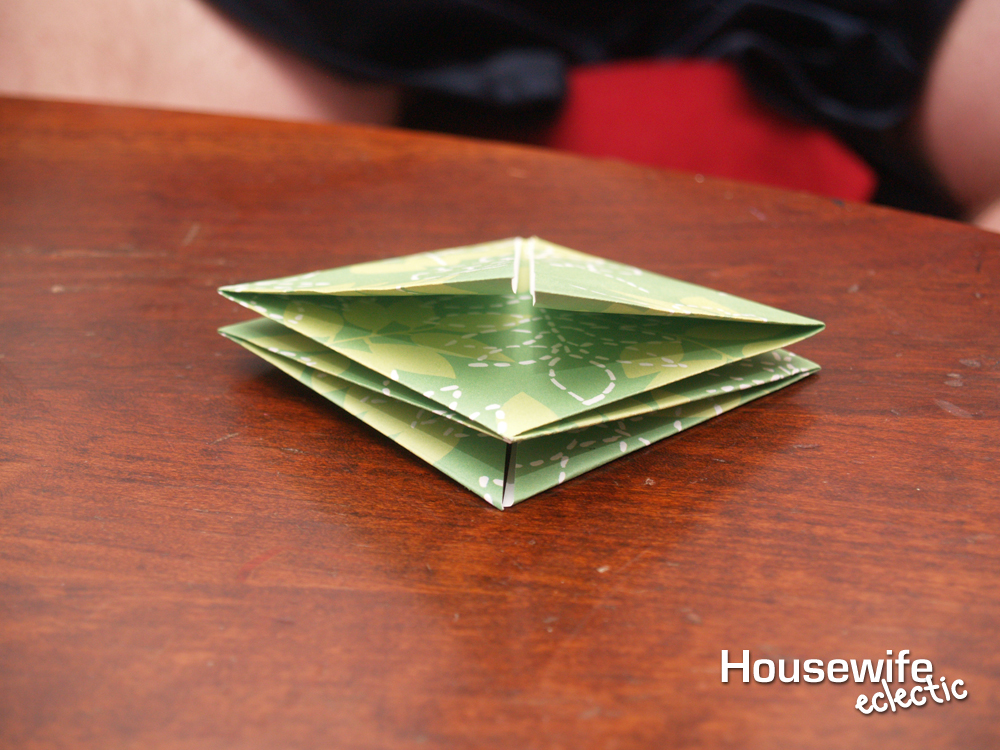
Fold the right side until it meets the center. Do the same with the left. Flip it over and repeat.
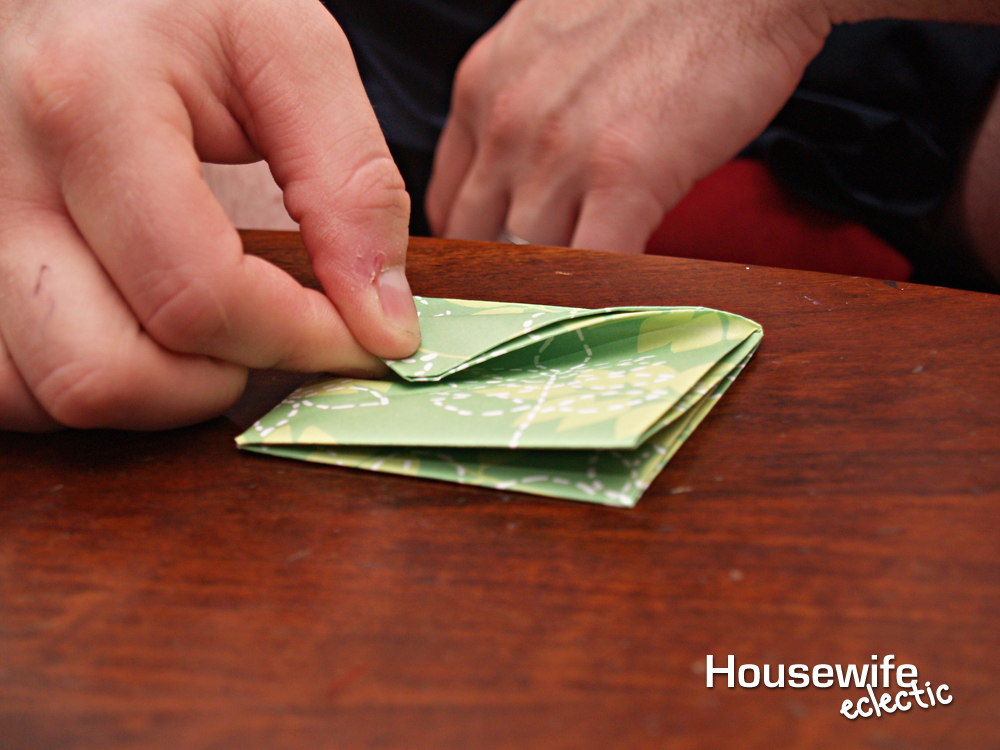

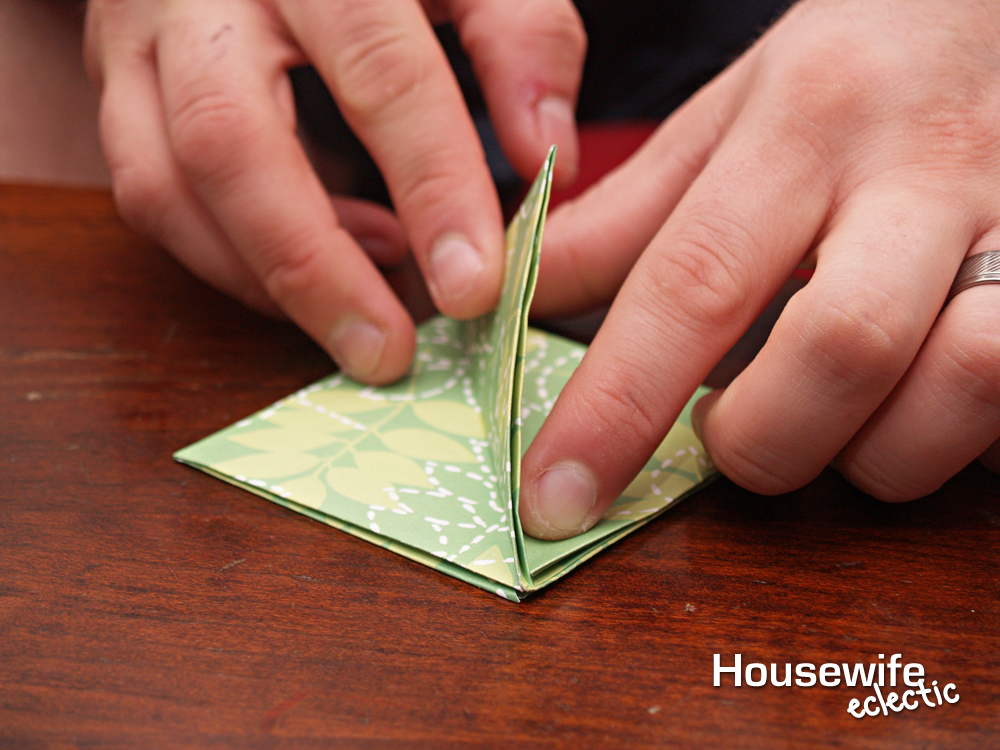
Take the two folded corners and tuck them into each other on both sides.

While holding sides like shown below…
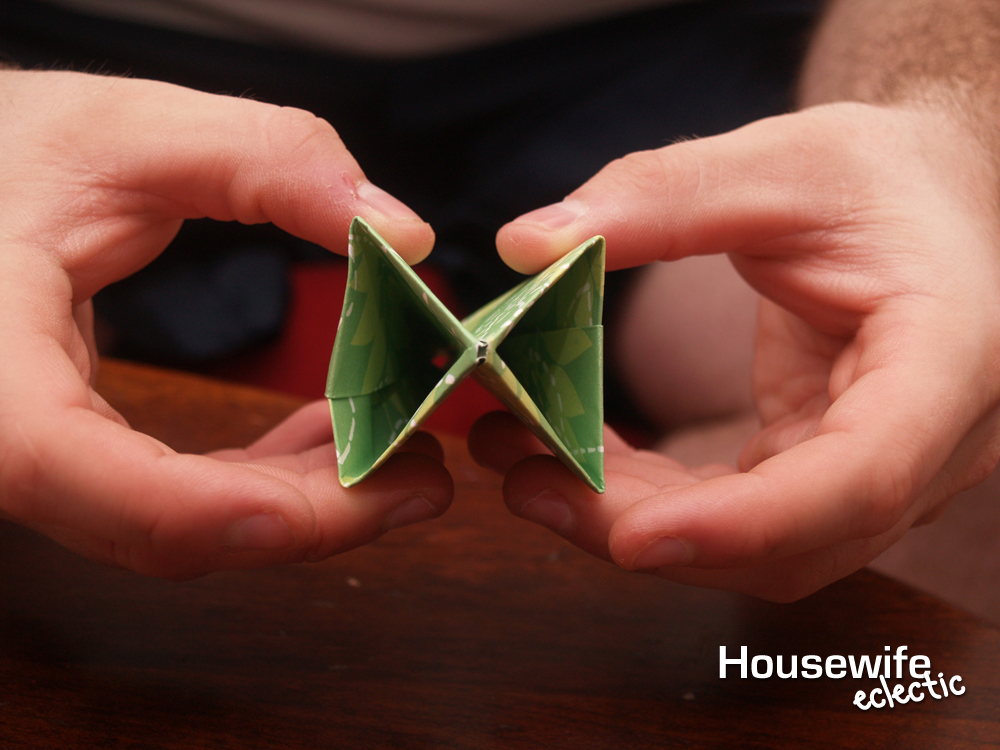
gently blow into the hole at the bottom.


Now peel down the four petals.
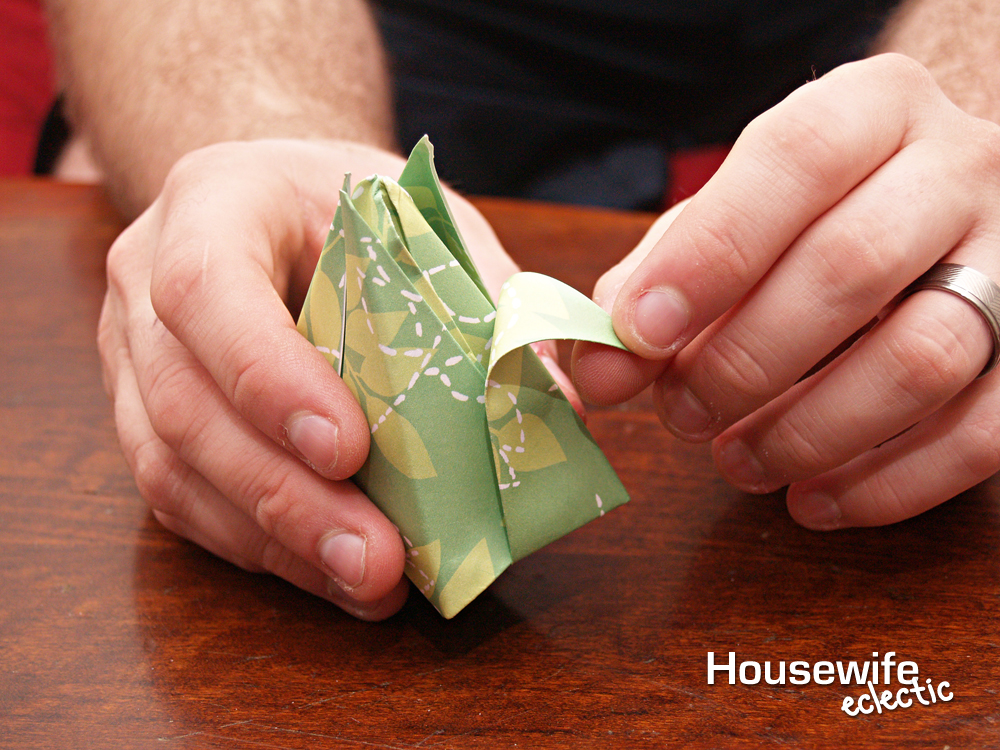
Voila! A finished rose. Take the remnant that was left from making the rose square and fold it in half long ways. Cut it down the center. Roll over a pipe cleaner and put up the hole at the bottom.


Wow! Those are beautiful. I love creative people. These are better than real flowers.
Popped in from SITS! Those are adorable!
Those are beautiful!
…stopping by from SITS…
Steph @ A Grande Life
Awesome!
Stopping by from SITS to say Hi to mt SITSer!
How sweet
stopping by from sits
I love 'em! The only rose I got this year was from one of Mark's students. 🙂
That is cool! I'm going to have to try that!! Thanks for the tutorial!
Would you mind if I posted the link for these on my blog??? Thanks again for the snazzy idea! I have a friend that just had her baby and I wanted to take something when I went to visit; these are perfect!
Those are so awesome!!! thanks so much!
amazing, wonderful, fantastic! — and the roses are pretty great, too!
Dropping by from SITS, gorgeous roses. Thank you for the tutorial.
So gorgeous! I might try these tomorrow if I get a chance!
Congrats on your SITS day!
Omg! this takes me back. We used to make these in school. I had totally forgotten about them. Thanks for the tutorial. My mom's and aunt's b'days are coming up and I my bouquet is going to stand out.
Happy SITS day! What a cute idea!
Seriously…those are way cute. I would think that I would love to receive some of those from my husband more then fresh flowers because he MADE them!
Stopped by from SITS.
Such a fun project..thank you for sharing and doing such an awesome tut.
Congrats on being the FB at SITS today!! I'm enjoying your blog with my morning coffee.
Hugs,
Regi
What a husband! Congrats on scoring a thoughtful, creative catch!
I can't wait to make these. I love origami, but I've never seen these before. Thanks for sharing.
Um, wow. That is amazing. I could NEVER do that, but it is extremely cool looking. Nice job! 🙂
Congratulations on your SIT day! I'm often struck by how many happy little coincidences occur through SITS…for example…yesterday, I came across an origami kit and book at a local second-hand shop. I bought it for my daughters. This morning, jumped on SITS, saw your feature, and just had to start out with this post! Those flowers are exquisite! So glad to meet you, and to be your newest follower! Hope your SITS day is a huge success! Jenn/Rook No. 17
Super cute!!!
Beautiful! I wonder if my 16yo Girl Scouts could make those. Probably not. LOL! But I can try! Happy SITS day!
These are AWESOME!!!
Such a fun-looking project! Congratulations on your SITS Day, too!
Stopping by from SITS. I am going to have to try to make these. Very creative. Hope you enjoy your day!!!
How pretty! Stopping by from SITS.
Popped in from SITS!
Amazing!
B
Happy SITS day. Those roses are awesome!
Fantastic tutorial! Can't wait to figure out how to use them for a party!
Congrats on your SITS day! I love these flowers- def. going on my "Friday Faves" blog post!
these are fabulous – what a refreshing idea, especially for those people in your life who "have everything!"
What a guy!
Wow! I think you are really talented. Im so happy I have found this post. Keep it up!
These are so awesome!! Way to go Hubby!! 🙂
I'd love for you to link this up to my linky party, Tute {Yourself} Tuesday!
LittleEme.blogspot.com
Origami is beautiful!
I will make my mother a paper bouquet for her birthday this month.
Cool! Love making origami when I was at school… and I think I would love to try making them again! Thanks for the tutorial!