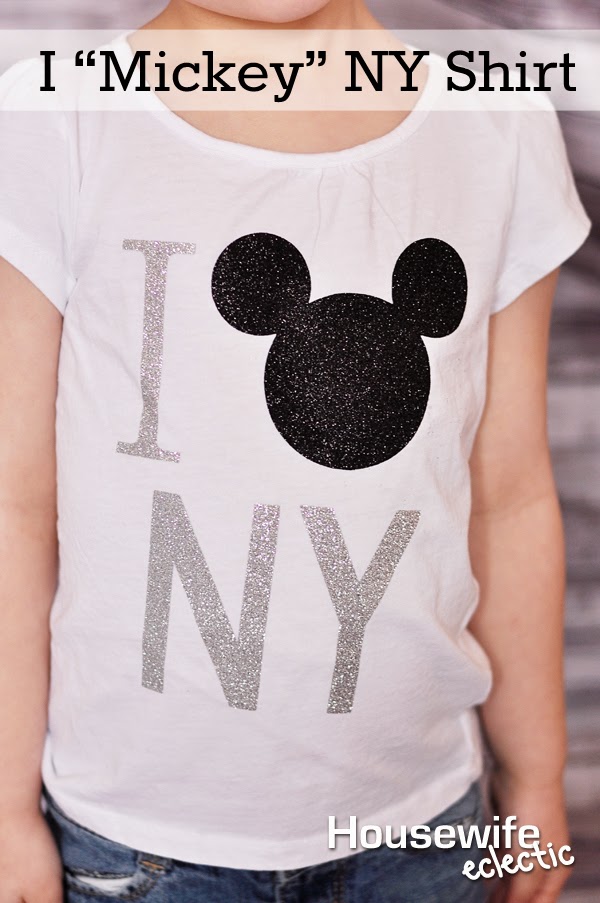
• Skip to secondary menu
  • Skip to main content
  • Skip to primary sidebar

Housewife Eclectic

Recipes, Crafts, Book Reviews and More

  • Tutorials
  • Recipes
  • Books
  • Parenting
  • Tech Help
  • About Me
  • Printable Store

I “Mickey” NY Shirt

September 9, 2014 by Wifeeclectic 11 Comments

When we were in New York last year, we kept seeing these darling Mickey Mouse New York shirts all over the place. We loved them, but unfortunately for whatever reason, we couldn’t find one in my daughter’s size. When we got home one of the first things I did was sit down to make her one. I made this shirt using a Cricut Explore, I actually don’t personally own the machine but was using a friend’s. It was a fun to use machine and I love some of the easy features it has. This particular tutorial is for most of the basics, we will get more in depth in later ones.
You will need:
  • A cutting machine
  • Black glitter heat transfer
  • Silver glitter heat transfer
  • An iron
  • A shirt to iron to


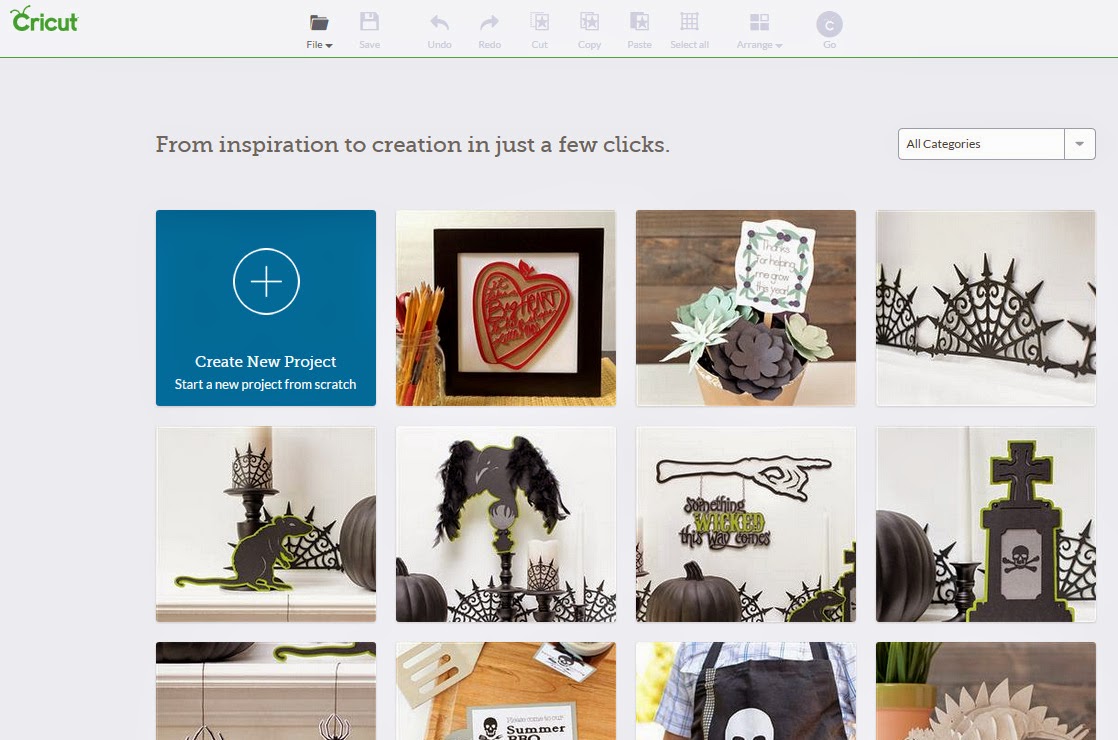
To make this shirt, head over to the Explore site and select the great big blue, Create a New Project button.

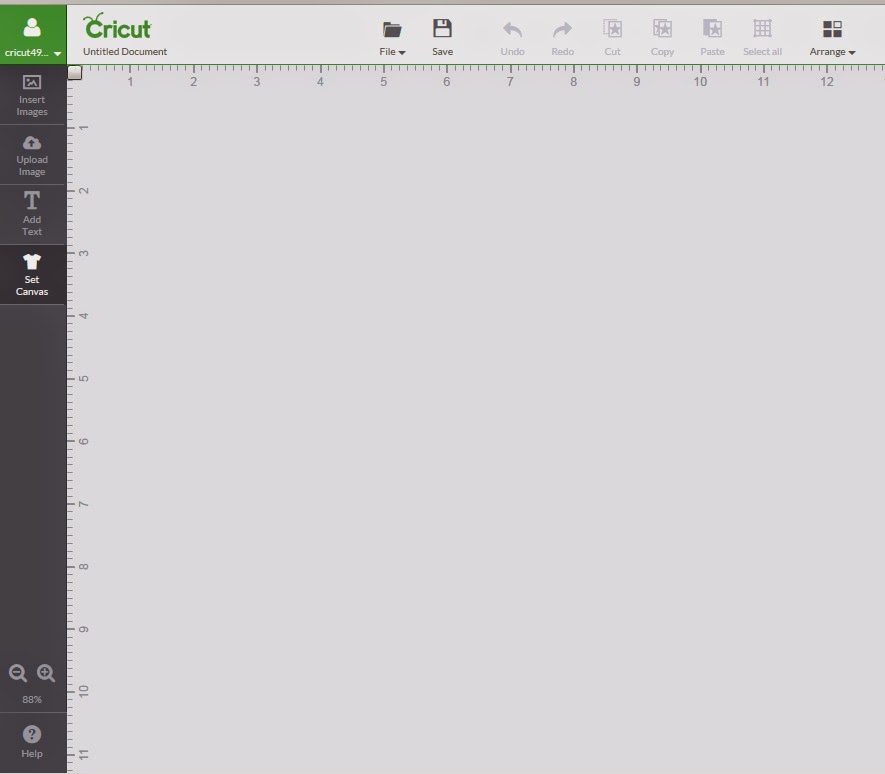
On the left hand side you will see a bunch of buttons, including Set Canvas. Click that button to tell the software what kind of project you are making. You can do it without this step, but this helps you visualize so well!

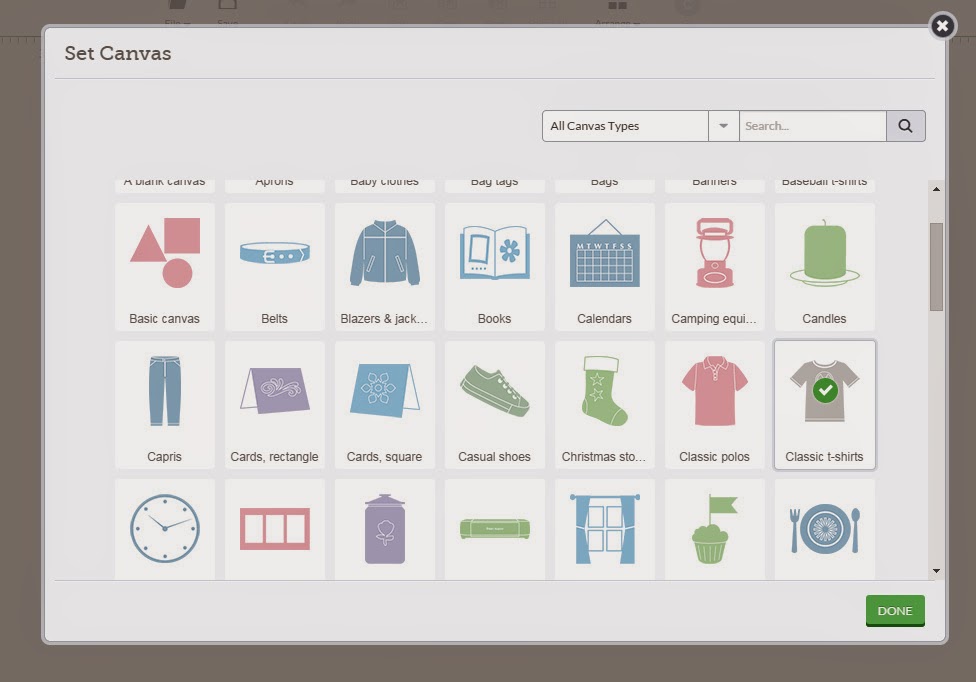
Scroll down and click classic T-Shirt.

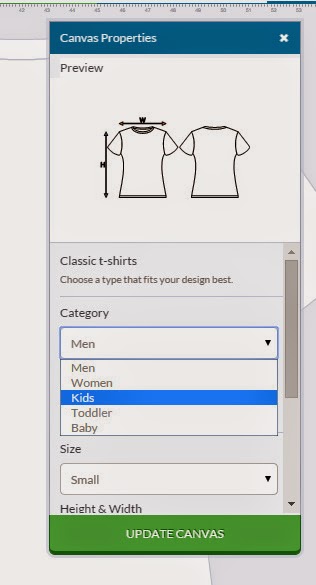
Then select the type and size of t-shirt you are making and hit Update Canvas,

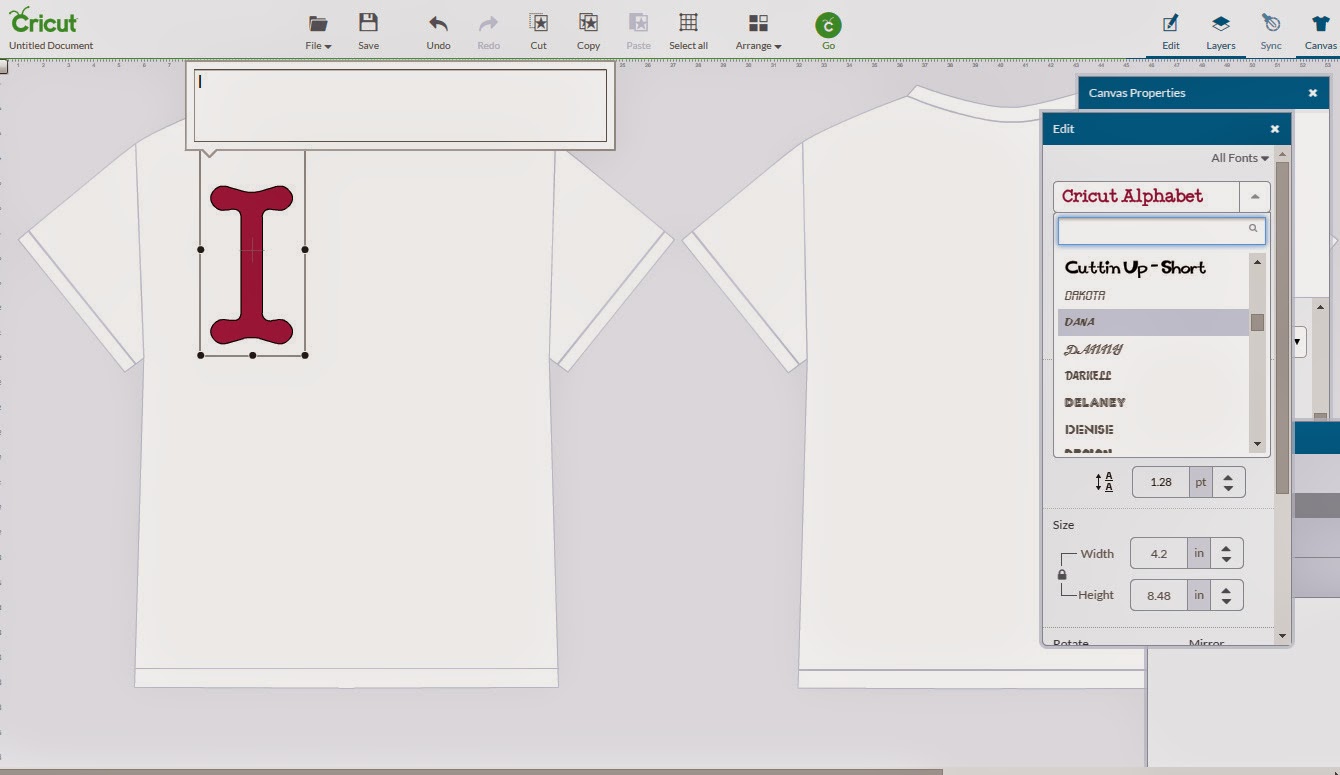
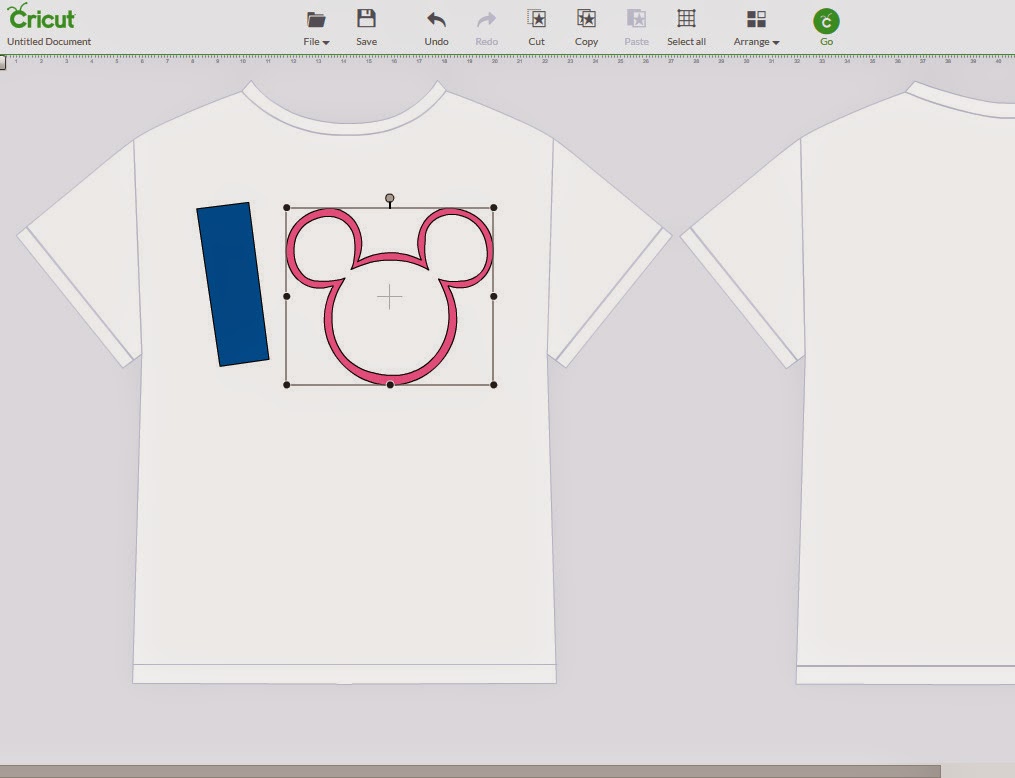
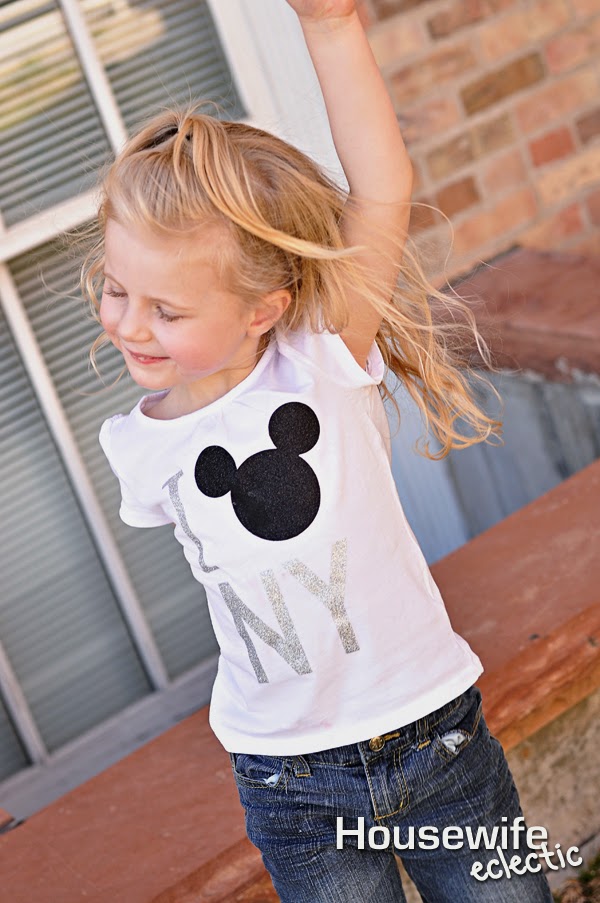
This shirt is actually really simple to make. You just need to Add the I and NY in two different text boxes. Then either search Cricut’s images for a Mickey head or add you own and trace it. Since I am cutting in two different types of glitter vinyl, I make those parts of the project different colors. This will line up everything correctly when go to cut the vinyl.

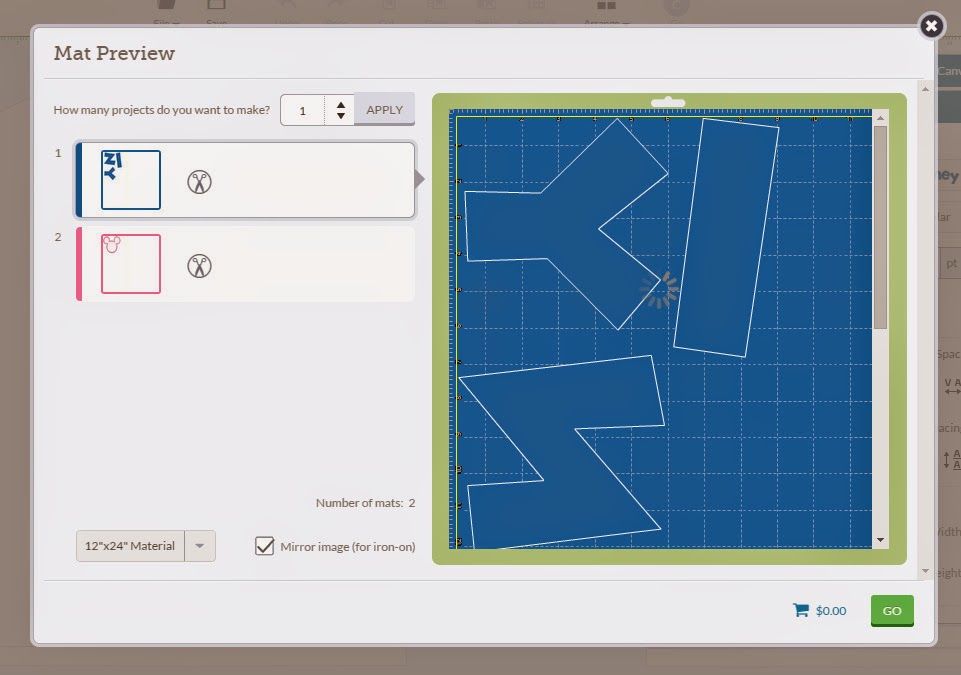
When you hit cut, it will ask you how many you plan to make, so if can plan your mats accordingly. It will groups the different color items onto different mats because it assumes you want to cut them out with separate colors and my absolute favorite part of the Explore? A check box that you can check that says you are printing this with iron-on and it will mirror everything for you. Kind of fantastic.

Hit print and go ahead and cut your vinyl. Make sure your machine knows what kind of material you are cutting, glitter is thicker than regular heat transfer. Weed the excess off of the heat transfer, until just the carrier sheet (Clear) and your design remains.
Preheat your shirt or other surface for about 3 seconds with a iron set at 325 degrees. Place the main design glitter side down on the shirt. Apply firm pressure on ALL parts of the design for 10-15 seconds. Flip the shirt inside out and apply heat and pressure on the design from the inside as well. Peel the clear carrier sheet off while the design is still hot.
This shirt comes together is less than 30 minutes and is a perfect reminder of a fun trip!

post signature

Filed Under: Cricut, Fashion, Tutorials Tagged With: Arts and Crafts, Cricut, Disney

Reader Interactions

Comments

  1. Masshole Mommy says

    September 9, 2014 at 6:43 pm

    That is way cute!! I love it.

    Reply
  2. Heather says

    September 9, 2014 at 7:05 pm

    That is cute! I love that the decals sparkle!

    Reply
  3. bxcrochet says

    September 10, 2014 at 2:09 am

    Wow that shirt came out great. I have been wanting to get a cricut.

    Michelle f.

    Reply
  4. bedlambrides says

    September 10, 2014 at 3:41 am

    You always make the most amazing shirts!

    xo,
    caitlin

    http://gussied-up.blogspot.com

    Reply
  5. Maddi'sMommy says

    September 10, 2014 at 4:39 am

    So cute and so easy! You would never know it was hand made.

    Reply
  6. Onica MommyFactor says

    September 10, 2014 at 10:23 am

    What a cute design idea for a shirt. I like that you can make it and customize yourself.

    Reply
  7. Mistee Dawn says

    September 10, 2014 at 1:36 pm

    How super cute and creative. I would love to make one for my daughter, might have to do that.

    Reply
  8. BonBon Rose Girls Kristin says

    September 10, 2014 at 6:14 pm

    Too cute for words! We're a major Disney fam. We go a couple times a month. It's our favorite place!

    Reply
  9. Katrina Gehman says

    September 10, 2014 at 6:28 pm

    i love this, it's so cute. i have seen the machine before. i will have to look into getting one.

    Reply
  10. Krystal Butherus says

    September 10, 2014 at 7:00 pm

    This would be super cute for an Orlando trip! Thanks for the idea!

    Reply
  11. Payal Bansal says

    September 12, 2014 at 4:22 pm

    I didnt know, it was so easy to make your own designer Tee. Loved it

    Reply

Leave a Reply Cancel reply

Your email address will not be published. Required fields are marked *

Recipe Rating


Primary Sidebar

Connect with Us

Facebook
Twitter
Follow Me
Instagram
Pinterest
RSS
Follow by Email

Welcome to Housewife Eclectic

Debra Hawkins - Housewife EclecticHi, I'm Debra. I am a craftaholic photographer married to a web-programming amateur chef with two sassy littles keeping it interesting. It gets crazy around here. Read More…

Archives

Copyright © 2023 · Lifestyle Pro on Genesis Framework · WordPress · Log in