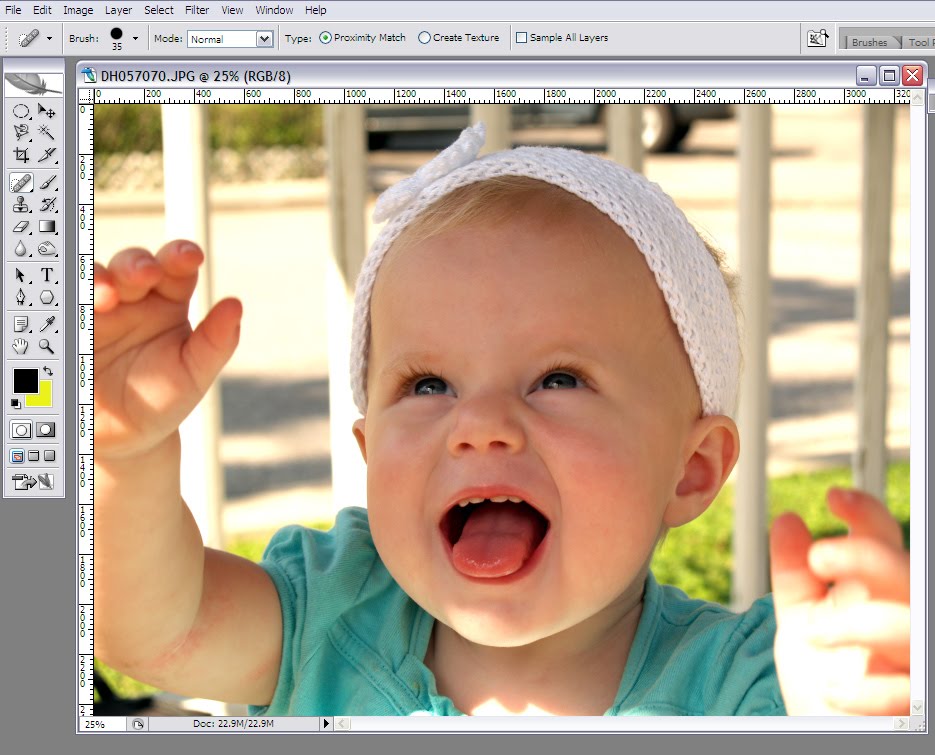
So, last time we talked about how to use the Filter Gallery to add some neat effects to your photos. Today, we’re going to continue with that. I hope those of you who have Photoshop took the time to experiment with it. If not, maybe this post will inspire you.
Most of the filters are pretty self explanatory and easy to use. But, one category is not so easy to understand. In fact, it frustrated me for a long time until I realized what was going on. I’m talking about the SKETCH category.
This has some really neat effects, but they may not appear to work unless you do some preliminary work.
WARNING: Like I mentioned last time, effects are not great for every photo. In fact, as I did this post, I realized how few of them worked for the particular photo I was working with. But, some of them really do add neat dimensions to photos.
Step 1: Open a photo in Photoshop that you want to edit.
Step 2: Next, go to your toolbar and locate the two offset color squares near the bottom of the palette. These are your foreground and background colors. The color on top is the foreground and the color underneath it is, well, the background color. You can easily flip these by clicking on the curved arrow in the top right corner.
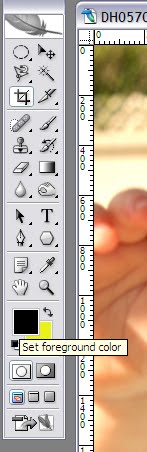
To effectively use the Sketch options, you must have a foreground and background color selected. This is really where your creativity comes into play. Don’t worry so much about what colors are already pre-existing in your photo because these effects by and large ignore them. Choose two colors you think go well together and would fit the mood of the photo.
Step 3: Click on the Foreground color. This will bring up the Color Picker window. This allows you to select the precise color you’re after. If you’ve never used this before, it can be a little overwhelming.
Start with the skinny bar that has a rainbow of colors. Click at the approximate color you want. You’ll notice I selected a purple/pink area. Next, go into the large ‘Select Foreground Color:’ field and move your mouse around. As you do so, you’ll notice the color in the box to the right of the skinny bar is changing. Whatever color appears in this box is what you have actually selected. The color beneath it (green in this case) is the previously selected foreground color.

Once you have selected the color you want, press the OK button.
Step 4: Repeat this operation with the Background color by clicking the Background color in the Tool palette. You should end up with your desired foreground and background colors.
 My Foreground color is a light purple and my Background is a bright baby blue.
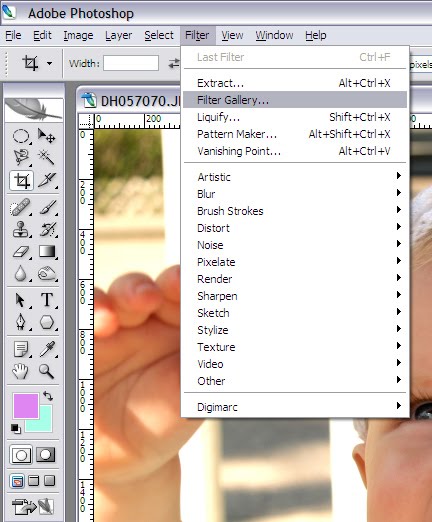
Step 5: Go to the Filter Gallery by selecting the Filter menu option and selecting Filter Gallery…
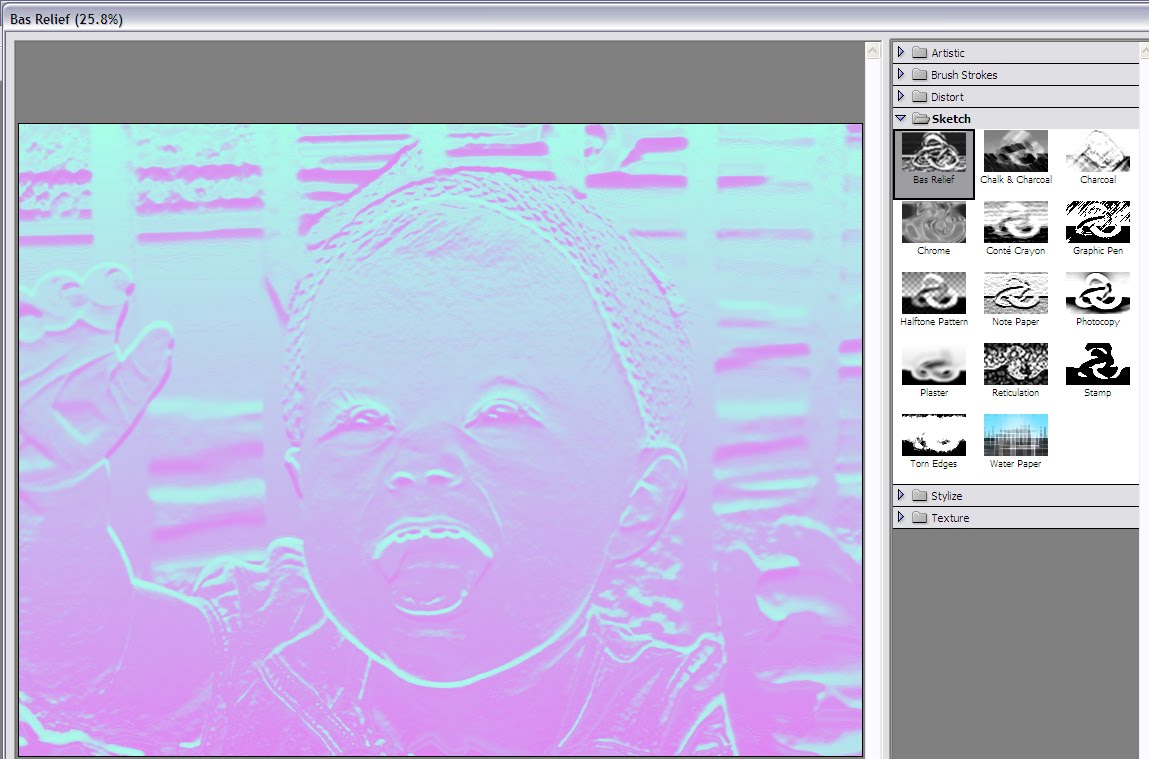
Step 6: Go to the Sketch options by clicking on Sketch within the Filter Gallery. Remember, if you need to zoom out, those options are in the bottom right corner.
Step 7: I’m going to start with the Bas Relief option. You’ll notice it used the foreground and background colors I selected to execute this effect. You can play with the customizable options on the right-hand side of the screen to make it just the way you want.
That’s all there is to it. Now, play around with the other options in the Sketch category. I’ll show you some samples of my favorites, at least for this photo.
CHARCOAL

CHROME
I don’t know if this really has any great application other than making someone look like the bad terminator from Terminator 2.

I don’t know if this really has any great application other than making someone look like the bad terminator from Terminator 2.

HALFTONE PATTERN


STAMP


No matter what you do to the picture, she's still adorable. Even as a mini Terminator. 🙂
I love your clear explanations. Thank you so much
This is really cool! Are you in Utah ? I saw some Temple pictures…I wasn't sure. I am in Utah!
Love your blog, LOVE photography! Come say hi and follow back!
I would love to be friends!
Xo
I love all your photography and tips!
I'm a new follower 🙂
~Victoria
http://ourlifewithjake.blogspot.com
We are now following you from Friendly Follow Friday!
Elijah's crib
pibyang
Hi,
That is so cool! Cant wait to try it. Of course, you have a great subject LOL. No matter what you do this little face is always cute. Thanks for sharing. Following you from FF.
Anne-Marie 😀
That's a great tutorial and reminds me that I have to go pick up Photoshop. Thanks for sharing.
Visiting from New Friend Friday.
Thank you for the tutorial!
Hi! I am your newest follower from Follow Friday!
I’d love if you would visit my blog!
http://www.hislittlemrs.blogspot.com
Happy Friday follow! I am now following along. Hope you will stop by and do the same 🙂
I love the photo tutorials, cant wait to try them!
I'm also trying to learn to edit and design my photos, this is great..
I'm your new follower fr. Friday Follow, hope you can visit me too, have a nice day!!
Hi there.
Stopping by from Friday-Follow to say hello.
Thanks for playing.Please post our image so people know to comment and follow.
Have a great day!
http://harrietandfriends.com/2010/06/building-friendships-one-blog-at-a-time/
I love photography tips!!!
I'm your newest follower! I'd love for you to stop by my blog!
http://www.ingenuemom.com
Hi I'm here from Fun Friday Follow – Great blog 🙂
Sandie lee
http://imaginationcafeblog.blogspot.com
Thanks for the tips! Off to (re)edit some pics 🙂