I have gotten a lot of requests for a tutorial for some of the photoshop basics. So, here it is. These are the things that should be among the first that you learn about photoshop.
 The first thing we are going to talk about changing, is the lighting in a picture. Open your photo and then open levels. (Go to image/adjustments/layers or Crtl-L) The layers box will look like the one below.
 There are three little triangles at the bottom of the histogram. The one on the far right, brings more highlights into your photo. If you pull it to the left, it will add more, as in the picture below. It brightens all the light areas.
 The middle one does your midtones. A lot of times when you have a dark picture, this is where to start but be careful, this can also make your pictures look flat (like they don’t have enough contrast). Pulling to the left, brightens the mids and to the right, darkens.
 The far left one darkens the shadows. As in the photo below.
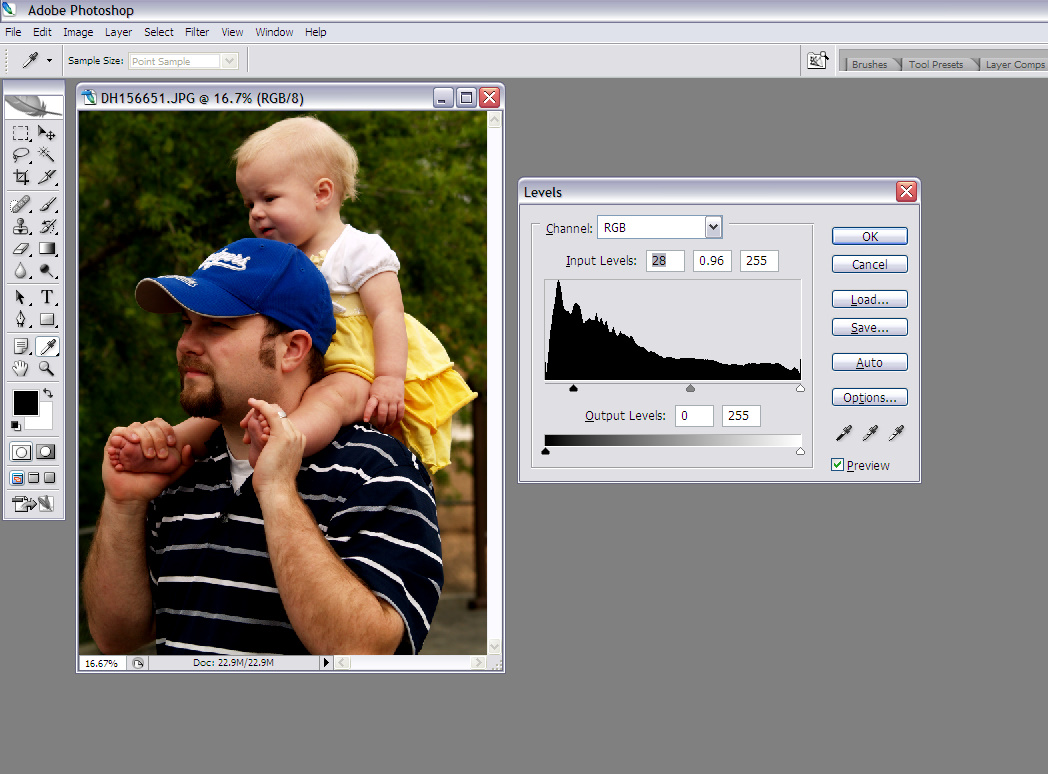 There is a drop down menu on in your levels box at the very top. It usually says RGB but you can change it to say an individual color. This gives you the ability to add a certain color or take away a certain color from a photograph. For instance, I have red selected in the photograph below.
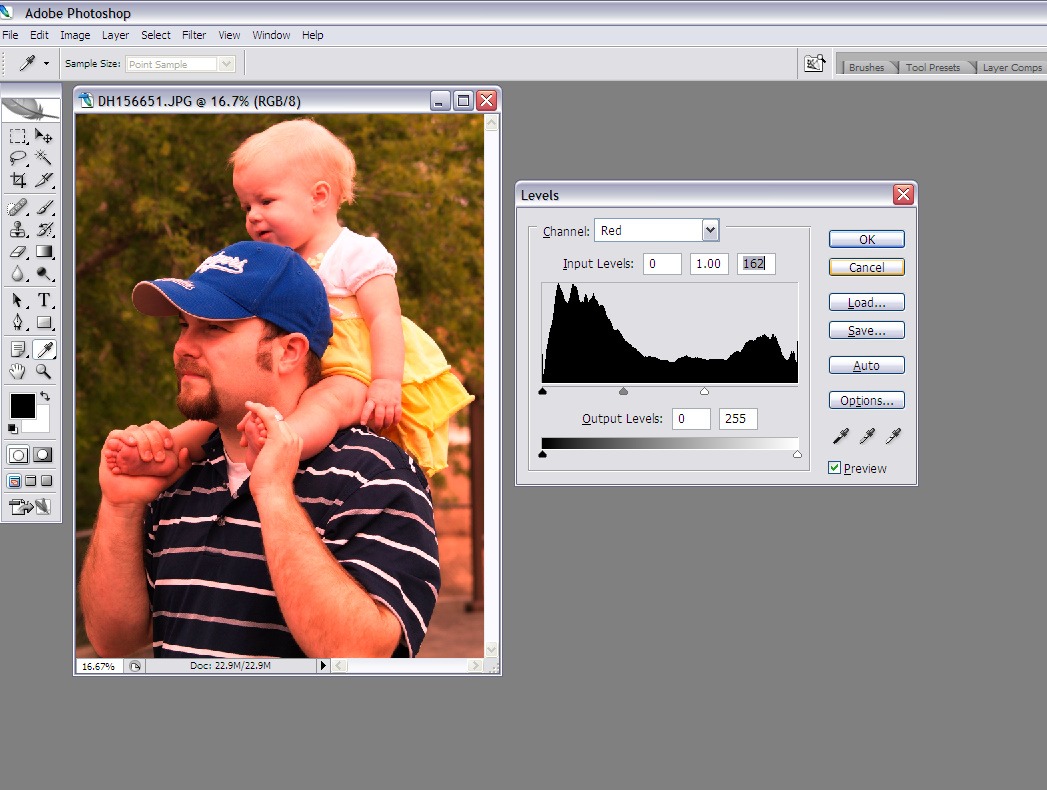 and now green. This feature is really helpful if your pictures have a lot of blue/red or any other particular color in them.
 Another basic feature is to change the hue/saturation levels in your photo. (Go to image/adjustments/ hue/saturation.) Saturation allows you to change how much or how little color is in your photos. In the photo below, I upped the saturation so the colors are extremely vibrant.
 In the photo below, I changed the colors of the photo by playing with the Hue slider.
 and this is what it looks like when you take the saturation bar the other way. Your photo goes black and white.
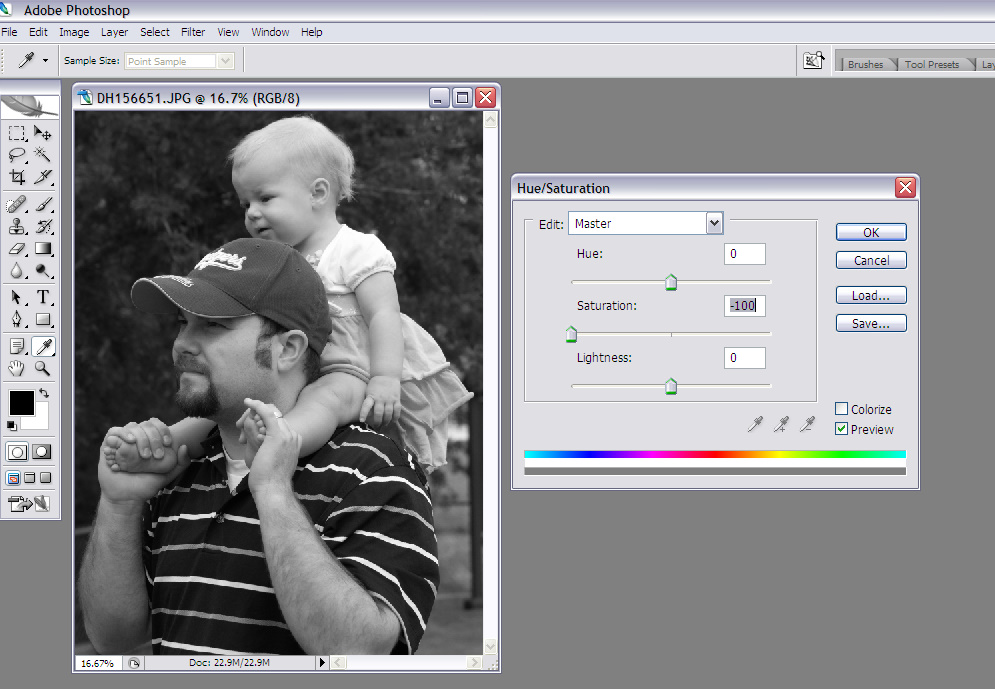 Another extremely important basic is controlling the brightness/contrast. (Go to image/adjustments/ brightness/contrast.) By sliding the brightness slider to the right you make your photo brighter (as in the photo below) and by sliding it to the left you darken it.
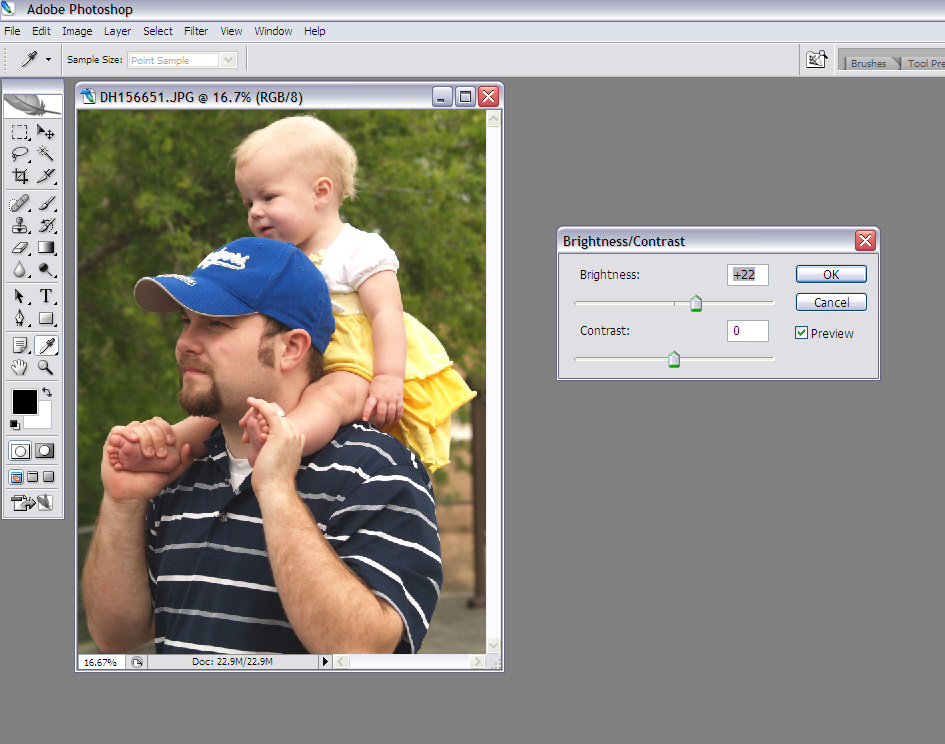 With the contrast slider, you can add contrast or take it away. This allows you to put contrast into photos that feel flat. (right=more contrast, left=less contrast)
 Every photo is different, so in order to figure out exactly how to fix your photo, you are going to have to devout yourself to a little bit of playing around.
Any more questions? E-mail me at debrajoyhawkins @ gmail.com
Wow, that is so helpful! Thanks, I'm going to go try a few of these tips on my trial version of Elements.
I love photoshop!! It has soo many things you can do!!
NO way that is so cool. I so need to figure out my photoshop. 🙂 I have elements and still hard for me. 🙂
Happy Friday Follow.
Following you.
http://littleyayasandblessed.blogspot.com/
~Cindi
These are such great tips! Thank you so much. I've been trying to figure out Photoshop for a while now. Glad I found you on Friday Follow! Have a great weekend!
yellowhouseknits.blogspot.com
I am your newest follower via FF. Your blog is great and I look forward to reading more. Thanks for the demo on photo shop :o)
Thanks so much! I love PhotoShop, but have so much to learn. I found you on Friday Follow. I'm a follower, now and look forward to future posts.
We are your newest followers from Friday Follow!! Have a Fantastic Weekend.
-The Team @ Inspired Gifts
http://inspiredgiftsblog.blogspot.com
I am new to Friday Follow and one of your newest Followers! I look forward to reading your blog and check out my blog! 🙂
http://frugalsciencegal.blogspot.com/
Loved the tutorial! Following you now via Friday Follow!
Happy Friday!
One of these days I'll fork over for Photoshop. I think we need a better camera first. I'm so disappointed in the one we bought a year ago. For now, I use Photoscape and it works pretty well. It's about as simple as you can get, though, it obviously isn't as powerful as Photoshop!
hi from follow friday! i'm your newest follower and i happen to be just getting back into photography, and am trying to learn photoshop elements — does your tutorial apply to PSE too??? so glad i stopped by!
Hi, I'm your newest Friday follower!
Come visit me at Mom-et-al.com
-Maria
/
great tutorial that I need to pay more attention to!
Stopped in today from Follow Friday
Its the most easiest task in Photoshop, I guess who have basic idea on photoshop tools can be able to apply this. Still thanks for describing it in a good way.
Your tutorial really for basic Photoshop learner. As a basic learner,it is most helpful for me. A lot of thanks for sharing.
Photo Editing India
a very well description of how we can manually change the tone using photo shop.Choosing the correct tone is very difficult,even for professionals. Hue saturation and gamma adjustments are very important.Thanks for the step wise tutorial.
nice tutorial.thanks for sharing.
Very much informative post.
keep writing.
Great post ! I need this tutorial. Thanks for sharing creative and informative post