One of the most popular photographic effects is sepia. For those not up on their photo lingo, sepia is the style of photograph that looks like it’s from the Old West – kind of brownish-yellowish.
Most photo editing programs have a quick-edit sepia effect, but most of these tend to look too yellow, too brown or sometimes too pinkish. Getting the right sepia effect takes a bit of practice, but it’s surprisingly simple.
To begin, we need to revisit what we did last week: turning a photo black and white.
Step 1: Open a photo you want to edit in Photoshop.
 Step 2: Go to the Hue/Saturation palette by going to the Image menu, down to Adjustments and click on Hue/Saturation…
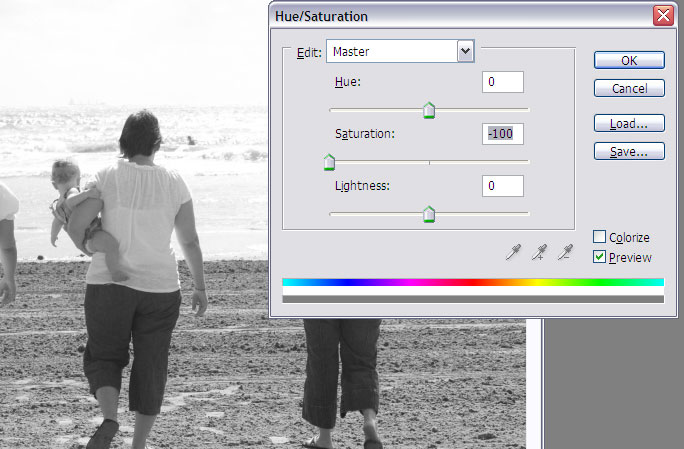
Step 3: Drag the Saturation slider down to -100. Your photo should be in black and white now. Press OK.
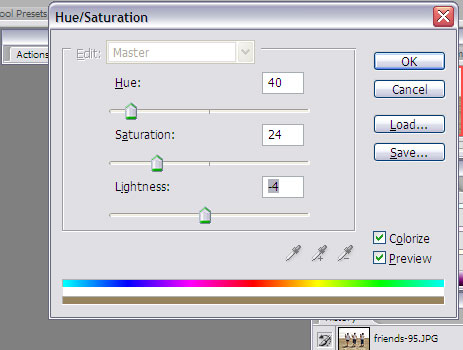
 Step 4: Now, go back to the Hue/Saturation palette. I know this seems redundant, but trust me on this one.
Step 5: Go to the bottom-right corner of the palette and click the Colorize check box. This will add some color to your black and white photo.
Step 6: Here’s where you turn your photo into sepia. Move the Hue slider to the left until it turns a yellow/brown color. Don’t worry about getting the color too dead on because it probably won’t happen. Just get it in the ballpark.
 Step 7: Now play with the Saturation slider to add saturation or take it away. This is really a matter of personal preference and varies from photo to photo. If you want the sepia really faded, keep the saturation levels low. If you want a more vibrant sepia, increase the saturation levels.
Step 8: Finally, you can move the Lightness slider ever so slightly one direction or the other to add or take away lightness. This is a fine-tuning option. Once you have the photo the way you want it, press OK and…
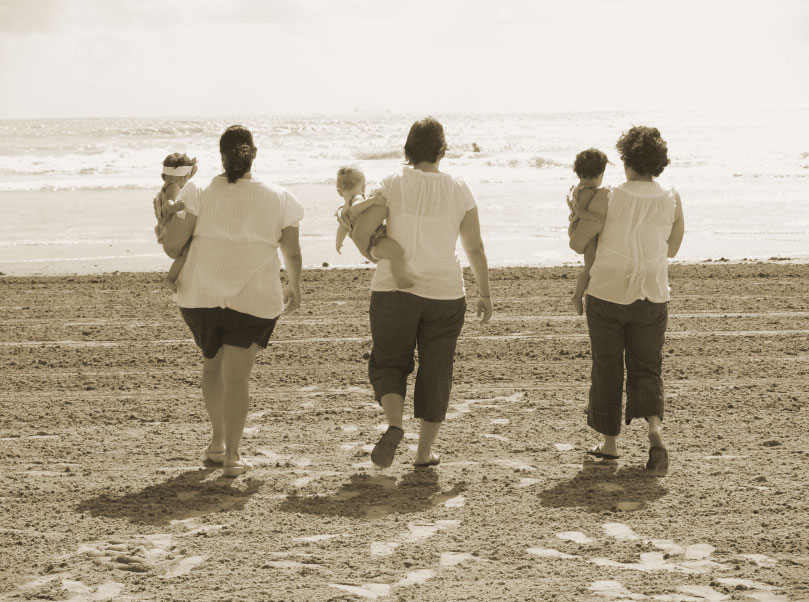 There’s your sepia!
You don’t have to stick with the traditional sepia if you don’t want. To change the color, you basically follow the same steps, but instead of moving the Hue slider in the yellow/brown range, you can move it to any other color scheme you find interesting. Below is an example in the blue-green color scheme. It adds an interesting dynamic to the photo, making it seem slightly other-worldly.
 And that’s all there is to it. Sepia is a very easy effect and this is a quick and easy method. A great addition to sepia is to add aging effects, but that’s for another time. Stay tuned.
I always learn so much from these tutorials. Thanks! I've always loved the look of sepia tones.
Thanks, I may have to try this for next week's Wordless Wednesday.