This last week I wanted to start a project, a quiet book has been on my mind forever and so I got to work. It was simple and fun to make and since I made all of my own patterns, I thought I would share it here. This is the first part of what will be a weekly series for the next few weeks. Week 1- Balloon/Colors matching page.
 You will need:
A page of felt, I just bought these as the page size at Hobby Lobby.
Scraps of felt in 8 different colors
Embroidery Floss in colors matching your felt scraps
Package of ric-rac
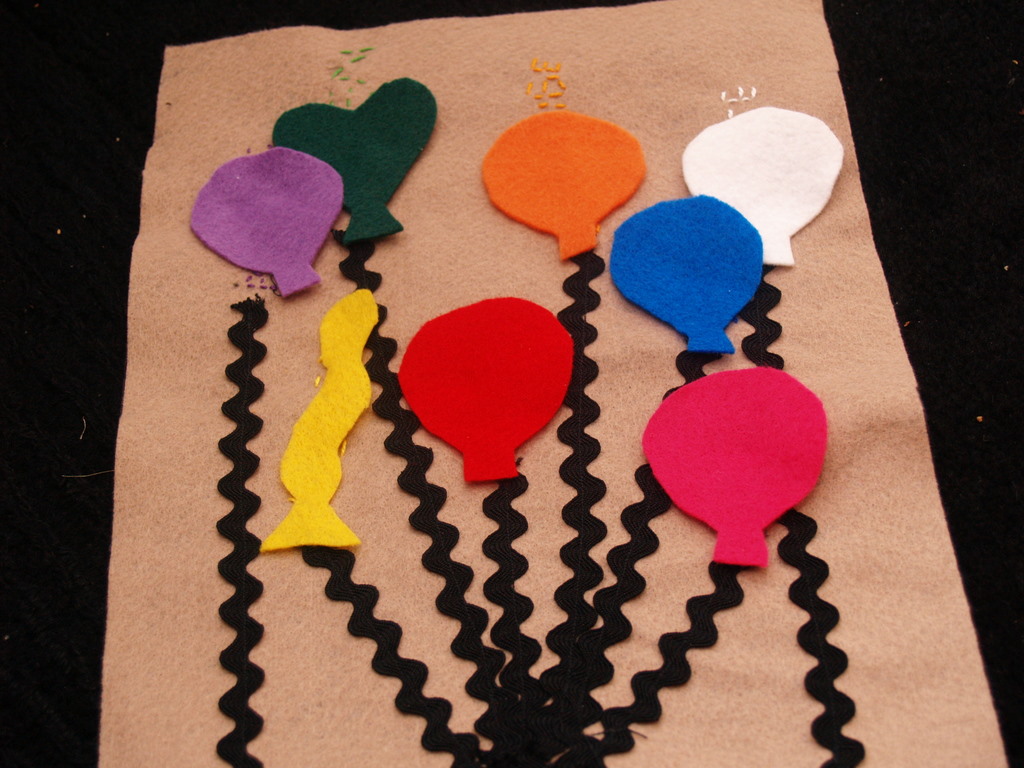
Cut out 8 balloons in each of your different colors. You can create you own shapes, or go here to download a PDF of the shapes I made. It doesn’t matter what color is what shape, however, the colors with more letters in their name work better as the long shaped balloons.
Lay out your ric rac with your cutout balloons and see what different lengths your ric rac needs to be to allow all the balloons to be seen.
Sew the ric rac onto the felt. I used my machine and black thread and it worked great. With a pencil above each piece of ric rac write the color name out lightly. With your embroidery floss, go over your letters.
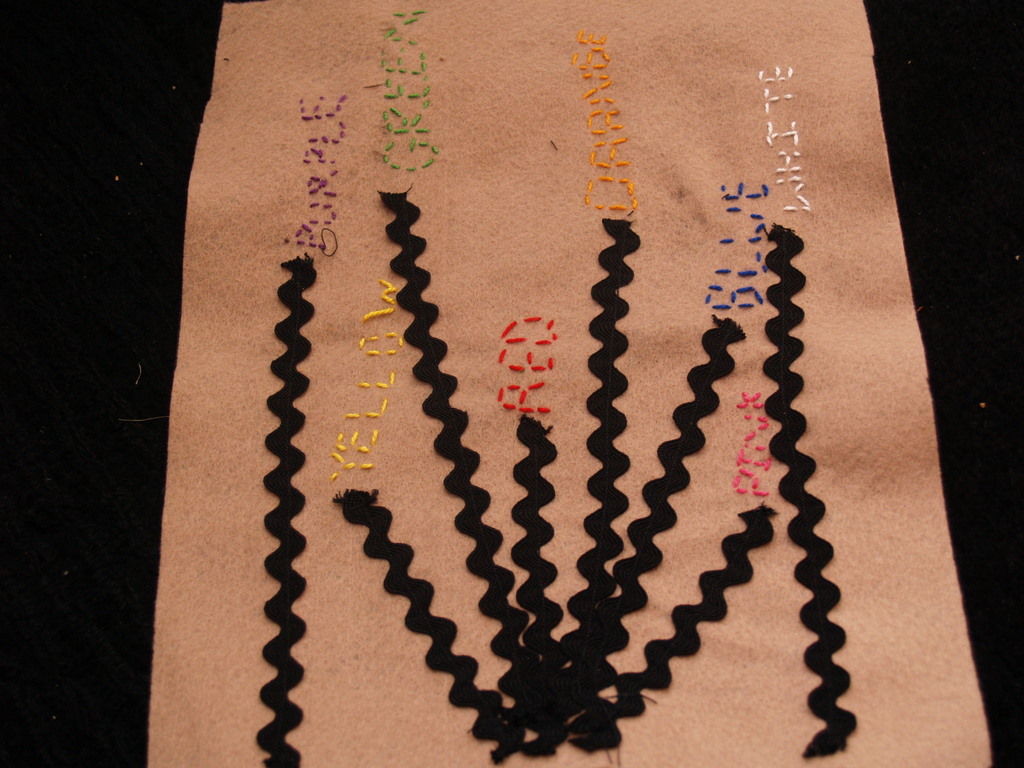 If you have an older child, you could embroidery all the names in black, so they have to read to match. Since my child is much younger, I wanted her to match the colors.
Felt sticks on felt very well, so I did not feel the need to use Velcro but you can if you want. I always like to make my projects a couple of steps easier if I can.
There is not a storage place for the balloons on this page but there is a storage place for them on the next page that will face the balloon page. Stick around next week and we will make that page.
Any questions on this page? Leave me a comment and I will make sure to get back to you!
I'm so excited about this tutorial! I've been thinking about a quiet book for G.
Cute! I love the idea of stitching the names in the color. It makes the book last longer, so even kids who are starting to read can still use it. Love it!
I have felt and I need quiet . . . perfect! 😉
Great idea! Thanks for the tutorial!
That's a cute idea! My, there are lots of possibilities. Thanks for sharing.