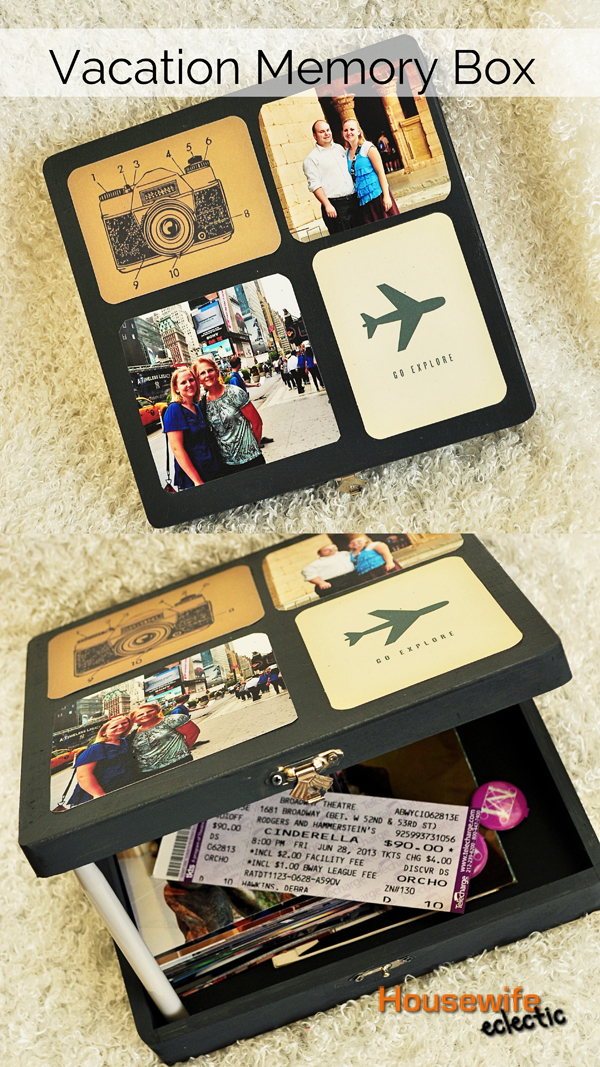
Vacation Memory Box
I love the look of scrapbooks, but I have never been a fan of making them. That is one of the reasons I like Project Life, it appeals to the crafter in me, because I still get to create, but it doesn’t need scissors or glue, so it comes together quickly. Project Life features sheet protectors that are designed for your favorite photos, add writing to a few Project Life cards and add to the protectors for a finished layout, fast.
For this project, I decided to use Project Life elements to create something else, I used the Vintage Travel Core Kit because it features travel themed images such as maps, which I loved for a project featuring my vacation.
For this project you will need:
- A wooden box, I love this flat box that I found at Michaels
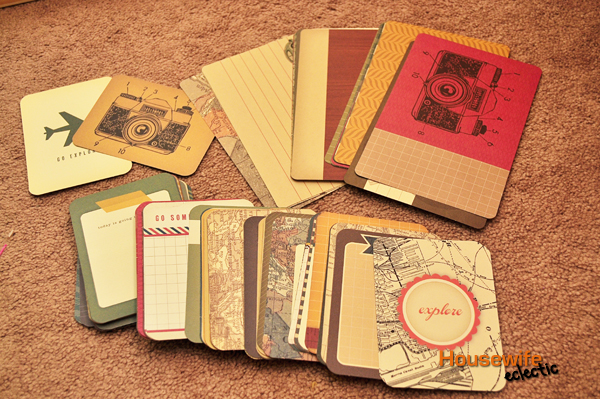
- Project Life Cards, You can find The Dear Lizzy 5th and Frolic Core Kit or the Vintage Travel Core Kit at Michaels as well.
- Paint (I used a charcoal color)
- Mod Podge
- Photos from your trip
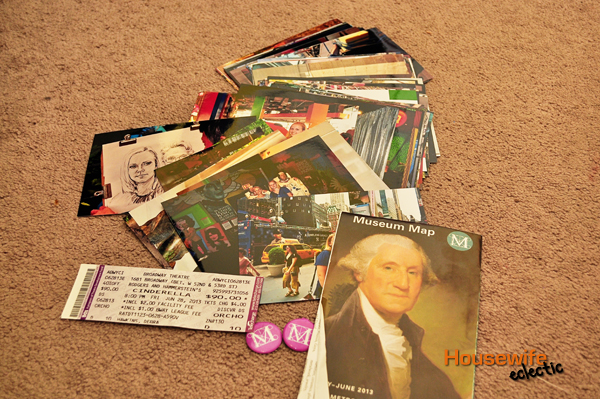
- Memorabilia from your latest trip

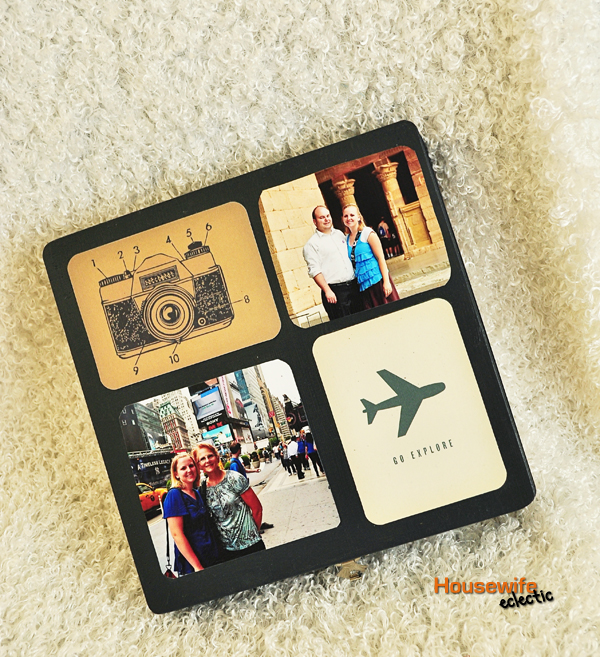
Pick out a couple of Project Life Cards for the top of your box and a couple of photos. I liked the look of doing one horizontal card and one vertical, to break up the design a little bit. I used the Project Life Card corners as a guide to round the edges of my photos as well.
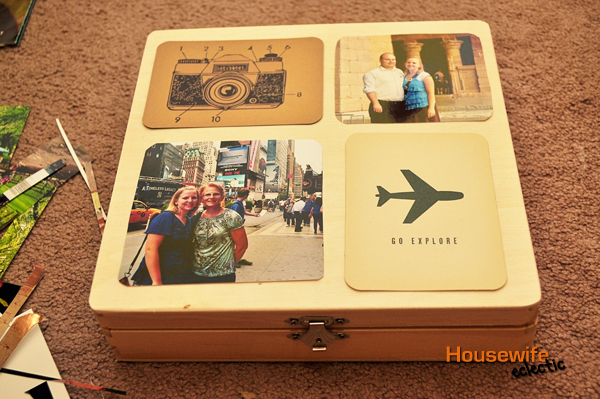
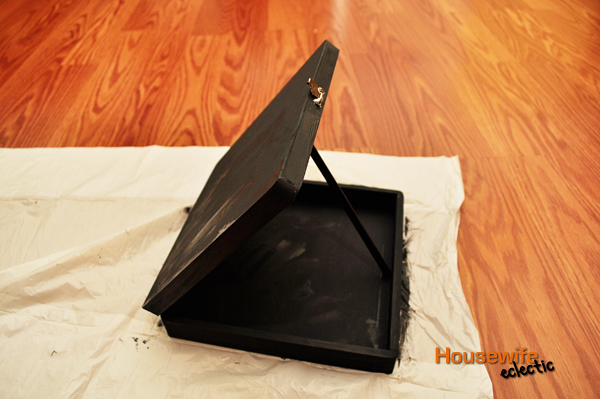
Paint your box, both inside and out. Allow to dry completely.
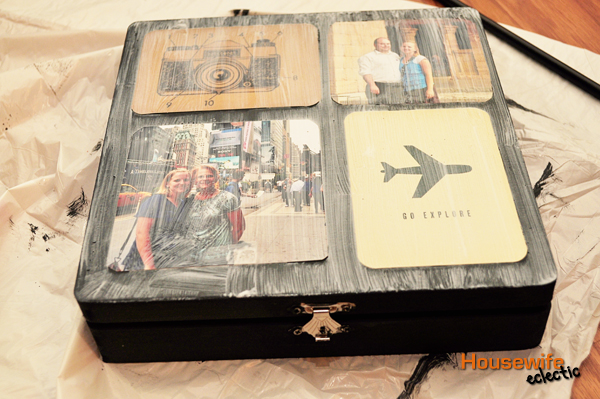
Secure the cards and photos to the top of the box with a layer of Mod Podge. Smooth the photos out from the center with the side of your finger. I like to allow this to dry for a few minutes before I add a layer of Mod Podge to the top of the photos to finish the project.
Add your memorabilia to the box and the project is completed. What I really love about this project is, it is so cute, you can display it as well as use it for storage.

Vacation Memory Box
Materials
- A wooden box I love this flat box that I found at Michaels
- Project Life Cards You can find The Dear Lizzy 5th and Frolic Core Kit or the Vintage Travel Core Kit at Michaels as well.
- Paint I used a charcoal color
- Mod Podge
- Photos from your trip
- Memorabilia from your latest trip
Instructions
- Pick out a couple of Project Life Cards for the top of your box and a couple of photos. I liked the look of doing one horizontal card and one vertical, to break up the design a little bit. I used the Project Life Card corners as a guide to round the edges of my photos as well.
- Paint your box, both inside and out. Allow to dry completely.
- Secure the cards and photos to the top of the box with a layer of Mod Podge. Smooth the photos out from the center with the side of your finger. I like to allow this to dry for a few minutes before I add a layer of Mod Podge to the top of the photos to finish the project.
- Add your memorabilia to the box and the project is completed. What I really love about this project is, it is so cute, you can display it as well as use it for storage.

I love how this turned out!
I absolutely LOVE the idea of a vacation memory box. I never know what to do with the extra souvenirs that aren't in my digital scrapbook and this is the perfect idea. I'm pinning!! Thank you 🙂
Yvonne @ TriedandTasty.com
Holy Cow! I love this idea, really! I have wanted to get started using project life but just haven't yet. This has inspired me because it looks so easy to use their stuff!
What a perfect idea!!! And the project life stuff is super cute. Love it all!
Very cute! I love this idea!
I love this idea! Yours turned out so cute. Pinned!
Debra I absolutely adore this idea. I so want to do something similar for disneyland!
Man, those Project Life graphics are BOMB! They go great with all your fun treasures 🙂
This is a great idea! Love it! (and will most definitely use it.)
I love this box. What a great idea!
Brilliant idea! I can't wait to make one after our road trip this summer.