If you’ve been keeping score, this is the third post in a series about increasing the exposure to your blog by using social media. If you’ve missed the previous posts, you can find them below:
Part 1 – Why you should use social media to extend your blog’s reach
Part 2 – How to setup a Facebook page for your blog.
Before we get into today’s topic of how to expand your reach through Google+, I want to address a concern I feel is bouncing around in many readers’ heads. That is the worry that all this takes so much time and the associated concern of, is it all worth it?
The answer is a resounding… well, it’s up to you. I know, kind of anticlimactic.
It is quite a bit of work to post on your blog, on Facebook, Google+ and Twitter. I’ll give you that. But, think about how much time you spend checking and rechecking your e-mail in a given day. How much time do you spend on Facebook browsing through status updates that may or may not be of much interest to you? Chances are, if you’re like me, you’re spending a fair amount of time on that. What if you used even 5-10 minutes of that time to add some valuable content on social media? That’s not much time, but it will produce results.
The big reason this is all so important is because of the real value of social media:
1. It establishes your blog as an authority in whatever topic you mainly blog about, as well as firming up your blog’s brand.
2. It boosts your blog’s SEO, which means more people coming to your blog, which can only be a good thing.
Companies spend thousands of dollars on employees or outsourced firms to do this for them. If it’s worth that much to them, it’s worthwhile for you too.
To address these concerns further, I will do some future posts about how to speed up and/or simplify this process.
On to today’s topic: creating a Google+ page for your blog.
If you missed my previous posts about Google+, you can review them here and here, but our main focus is on how to make a page for your blog.
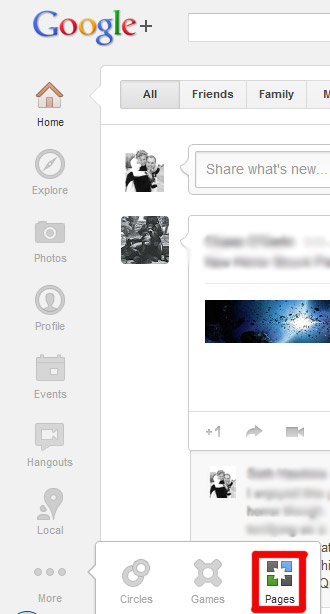
To get started, visit plus.google.com and make sure you’re logged in to your Google account. When you arrive at your home page, look down to the bottom and click on the button that has the … and select Pages.
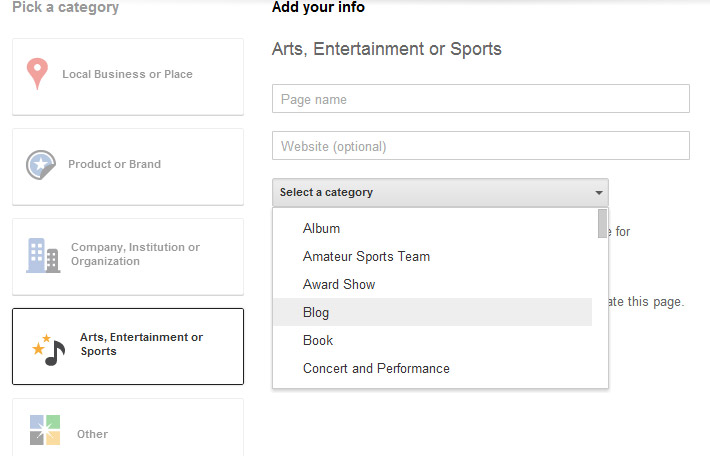
Now you have the option of selecting the type of page you’re creating. For your blog, select Arts, Entertainment or Sports. In the info area, enter the following information:
- Page name = the name of your blog
- Website = copy and paste your blog’s URL
- Select a Category = Blog
Next, you will write a 10-word tagline (take some time to think about this) and upload your profile picture.
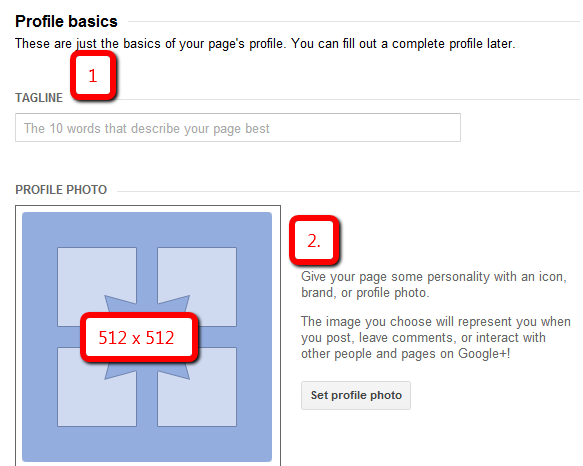
The ideal dimensions for your profile picture are 512px x 512px. You can probably use the same profile picture you used when you created your Facebook page last week. In fact, I would recommend this because it improves the branding consistency across your platforms.

Now that you’ve finished your initial setup, you will be taken to your blog’s new Google+ page. This works similar to Facebook. While you may be signed in as yourself to Google+, while on your page, you are acting in behalf of your page, so everything you post here will be posted as if your blog were a living entity capable of posting things for itself.
The first thing you’ll notice is you have your profile image, but not much else. Let’s spruce things up a bit by adding a cover image. This is similar to a Facebook cover image, except that the dimensions are different. If you need a refresher on how to make a cover image, click here.

Great, now your Google+ page at least looks like it’s attached to your blog. Now you need to add some content. Start by going up to the title of your Google+ page and click on the blue Edit Profile button.
Select the About tab and set about filling out this information.
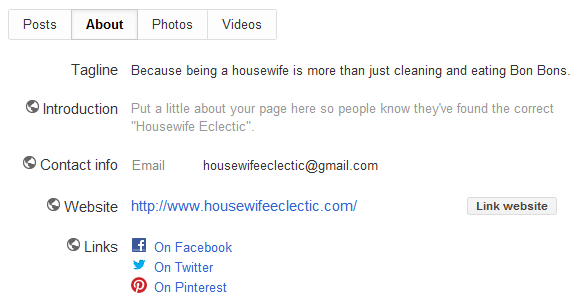
The tagline should already be included from when you set up your page. Now add an introduction, contact information and most importantly, your website URL. This is the really key detail because this is how people get back to your blog to read it.
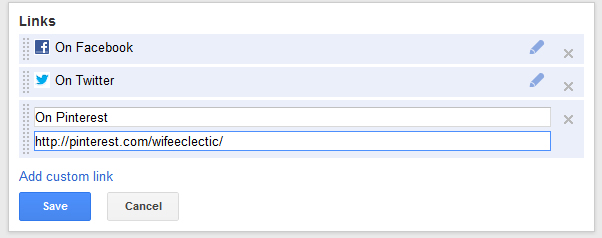
In the Links section, you can add links to whatever you want. To keep things branded, and to keep the loop of social media alive, I added the links to my Facebook, Twitter and Pinterest pages. Now, a new visitor to my page sees that not only do I exist, but I’m actively engaged with social media.
To add links, simply click on the links section and fill out the brief form seen below:
Once your About tab is completed, you can click on the Photos and Videos tabs. Now, you don’t have to keep the Photos or Videos tab. If you don’t want them, you can turn them off. However, blogs tend to be rather visual to begin with and the more visual elements you have on your Google+ page, the more people will stay on the page and probably look at your blog, so I would keep them active.
Once all your settings are just how you want them, go to the top and click the Done Editing button.
Click on your Posts tab and now you can write a status update, just like you would on Facebook. Your posts can be about anything. To review the features of the post box, see below.
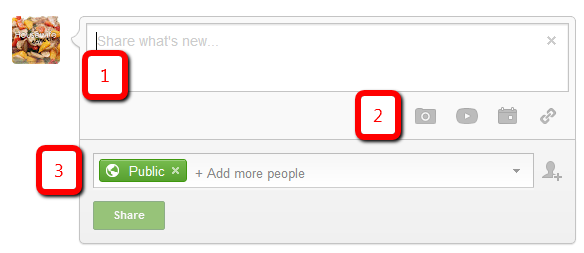
1. In the large box, type your status update.
2. These four buttons allow you to add more information to your post. The icons, from left to right, are: add an image, add a video, add an event, and add a link.
3. This is who you are going to share your post with. By default, it is public, which is good since your blog is public. However, if you want to give a special treat to just your followers or others in your Google+ circles, you can do that as well.
As you can see, setting up a Google+ page for your blog is very similar to the process with Facebook. Now it’s just a matter of keeping it up to date. Upload some pictures and videos from your blog. Start writing posts. Add a link to your blog post every day. These things don’t take long and once you get in the habit, you’ll start to build a loyal Google+ following and see the power of this amazing social network.
if you already have a profile on G+ do you need separate one for your blog
Okay, truth is, I need to sit down and re-read all of these posts on social media. It seems almost overwhelming how much stuff there is out there, and like anyone else who has a store, we need to keep up with it. Fortunately, I have two daughters who are social media savvy. Thanks for the work that went into these posts.